
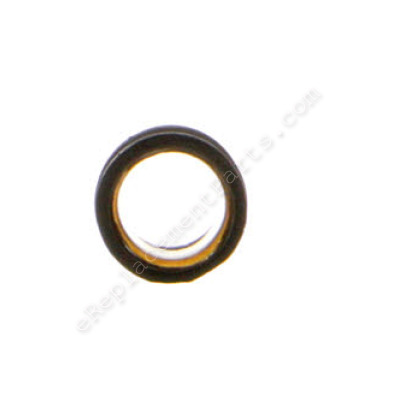


This is an original part from Ingersoll Rand. The valve seat is compatible with several impact wrenches, allowing the valve to be secured onto the housing interior. A wrench is often necessary for the replacement, and the valve seat is sold individually.
Valve Seat 131-303
OEM part for: Ingersoll Rand
Part Number: 131-303
$4.99
In Stock
Jump To:
Frequently Purchased Together ?
Compatibility
This Valve Seat will fit the following 8 machines. Confirm this part works with your model, and view the detailed model diagrams and repair help we have to offer.
Ingersoll Rand
Show More Compatible ModelsThis item works with the following types of products:
Customer Part Reviews ?
Average Rating (out of 5):
Click to filter by ratings:
5 stars
1
4 stars
0
3 stars
0
2 stars
0
1 stars
0
< PREV
- 1
Put my drill back to new.
My part's arrived promptly, and it was super easy to fix my IR drill. I'm grateful for replacement parts to be available. So I bought double of what I needed for the wear part's. Now I just need to find more air tools to repair. Hahaha
Guest -
November 22, 2022
Verified Purchase
Questions & Answers ?
Our customer Service team is at the ready daily to answer your part and product questions.

Ask our Team
We have a dedicated staff with decades of collective experience in helping customers just like you purchase parts to repair their products.
Does this fit my product?Questions & Answers for Valve Seat
No questions have been asked yet
Customer Repair Instructions ?
All our customer repair instructions are solicited directly from other customers just like you who have purchased and replaced this exact part.
Air impact wrench lost power
Dennis - February 17, 2023
Tool Type
Ratchet Wrench
Difficulty
Easy
Time
15-30 minutes
Tools Used
Screwdriver, Pliers
Parts Used
Removed old parts to find out what was broken. Ordered parts , ordering parts was very easy and fast shipping. It took two times to get the parts back in the correct way. Successful the second time and wrench works great.
Did you find this story helpful?
Thanks for voting and helping fellow customers!
Air impact wrench would not stop
Chad - August 4, 2022
Tool Type
Ratchet Wrench
Difficulty
Medium
Time
15-30 minutes
Tools Used
Socket set, Breaker bar, angled pick, air tool oil, blue loctite
Parts Used
Ingersoll Rand 231G. Remove trigger. Remove air inlet with socket & breaker bar. Remove plate and valve spring. Dump out air valve. Force angled pick down between valve seat and body of the tool, pry out seat. (This is difficult and will take several tries.) The valve seat has a wide-open side and a slightly "fatter" side; the open side goes in towards the motor, fatter side towards the air inlet. Lube it with a bit of air tool oil and slip it in; using the biggest socket that will fit down the hole and an extension, press the seat all the way down to the bottom. Drop the air valve in, stem first. Drop the spring in, narrow end down. Reinstall the spring and plate; reinstall the inlet with blue loctite. Reinstall the trigger.
Did you find this story helpful?
Thanks for voting and helping fellow customers!
replaced valve seal for IngersolRand 231H impact wrench
Richard - June 29, 2022
Tool Type
Ratchet Wrench
Difficulty
Medium
Time
30-60 minutes
Tools Used
Socket set, 15\\
Parts Used
Watched a few vids on how to get to this seal - none prepared me for the red Loctite IR used on the threads. After padding out an under-table vice to securely hold the impacter, it took a pretty good tug with a 15" breaker bar to break loose the nut that holds the air fitting.
Once committed to lean on that nut (the 6 point socket left it's mark on the flats), out comes the spring, the valve piece and then the old seal, which pulled straight out with a hooked tool. New seal pushed in easily with a deep well socket. The valve had sharp edges, so softened any felt edges/corners with a fine file before reinstalling. Cleaned and lubed the hammer mechanism, bearings, and the vanes/pump while at it, so this impacter is good as new again
Once committed to lean on that nut (the 6 point socket left it's mark on the flats), out comes the spring, the valve piece and then the old seal, which pulled straight out with a hooked tool. New seal pushed in easily with a deep well socket. The valve had sharp edges, so softened any felt edges/corners with a fine file before reinstalling. Cleaned and lubed the hammer mechanism, bearings, and the vanes/pump while at it, so this impacter is good as new again
Did you find this story helpful?
Thanks for voting and helping fellow customers!
Air ratchet would run without pressing the throttle
William - February 27, 2022
Tool Type
Ratchet Wrench
Difficulty
Medium
Time
Less than 15 minutes
Tools Used
Pliers, Roller pin punches
1. Removed roller pins with small punch.
2. Slide out the bottom plastic housing of the ratchet
3. Remove air inlet
4. Remove spring and throttle valve
5. Remove air inlet quantity adjustment knob while making sure not to lose the metal pin
6. The throttle valve seal must be installed exactly the same way it’s removed or it will leak.
7. Pull out old seal with pick set and install new one.
8. Reverse of steps.
9. After everything is back together the throttle should be able to be pressed and it should spring back. If it doesn’t the throttle valve seat is either installed wrong or the spring is wrong. Nothing should need to be forced too much into place except the roller pins.
10. When installing the roller pins for the throttle switch and air adjustment knob. Make sure the knob is pointing in the red range marked on the plastic housing of the ratchet. If it’s pointing outside that range and the pin is hammered in, it will damage the knob.
Did you find this story helpful?
Thanks for voting and helping fellow customers!
OEM stands for Original Equipment Manufacturer and means the part you’re buying is sourced directly from the manufacturer who made your product. At eReplacementParts, we sell only genuine OEM parts, guaranteeing the part you’re purchasing is of better design and of higher quality than aftermarket parts.
Our product descriptions are a combination of data sourced directly from the manufacturers who made your product as well as content researched and curated by our content & customer service teams. This content is edited and reviewed internally before being made public to customers.
Our customer service team are at the ready daily to answer your part and product questions. We have a dedicated staff with decades of collective experience in helping customers just like you purchase parts to repair their products.
All our part reviews are solicited directly from other customers who have purchased this exact part. While we moderate these reviews for profanity, offensive language or personally identifiable information, these reviews are posted exactly as submitted and no alterations are made by our team.
All our customer repair instructions are solicited directly from other customers just like you who have purchased and replaced this exact part. While we moderate these reviews for profanity, offensive language or personally identifiable information, these reviews are posted exactly as submitted and no alterations are made by our team.
Based on data from past customer purchasing behaviors, these parts are most commonly purchased together along with the part you are viewing. These parts may be necessary or helpful to replace to complete your current repair.
All our installation videos are created and produced in collaboration with our in-house repair technician, Mark Sodja, who has helped millions of eReplacementParts customers over the last 13 years repair their products. Mark has years of experience in selling and repairing both commercial and residential products with a specialty in gas-powered equipment.
This data is collected from customers who submitted a repair instruction after replacing this exact part. Customers can rate how easy the repair was to complete and how long it took. We aggregate this data to provide a repair rating that allows customers to quickly determine the difficulty and time needed to perform their own repair.