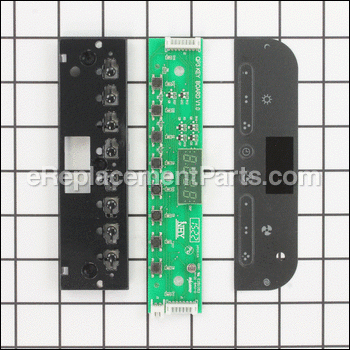
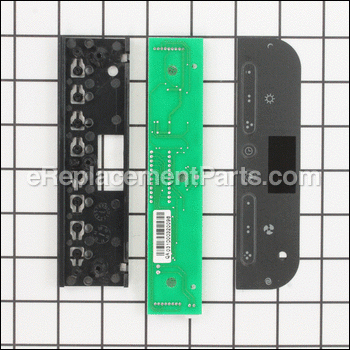
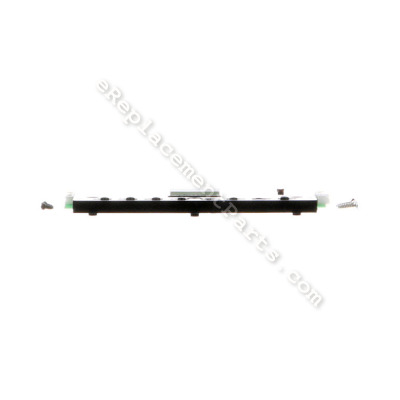
Interface Blk S97018257
OEM part for: Broan
Part Number: S97018257
Compatibility
This part will fit the following 14 machines
Broan
This item works with the following types of products:
- Range Parts
This part replaces obsolete part #: SS97018257, 97018257
Questions & Answers ?
Our customer Service team is at the ready daily to answer your part and product questions.

Ask our Team
We have a dedicated staff with decades of collective experience in helping customers just like you purchase parts to repair their products.
Does this fit my product?Questions & Answers for Interface Blk
Customer Repair Instructions ?
All our customer repair instructions are solicited directly from other customers just like you who have purchased and replaced this exact part.
Circuit board was defective (Clock would not keep time)
Tool Type
Range
Difficulty
Easy
Time
30-60 minutes
Tools Used
Screwdriver, Flashlight, ESD wristband
Parts Used
Part #: S97018257
Installation Guide:
1- Turn off power (Breaker) or unplug unit as applicable.
2- Remove particulate filters (2).
3- While supporting fan shroud (assistant would be helpful but not necessay), remove 6 retaining screws. 1 at each corner and 1 at front edge and rear edge in center of shroud.
NOTE - This is a good time to carefully clean away excess oil/grease that may have accumulated on the inside surfaces. Filters may be cleaned in the dishwasher if needed.
4- Carefully pry away Black face label from front of vent hood. I suggest you apply some painters tape around the outside of the label to prevent accidental scratching of the metal surface.
5- Once the label is removed, it will be possible to see the 3 screws retaining the circuit board assembly in to place. Carefully Remove the 3 screws while using one hand (or an assistant) to hold assembly in place.
6- Once screws have been removed, it is very easy to simply slide the assembly to the right side and aft of the hood and allow to hang down by the wire assembly. Note the location of the wires to the assembly as the longest wire cable will mount on the Left side when viewing the panel assembly.
Remove the 3 wire cables.
7- Clean surface of vent assembly with alcohol where the black label will be attached. DO NOT saturate the area. This will ensure no glue remains on the surface which could negatively affect application of the new label (Faceplate).
CAUTION - In order to prevent Electrostatic damage to the new Circuit board assembly, Use an approved ESD wrist band from this point forward.
8- Avoid touching any circuitry and only handle the board by the edges. Remove the new circuit board assembly from the Gray colored ESD wrapper and place on ESD wrapper during back-up plate installation.
9- Assemble the black back-up plate to the circuit board assy with the 3 small black screws provided. DO NOT Over-tighten screws or damage to the board may occur. Tighten only enough to ensure screws are flush to the surface and that the board and back-up plate are not loose.
10- Reattach the 3 wire cables previously removed.
11- Carefully insert the Circuit board assembly back into proper position on the vent hood. Be careful not to scratch the clock face and reattach using the 3 silver screws provided.
12- Once the assembly is securely in place, restore power to the vent assembly and carefully check that clock illuminates, lights and fan operates. If all functions work, proceed to the next step to apply the Black faceplate.
13- Apply the new Black faceplate .
14- Install cleaned filters.
15- Set clock and lighting functions as desired.
User interface panel on hood had holes from use and not working reliably
Tool Type
Range
Difficulty
Medium
Time
More than 2 hours
Tools Used
Screwdriver, Nutdriver, Adjustable Wrench, Soap and water to clean blower
Parts Used
OEM stands for Original Equipment Manufacturer and means the part you’re buying is sourced directly from the manufacturer who made your product. At eReplacementParts, we sell only genuine OEM parts, guaranteeing the part you’re purchasing is of better design and of higher quality than aftermarket parts.
Our product descriptions are a combination of data sourced directly from the manufacturers who made your product as well as content researched and curated by our content & customer service teams. This content is edited and reviewed internally before being made public to customers.
Our customer service team are at the ready daily to answer your part and product questions. We have a dedicated staff with decades of collective experience in helping customers just like you purchase parts to repair their products.
All our part reviews are solicited directly from other customers who have purchased this exact part. While we moderate these reviews for profanity, offensive language or personally identifiable information, these reviews are posted exactly as submitted and no alterations are made by our team.
All our customer repair instructions are solicited directly from other customers just like you who have purchased and replaced this exact part. While we moderate these reviews for profanity, offensive language or personally identifiable information, these reviews are posted exactly as submitted and no alterations are made by our team.
Based on data from past customer purchasing behaviors, these parts are most commonly purchased together along with the part you are viewing. These parts may be necessary or helpful to replace to complete your current repair.
All our installation videos are created and produced in collaboration with our in-house repair technician, Mark Sodja, who has helped millions of eReplacementParts customers over the last 13 years repair their products. Mark has years of experience in selling and repairing both commercial and residential products with a specialty in gas-powered equipment.
This data is collected from customers who submitted a repair instruction after replacing this exact part. Customers can rate how easy the repair was to complete and how long it took. We aggregate this data to provide a repair rating that allows customers to quickly determine the difficulty and time needed to perform their own repair.


