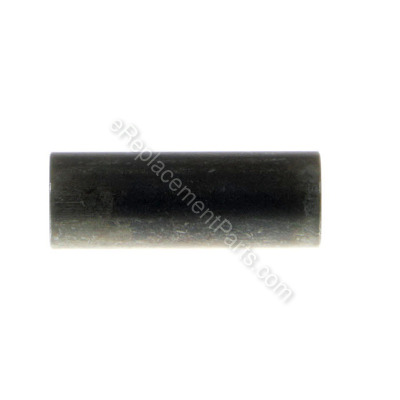
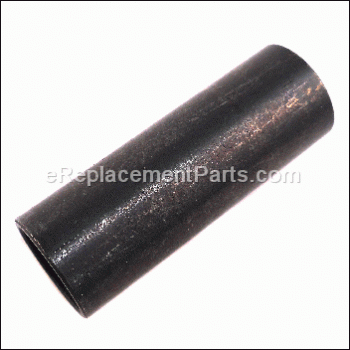
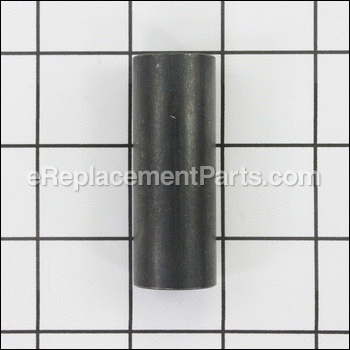
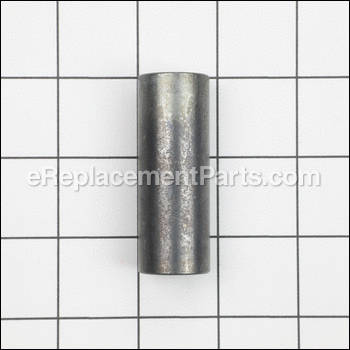


This part is an original part from Toro and Lawn Boy for use in lawn tractors. The spacer fits between the spindle housing and the bearing shield. An allen wrench may be necessary during the installation of this part. Over time this part may break will need to be replaced. This item is sold individually and is made of metal.
Spacer 62-3661
OEM part for: Toro, Lawn Boy
Part Number: 62-3661
$17.43
In Stock
Jump To:
Frequently Purchased Together ?


Compatibility
This Spacer will fit the following 258 machines. Confirm this part works with your model, and view the detailed model diagrams and repair help we have to offer.
Toro
Lawn Boy
Show More Compatible ModelsThis item works with the following types of products:
- Lawn Tractor Parts
Customer Part Reviews ?
Average Rating (out of 5):
Click to filter by ratings:
5 stars
1
4 stars
0
3 stars
0
2 stars
0
1 stars
0
< PREV
- 1
What I needed!
Working on a Toro mower spindle that the bearings had gone out and it shattered the spacer. Got it quick and price was good!
Guest -
September 4, 2021
Verified Purchase
Questions & Answers ?
Our customer Service team is at the ready daily to answer your part and product questions.

Ask our Team
We have a dedicated staff with decades of collective experience in helping customers just like you purchase parts to repair their products.
Does this fit my product?Questions & Answers for Spacer
No questions have been asked yet
Customer Repair Instructions ?
All our customer repair instructions are solicited directly from other customers just like you who have purchased and replaced this exact part.
Needed threads on spinfle
Patricia - June 14, 2023
Tool Type
Lawn Mower
Difficulty
Medium
Time
30-60 minutes
Tools Used
Socket set, Wrench Set, Nutdriver, Threader for shaft
Had to put threads on spindle
Did you find this story helpful?
Thanks for voting and helping fellow customers!
Lost gas cap and spacer for tire!
Roland - May 24, 2023
Tool Type
Lawn Mower
Difficulty
Easy
Time
Less than 15 minutes
Tools Used
Wrench Set
Parts Used
Put the gas cap on the tank and put the spacer on the tire and put it on the tractor.
Did you find this story helpful?
Thanks for voting and helping fellow customers!
Deck spindle bearings operating noisy.
Scott - May 13, 2020
Tool Type
Lawn Tractor
Difficulty
Medium
Time
1-2 hours
Tools Used
Screwdriver, Socket set, Electric impact wrench, hammer ,drift punch
Parts Used
1. Removed deck from Toro Z4200.
2. Impacted wrenched off spindle pulley nuts, removed pulleys.
3. Stood deck on it’s side and impact wrenched off the blades and tapped out spindle shafts.
4. Using drift punch and hammer knocked out both bearings from each of the spindle housing,
Spacers in between bearings might break due to the material made of.
5. Cleaned up inside of spindle housing, applied never seize compound to bearing bores,
Install one bearing, then a new spacer then second bearing. Might need to support the
spacer with the blade’s shaft to center it while installing second bearing in the spindle
housing. Used drift punch and hammer carefully on outer race to install bearings. Bearings
should be touching the spacer. You can try use an old bearing to place on the new bearing
to tap in place with hammer.
6. Install shaft, blade and pulley.
7. After reinstalling all components spin the rotating assembly hand and the rotation should be
smooth with no binding, like free-wheeling. If not recheck if parts are binding/touching the
housing in any way or a clearence problem between bearings. The metal spacer is needed
to take the tightening load off the bearings in the spindle housing.
8. Reinstall deck to mower and test.
Did you find this story helpful?
Thanks for voting and helping fellow customers!
Old shaft broke.
Andrew - June 21, 2019
Tool Type
Lawn Mower
Difficulty
Easy
Time
15-30 minutes
Tools Used
Screwdriver, Pliers, Socket set
1 Removed the old spindle.
2 put all the pieces together.
3 Installed the new spindle.
2 put all the pieces together.
3 Installed the new spindle.
Did you find this story helpful?
Thanks for voting and helping fellow customers!
OEM stands for Original Equipment Manufacturer and means the part you’re buying is sourced directly from the manufacturer who made your product. At eReplacementParts, we sell only genuine OEM parts, guaranteeing the part you’re purchasing is of better design and of higher quality than aftermarket parts.
Our product descriptions are a combination of data sourced directly from the manufacturers who made your product as well as content researched and curated by our content & customer service teams. This content is edited and reviewed internally before being made public to customers.
Our customer service team are at the ready daily to answer your part and product questions. We have a dedicated staff with decades of collective experience in helping customers just like you purchase parts to repair their products.
All our part reviews are solicited directly from other customers who have purchased this exact part. While we moderate these reviews for profanity, offensive language or personally identifiable information, these reviews are posted exactly as submitted and no alterations are made by our team.
All our customer repair instructions are solicited directly from other customers just like you who have purchased and replaced this exact part. While we moderate these reviews for profanity, offensive language or personally identifiable information, these reviews are posted exactly as submitted and no alterations are made by our team.
Based on data from past customer purchasing behaviors, these parts are most commonly purchased together along with the part you are viewing. These parts may be necessary or helpful to replace to complete your current repair.
All our installation videos are created and produced in collaboration with our in-house repair technician, Mark Sodja, who has helped millions of eReplacementParts customers over the last 13 years repair their products. Mark has years of experience in selling and repairing both commercial and residential products with a specialty in gas-powered equipment.
This data is collected from customers who submitted a repair instruction after replacing this exact part. Customers can rate how easy the repair was to complete and how long it took. We aggregate this data to provide a repair rating that allows customers to quickly determine the difficulty and time needed to perform their own repair.