
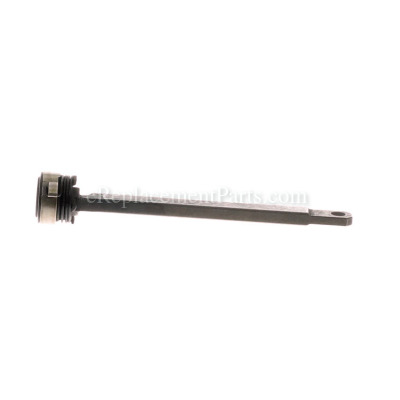


Assembly Sliding Rod And Blade 300309044
OEM part for: Ryobi
Part Number: 300309044
$19.01
In Stock
Compatibility
This part will fit the following 3 machines
Ryobi
P514 18V Reciprocating Saw with Anti-Vibe Handle View Diagrams & Manuals
P511 18 Volt Cordless Reciprocating Saw View Diagrams & Manuals
P515 18 Volt Cordless Reciprocating Saw View Diagrams & Manuals
This item works with the following types of products:
- Reciprocating Saw Parts
- Saw Parts
This part replaces obsolete part #: 300309032
Customer Part Reviews ?
Average Rating (out of 5):
Click to filter by ratings:
5 stars
14
4 stars
1
3 stars
0
2 stars
0
1 stars
0
< PREV
- 1
- 2
Easy order process, shipped quickly arrived in good condition!
Shipped and arrived as expected!
Guest -
July 14, 2022
Verified Purchase
Rod replacement
The part was exactly what I needed. Replacement was pretty straightforward. The only issue was removing the tiny snap rings. They were smaller then all my snap ring pliers. An extra hand would have been handy on the rings.
Works perfectly.
Robert -
March 24, 2022
Verified Purchase
Great quality!
Great quality. It works perfectly thanks
Guest -
January 25, 2022
Verified Purchase
great communication and delivery
worked perfectly.
Anonymous -
October 29, 2021
Verified Purchase
saw zaw blade holder replacement
part came in a reasonable time, part fit easy repair. saved me from spending more money on a new saw zaw.
Guest -
October 23, 2021
Verified Purchase
Easy repair
Took awhile to arrive. Fits and works fine
Guest -
October 1, 2021
Verified Purchase
Perfect part. Installation was not easy...take a lot of tools to replace it.
Perfect part. Installation was not easy...take a lot of tools to replace it.
Guest -
September 7, 2021
Verified Purchase
Fast shipping , great price
The part arrived quickly and was as described. Great customer sevice
Guest -
June 23, 2021
Verified Purchase
Was as advertised
Good the Rod Assembly sooner than expected. Average person would have a challenge to do the replacement. Thank goodness for You Tube because I’m the average person. The spring loaded blade retainer is stiff, but once broke in it should work smoother. Regardless it was broke and only good for parts before, now it’s a working saw zac!
Guest -
June 8, 2021
Verified Purchase
Part fit well
The part fit correctly even though my saw was an older discontinued model. It said the part would fit and it did.
Guest -
April 13, 2020
Verified Purchase
t
t
t -
t days ago
Verified Purchase
eReplacementParts Team
t
Questions & Answers ?
Our customer Service team is at the ready daily to answer your part and product questions.

Ask our Team
We have a dedicated staff with decades of collective experience in helping customers just like you purchase parts to repair their products.
Does this fit my product?Questions & Answers for Assembly Sliding Rod And Blade
No questions have been asked yet
Customer Repair Instructions ?
All our customer repair instructions are solicited directly from other customers just like you who have purchased and replaced this exact part.
Tried to cut down a tree with a cordless reciprocating saw and broke the part that holds the blade
Denise - December 18, 2015
👍 17 of 18 people found this instruction helpful
Tool Type
Reciprocating Saw
Difficulty
Medium
Time
30-60 minutes
Tools Used
Pliers, T20 long Torx socket and ratchet, external circlip pliers
Parts Used
This is for a Ryobi 18V One+ reciprocating saw. It wasn't as simple as I thought it would be, but wasn't too bad.
Remove all of the T20 Torx screws holding the two halves of the housing together and separate the halves. The entire assembly will remain in one half of the housing.
The Sliding Rod Assembly W/Quick Release passes through a guide before it connects to the rod that converts the rotating motion of the motor to the reciprocation motion of the rod. The two joints rotate around pins held in place with external circlips. Use circlip pliers or needle nose pliers to spread the circlips so the pins can be removed. There isn't enough room to push the pins far enough out so that the rod can be removed, so the cover over the guide needs to be removed. Once you have it off, you'll see that the rod goes through two blocks that can be removed from the guide. To have enough room to get the rod out, the entire assembly needs to be lifted from the housing it's still attached to. There's nothing tricky about this except that the gray blade release lever needs to be pulled out so that it can go through the slot. At this point, the old rod can be removed and the new one put in. Then, assembly is the reverse of disassembly. When putting the circlips back on, they need to be squeezed back together with a pair of needle nose pliers.
Did you find this story helpful?
Thanks for voting and helping fellow customers!
pin broke in sliding rod assembly
robert - September 11, 2019
👍 2 of 2 people found this instruction helpful
Tool Type
Jig saw
Difficulty
Medium
Time
30-60 minutes
Tools Used
Screwdriver, ring expander
took jigsaw apart. swapped out broken part and reassembled. works just like new.
Did you find this story helpful?
Thanks for voting and helping fellow customers!
OEM stands for Original Equipment Manufacturer and means the part you’re buying is sourced directly from the manufacturer who made your product. At eReplacementParts, we sell only genuine OEM parts, guaranteeing the part you’re purchasing is of better design and of higher quality than aftermarket parts.
Our product descriptions are a combination of data sourced directly from the manufacturers who made your product as well as content researched and curated by our content & customer service teams. This content is edited and reviewed internally before being made public to customers.
Our customer service team are at the ready daily to answer your part and product questions. We have a dedicated staff with decades of collective experience in helping customers just like you purchase parts to repair their products.
All our part reviews are solicited directly from other customers who have purchased this exact part. While we moderate these reviews for profanity, offensive language or personally identifiable information, these reviews are posted exactly as submitted and no alterations are made by our team.
All our customer repair instructions are solicited directly from other customers just like you who have purchased and replaced this exact part. While we moderate these reviews for profanity, offensive language or personally identifiable information, these reviews are posted exactly as submitted and no alterations are made by our team.
Based on data from past customer purchasing behaviors, these parts are most commonly purchased together along with the part you are viewing. These parts may be necessary or helpful to replace to complete your current repair.
All our installation videos are created and produced in collaboration with our in-house repair technician, Mark Sodja, who has helped millions of eReplacementParts customers over the last 13 years repair their products. Mark has years of experience in selling and repairing both commercial and residential products with a specialty in gas-powered equipment.
This data is collected from customers who submitted a repair instruction after replacing this exact part. Customers can rate how easy the repair was to complete and how long it took. We aggregate this data to provide a repair rating that allows customers to quickly determine the difficulty and time needed to perform their own repair.