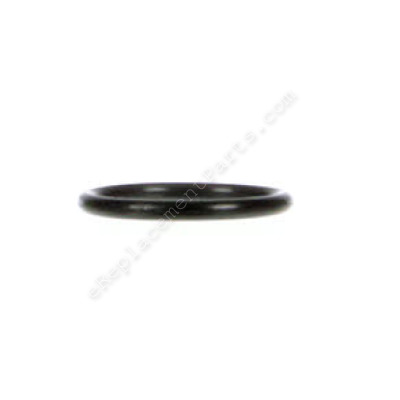


This is a genuine OEM replacement part used in Bostitch nailers. An O-ring is a flexible circle used to create a tight seal between rigid parts in order to retain pressure. Correct fit is essential for these parts to function properly. This O-ring size is 20.8 mm x 2.4 mm; multiple size rings are used in these machines so please see manual to ensure correct placement. Sold individually.
O-ring 174053
OEM part for: Bostitch, DeWALT, Stanley, Black and Decker
Part Number: 174053
$4.99
In Stock
Jump To:
Frequently Purchased Together ?


Compatibility
This part will fit the following 21 machines
Bostitch
CF15 Corrugated Tool View Diagrams & Manuals
MCN250S Metal Connector Nailer View Diagrams & Manuals
MCN250 Metal Connector Nailer View Diagrams & Manuals
MCN150 Metal Connector Nailer View Diagrams & Manuals
N75C Coil-Fed Pneumatic Sheathing Nailer View Diagrams & Manuals
N66C Coil-Fed Pneumatic Nailer View Diagrams & Manuals
N66BC Cap Nailer View Diagrams & Manuals
N66BC-1 (Type 0) Cap Nailer View Diagrams & Manuals
N75C-1 Type 0 Coil Sheathing/Siding Nailer View Diagrams & Manuals
N66C-1 (72400000) 15 Degrees Coil Siding Nailer View Diagrams & Manuals
MCN150 (Type 0) Nailer Power Tool View Diagrams & Manuals
MCN250 (Type 0) Met Conn Nailer Power Tool View Diagrams & Manuals
MCN250S (Type 0) Met Conn Nailer Power Tool View Diagrams & Manuals
N66C-1 (072400000 and Higher) Nailer Power Tool View Diagrams & Manuals
N66C-1 (17300 000 and Higher) Nailer Power Tool View Diagrams & Manuals
N66C-1 (62860000 and Higher) Nailer Power Tool View Diagrams & Manuals
DeWALT
DWMC150 (Type 1) 1.5 Metal Conec Nail View Diagrams & Manuals
DW66C-1 (Type 0) 15 Deg Coi Side Nail View Diagrams & Manuals
DW66C-1 (17300 000 and Higher) 15 Deg Coi Side Nail Power Tool View Diagrams & Manuals
Stanley
FMFP12704 (Type 0) 15deg Roofing Nailer View Diagrams & Manuals
Black and Decker
FMFP12704 (Type 0) 15deg Roofing Nailer Power Tool View Diagrams & Manuals
Show More Compatible Models
This item works with the following types of products:
- Nailer Parts
This part replaces obsolete part #: S06P002100
Repair Videos ?
Watch the Repair Video for
O-ring

Customer Part Reviews ?
Questions & Answers ?
Our customer Service team is at the ready daily to answer your part and product questions.

Ask our Team
We have a dedicated staff with decades of collective experience in helping customers just like you purchase parts to repair their products.
Does this fit my product?Questions & Answers for O-ring
No questions have been asked yet
Customer Repair Instructions ?
All our customer repair instructions are solicited directly from other customers just like you who have purchased and replaced this exact part.
Piston head valve was broke, center of the valve broken out.
James - August 22, 2017
👍 1 of 1 people found this instruction helpful
Tool Type
Nailer
Difficulty
Easy
Time
Less than 15 minutes
Tools Used
Wrench Set, Allen wrenches, 90 degree pic.
I removed gun head and saw the problem. Removed piston with a 90 degree pic through center of piston. I then prepped new piston by installing new o-ring, piston spring, and lube. I then pressed piston assembly into gun head, installed gun head with four screws. Test fired worked perfect.
Did you find this story helpful?
Thanks for voting and helping fellow customers!
leak air wouldn't fire nail
scott - March 16, 2023
replaced trigger valve , o-rings and piston head valve , solved all problems
Did you find this story helpful?
Thanks for voting and helping fellow customers!
deflectoer valve cracked
Greg - February 23, 2023
Tool Type
Nailer
Difficulty
Medium
Time
15-30 minutes
Tools Used
Wrench Set, allen and torx head wrenches
remove top end parts and replaced them on nail gun
Did you find this story helpful?
Thanks for voting and helping fellow customers!
Leaking air from the top therefore not nailing
Donald - November 2, 2022
Tool Type
Nailer
Difficulty
Easy
Time
Less than 15 minutes
Tools Used
, Allen wrench
Remove top of nailer, there are 4 Allen screws. Once removed in top piece that was removed there is one more small Allen screw to remove on the outside. Once removed the piston head valve comes out…clean the are, install new piston head valve and o rings, reassemble.
Did you find this story helpful?
Thanks for voting and helping fellow customers!
LEAKING OUT THE TOP
CHRIS - September 23, 2021
Tool Type
Nailer
Difficulty
Easy
Time
Less than 15 minutes
Tools Used
, 4MM ALLEN
Parts Used
REMOVE THE FOUR ALLEN BOLTS,REMOVE HEAD VALVE REVERSE FOR INSTALL
Did you find this story helpful?
Thanks for voting and helping fellow customers!
Nail driving piston going to the drive position as soon as the air was supplied
Richard - August 11, 2021
Tool Type
Nailer
Difficulty
Easy
Time
Less than 15 minutes
Tools Used
, Allen Wrenches
Replacement of the piston air valve that was cracked and all associated O rings to the piston valve, O rings looked OK but since I had the valve out I replaced the O rings
Did you find this story helpful?
Thanks for voting and helping fellow customers!
Air blowing out of head of cap assembly
Jerry - April 7, 2021
Tool Type
Nailer
Difficulty
Medium
Time
15-30 minutes
Tools Used
Power Drill, Allen wrenches dental pick
Removed 4 cap screws, popped off cap removed 2 orings and seal valve, put in new valve and orings greased the o rings re assembled cap Tool works great N66 coil nailer
Did you find this story helpful?
Thanks for voting and helping fellow customers!
Mark - March 9, 2019
Tool Type
Nailer
Difficulty
Easy
Time
Less than 15 minutes
Tools Used
, Allen wrench
Parts Used
1) remove piston cap,(allen wrenches)
2) remove broken composite head in removed cap
3) replace rings and composite head
4) reinstall head cap and gasket
2) remove broken composite head in removed cap
3) replace rings and composite head
4) reinstall head cap and gasket
Did you find this story helpful?
Thanks for voting and helping fellow customers!
OEM stands for Original Equipment Manufacturer and means the part you’re buying is sourced directly from the manufacturer who made your product. At eReplacementParts, we sell only genuine OEM parts, guaranteeing the part you’re purchasing is of better design and of higher quality than aftermarket parts.
Our product descriptions are a combination of data sourced directly from the manufacturers who made your product as well as content researched and curated by our content & customer service teams. This content is edited and reviewed internally before being made public to customers.
Our customer service team are at the ready daily to answer your part and product questions. We have a dedicated staff with decades of collective experience in helping customers just like you purchase parts to repair their products.
All our part reviews are solicited directly from other customers who have purchased this exact part. While we moderate these reviews for profanity, offensive language or personally identifiable information, these reviews are posted exactly as submitted and no alterations are made by our team.
All our customer repair instructions are solicited directly from other customers just like you who have purchased and replaced this exact part. While we moderate these reviews for profanity, offensive language or personally identifiable information, these reviews are posted exactly as submitted and no alterations are made by our team.
Based on data from past customer purchasing behaviors, these parts are most commonly purchased together along with the part you are viewing. These parts may be necessary or helpful to replace to complete your current repair.
All our installation videos are created and produced in collaboration with our in-house repair technician, Mark Sodja, who has helped millions of eReplacementParts customers over the last 13 years repair their products. Mark has years of experience in selling and repairing both commercial and residential products with a specialty in gas-powered equipment.
This data is collected from customers who submitted a repair instruction after replacing this exact part. Customers can rate how easy the repair was to complete and how long it took. We aggregate this data to provide a repair rating that allows customers to quickly determine the difficulty and time needed to perform their own repair.