Brush And Brush Holder (brush 30438 - OEM Ridgid - eReplacementParts.com
eReplacementParts.com
877-346-4814
Ridgid Parts
Repair Parts Home
  
Vacuum Parts
  
Ridgid Parts
  30438 Brush And Brush Holder (brush

Brush And Brush Holder (brush 30438

OEM part for: Ridgid

Part Number: 30438


Install
Videos!
Brush And Brush Holder (brush - 30438:Ridgid 360 View
Brush And Brush Holder (brush - 30438:RidgidBrush And Brush Holder (brush - 30438:RidgidBrush And Brush Holder (brush - 30438:Ridgid 360 View
In Stock
Ships within 1 business day
Medium 15-30 minutes (9 rated repairs)?
OEM: Original Equipment Manufacturer ?
Ridgid
Does this d-block d-md-none fit my product?

Product Description ?

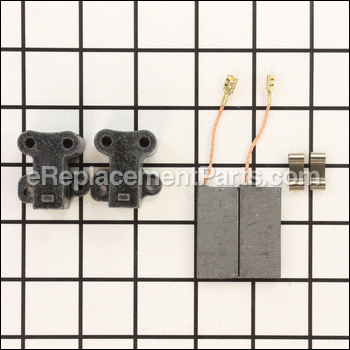
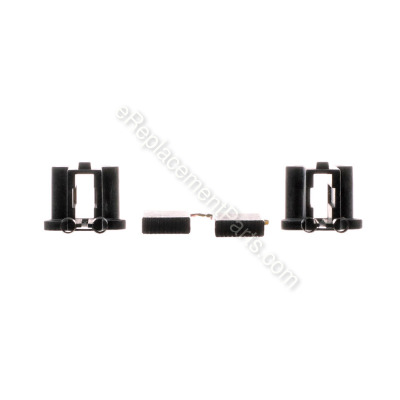
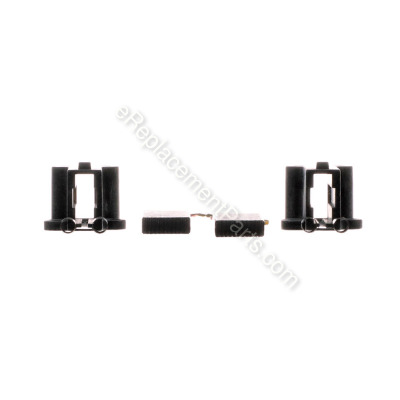
This brush and brush holder set is supplied by the original manufacturer for use in vacuums. It includes 2 carbon brushes, 2 brush holders, and two springs. The brushes have measurements of 1.5 inches long, 3/4 inches wide, and 3/16 inches thick. Over time the brushes may wear down, become damaged, or dislodged, leading to reduced power output, unusual noses, and difficulties starting the equipment. Ensure the equipment is switched off before beginning the repair. Remove the motor housing to access the brushes. Carefully remove the springs and fasteners that hold the brush and holders in place. Mount the new brush holders onto the motor and position the new brushes into the holders. Secure the brushes in place with the spring and reattach the motor housing to complete the repair.

  • Brush Dimensions
  • 1-1/2 Inches Long
  • 3/4 Inch Wide
  • 3/16 Inch Thick
  • Classification: Part
  • Weight: 0.07 lbs.
  • Shipping: Ships Worldwide

Compatibility

This part will fit the following 2 machines

Ridgid

RV2400A Wet/Dry Vacuum View Diagrams & Manuals
RV2600B Wet/Dry Vacuum View Diagrams & Manuals
Don't see yours? Try searching our site for :

This item works with the following types of products:

  • Vacuum Parts

Customer Part Reviews ?

4.7
Average Rating (out of 5):
3 Reviews
Click to filter by ratings:
5 stars
2
4 stars
1
3 stars
0
2 stars
0
1 stars
0
  • Highest Rating
  • Most Recent
< PREV
  • 1
NEXT >
  • easy repair
    when called and ordered my part he was very helpful, efficient. parts were delivered quickly as told. thank you
    Guest - March 3, 2020 Verified Purchase
    Fast friendly great price
    Deliveery was quick parts perfect
    Guest - November 1, 2019 Verified Purchase
    Replacement brushes
    The brushes were exactly what my vaccuum needed and it's working like new now. Did use the old holders and spings though.
    Guest - June 11, 2019 Verified Purchase
    t
    t
    t - t days ago Verified Purchase
    eReplacementParts Team
    t

    Questions & Answers ?

    Our customer Service team is at the ready daily to answer your part and product questions.

    photo of team member
    Ask our Team

    We have a dedicated staff with decades of collective experience in helping customers just like you purchase parts to repair their products.

    Does this fit my product?

    Questions & Answers for Brush And Brush Holder (brush


    Ridged vac brushes part number and total cost
    Jim for model number 145000 asked on 2022-02-13
    Hello Jim, thank you for writing. For model 14500, the brush is sold individually as part 816768. For specific pricing and availability, you can contact customer service 877 346 4814. We hope this helps.
    eReplacementParts Team February 13, 2022

    Customer Repair Instructions ?

    All our customer repair instructions are solicited directly from other customers just like you who have purchased and replaced this exact part.

    Medium 15-30 minutes (9 rated repairs)?

    The brushes on the motor were damaged during impeller repair. I bought this vac at a garage sale for $5 as a weekend project to see if I could fix it. This unit had the detachable leaf blower.

    Dan - February 28, 2017
    👍 5 of 6 people found this instruction helpful
    Tool Type

    Vacuum

    Difficulty

    Easy

    Time

    Less than 15 minutes

    Tools Used

    Screwdriver

    Disassembled blower housing and removed impeller so I could access the motor. Removed the motor and the brush holders were readily accessible. Once removed brush holders and disconnected the wire, the brushes were easy to replace. Parts were $11 for a total of $16 for a very good vac.
    Did you find this story helpful?
    Thanks for voting and helping fellow customers!

    Brushes worn out

    michael - October 5, 2016
    👍 2 of 2 people found this instruction helpful
    Tool Type

    Vacuum

    Difficulty

    Easy

    Time

    30-60 minutes

    Tools Used

    Pliers, Power Drill, Socket set, Allen key

    Took out all the screws disconnected blower wheel took out motor replaced brushes put it back together
    Did you find this story helpful?
    Thanks for voting and helping fellow customers!

    motor brushes worn out

    Joe - February 3, 2019
    👍 1 of 1 people found this instruction helpful
    Tool Type

    Vacuum

    Difficulty

    Medium

    Time

    30-60 minutes

    Tools Used

    Screwdriver, knife

    The replacement brushes were too big so I cut them down . Now the RIGID shopvac works like new.
    Did you find this story helpful?
    Thanks for voting and helping fellow customers!

    Vacuum didn't work

    Victor - February 10, 2018
    👍 1 of 1 people found this instruction helpful
    Tool Type

    Vacuum

    Difficulty

    Easy

    Time

    15-30 minutes

    Tools Used

    Power Drill, Wrench Set

    Remove the electric motor and replaced the brushes . Easy fix.
    Did you find this story helpful?
    Thanks for voting and helping fellow customers!

    Brush wire was broken.

    Shaun - October 20, 2021
    Tool Type

    Vacuum

    Difficulty

    Easy

    Time

    15-30 minutes

    Tools Used

    , Cordless screw gun

    Took out the motor took out brushes . Put new ones in. Had to cut down brushes to make them fit.
    Did you find this story helpful?
    Thanks for voting and helping fellow customers!

    Brushes completely worn, motor would not work

    Kamran - May 13, 2021
    Tool Type

    Vacuum

    Difficulty

    Hard

    Time

    1-2 hours

    Tools Used

    Screwdriver, Pliers, Power Drill, Socket set, air compressor

    Remove and disassemble the entire top part of the vacuum by removing all screws with an electric drill, and completely expose the electric motor. When removing the blower wheel from the housing, make note of the position of the washers; this will be critical for the free movement of the motor. Find the leads from the brushes and use a pair of long-nose pliers to pull them off the post. The motor brushes can be removed by manually loosening the brackets that hold them in; a screwdriver can help push the release clip, but do it carefully. The brushes I bought were slightly too tall, as they belonged to another model Ridgid vacuum, but they were the same width, had the right connector, and shape for the retaining coil. I solved that problem thus -- Using the old brush as reference, I drew a line marking how much material to remove from the new brush to make it the proper height. I clamped the new brush gently in a vise with the line just below the clamp surface. Using a sharp chisel, I shaved off enough material off the top of the motor brush, in thin layers, to make it the same height as the original. ** Be careful when you do this -- the brush material is soft, much like pencil lead, and will crack easily if you apply too much pressure.** To install the brush, you need to "back it in" to the slot in the bracket, connector first, and push it in all the way to make sure the coil spring pushes back easily on the brush. Carefully push the bracket back into position on the motor and reattach the brush lead to the electric post the same way you removed it. Reassemble the entire house, making sure the washers and retaining clips are positioned as they were originally when reattaching the blower wheel, otherwise the motor will not spin freely.
    Did you find this story helpful?
    Thanks for voting and helping fellow customers!

    Not running

    joseph - October 1, 2020
    Tool Type

    Vacuum

    Difficulty

    Easy

    Time

    15-30 minutes

    Tools Used

    Screwdriver, Pliers, Socket set, None

    Remove motor install new brushes keep in mind wire is on bottom
    Reverse the disassembly process
    Did you find this story helpful?
    Thanks for voting and helping fellow customers!

    The wire broke from the brush.

    Severo - September 29, 2020
    Tool Type

    Vacuum

    Difficulty

    Medium

    Time

    15-30 minutes

    Tools Used

    Screwdriver

    1. Removed the motor.
    2. I cut out part of the brush, because was too wide.
    3. Replace the brush and put back the motor and all external parts.
    Did you find this story helpful?
    Thanks for voting and helping fellow customers!

    Wire burnt off of a motor brush.

    George - November 18, 2019
    Tool Type

    Vacuum

    Difficulty

    Medium

    Time

    30-60 minutes

    Tools Used

    Screwdriver, Socket set, Impact driver for impeller nut

    Did you find this story helpful?
    Thanks for voting and helping fellow customers!

    OEM stands for Original Equipment Manufacturer and means the part you’re buying is sourced directly from the manufacturer who made your product. At eReplacementParts, we sell only genuine OEM parts, guaranteeing the part you’re purchasing is of better design and of higher quality than aftermarket parts.

    Our product descriptions are a combination of data sourced directly from the manufacturers who made your product as well as content researched and curated by our content & customer service teams. This content is edited and reviewed internally before being made public to customers.

    Our customer service team are at the ready daily to answer your part and product questions. We have a dedicated staff with decades of collective experience in helping customers just like you purchase parts to repair their products.

    All our part reviews are solicited directly from other customers who have purchased this exact part. While we moderate these reviews for profanity, offensive language or personally identifiable information, these reviews are posted exactly as submitted and no alterations are made by our team.

    All our customer repair instructions are solicited directly from other customers just like you who have purchased and replaced this exact part. While we moderate these reviews for profanity, offensive language or personally identifiable information, these reviews are posted exactly as submitted and no alterations are made by our team.

    Based on data from past customer purchasing behaviors, these parts are most commonly purchased together along with the part you are viewing. These parts may be necessary or helpful to replace to complete your current repair.

    All our installation videos are created and produced in collaboration with our in-house repair technician, Mark Sodja, who has helped millions of eReplacementParts customers over the last 13 years repair their products. Mark has years of experience in selling and repairing both commercial and residential products with a specialty in gas-powered equipment.

    This data is collected from customers who submitted a repair instruction after replacing this exact part. Customers can rate how easy the repair was to complete and how long it took. We aggregate this data to provide a repair rating that allows customers to quickly determine the difficulty and time needed to perform their own repair.

    eReplacementParts.com
    7174 South 400 West
    Suite 5
    Midvale, UT 84047
    visa mastercard discover american express PayPal