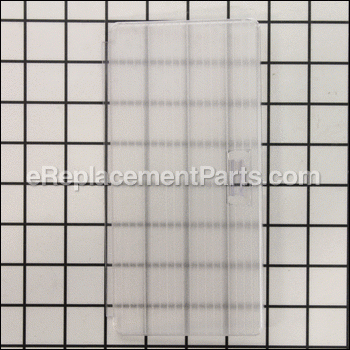

This replacement light lens is a genuine OEM sourced part, not an aftermarket imitation. It is a high quality item used on Broan range hoods to cover and protect the light bulb. This item is made out of durable transparent plastic and it is sold individually. This light lens can be easily installed with snap in action, no tools required.
Obe1208 Srv Asm Lens,light S97013316
OEM part for: Broan
Part Number: S97013316
$39.86
In Stock
Jump To:
Product Description ?
- 7 9/16" X 3 11/16"
- Classification: Part
- Weight: 0.11 lbs.
- Shipping: Ships Worldwide
Frequently Purchased Together ?

Compatibility
This part will fit the following 47 machines
Broan
753001 Range Hood View Diagrams & Manuals
753004 Range Hood View Diagrams & Manuals
753008 Range Hood View Diagrams & Manuals
753011 Range Hood View Diagrams & Manuals
753023 Range Hood View Diagrams & Manuals
753601 Range Hood View Diagrams & Manuals
753604 Range Hood View Diagrams & Manuals
753608 Range Hood View Diagrams & Manuals
753611 Range Hood View Diagrams & Manuals
753623 Range Hood View Diagrams & Manuals
754201 Range Hood View Diagrams & Manuals
754204 Range Hood View Diagrams & Manuals
754208 Range Hood View Diagrams & Manuals
754211 Range Hood View Diagrams & Manuals
754223 Range Hood View Diagrams & Manuals
762401 Range Hood View Diagrams & Manuals
762404 Range Hood View Diagrams & Manuals
762408 Range Hood View Diagrams & Manuals
762411 Range Hood View Diagrams & Manuals
762423 Range Hood View Diagrams & Manuals
763001 Range Hood View Diagrams & Manuals
763004 Range Hood View Diagrams & Manuals
763008 Range Hood View Diagrams & Manuals
763011 Range Hood View Diagrams & Manuals
763023 Range Hood View Diagrams & Manuals
763601 Range Hood View Diagrams & Manuals
763604 Range Hood View Diagrams & Manuals
763608 Range Hood View Diagrams & Manuals
763611 Range Hood View Diagrams & Manuals
763623 Range Hood View Diagrams & Manuals
764201 Range Hood View Diagrams & Manuals
764204 Range Hood View Diagrams & Manuals
764208 Range Hood View Diagrams & Manuals
764211 Range Hood View Diagrams & Manuals
764223 Range Hood View Diagrams & Manuals
81000 Range Hood View Diagrams & Manuals
83000 Range Hood View Diagrams & Manuals
PM44 Range Hood View Diagrams & Manuals
76000-C Under Cabinet Range Hood - 200 Cfm / 6.0 Sones View Diagrams & Manuals
76000-F Under Cabinet Range Hood - 200 Cfm / 6.0 Sones View Diagrams & Manuals
76000-B Under Cabinet Range Hood - 200 Cfm / 6.0 Sones View Diagrams & Manuals
76000-D Under Cabinet Range Hood - 200 Cfm / 6.0 Sones View Diagrams & Manuals
76000 Under Cabinet Range Hood - 200 Cfm / 6.0 Sones View Diagrams & Manuals
76000-G Under Cabinet Range Hood - 200 Cfm / 6.0 Sones View Diagrams & Manuals
76000-E Under Cabinet Range Hood - 200 Cfm / 6.0 Sones View Diagrams & Manuals
75000 Under Cabinet Range Hood - 250 Cfm / 6.5 Sones View Diagrams & Manuals
PM44-B Power Module - 410 Cfm / 5.5 Sones View Diagrams & Manuals
Show More Compatible Models
This item works with the following types of products:
- Range Parts
This part replaces obsolete part #: 97013316A, s97013316, 97013316
Customer Part Reviews ?
Average Rating (out of 5):
Click to filter by ratings:
5 stars
14
4 stars
0
3 stars
0
2 stars
0
1 stars
0
< PREV
- 1
- 2
Good replacement
Old part number was discontinued. But look at pictures of covers and found this one that worked
Guest -
June 28, 2022
Verified Purchase
Hood Range
I had a part # for my 30yr old unit and eReplacement did the rest. I was very surprised and pleased that I could get the part. Couldn’t have been any easier.
Guest -
June 2, 2022
Verified Purchase
Cover light for stove hood
Replacement part for discontinued item fit perfectly. Part received on time as promised and follow up inquiry as to service provided is very much appreciated.
Guest -
February 21, 2022
Verified Purchase
Exactly what I needed to make things look new again. Very prompt delivery.
Perfect fit.
Guest -
February 12, 2022
Verified Purchase
Perfect!
The lenses arrived as expected for the hood vent as promised. They were a perfect replacement for the broken ones and popped right in place! I can always count on eReplacements to put things back in shape!
Gloria -
December 28, 2021
Verified Purchase
Light Lens Replacement
Perfect part for the replacement. Great to have service done right and quickly!
Joseph -
February 17, 2021
Verified Purchase
Very happy with the part
It was perfect—even better than the original part!
Guest -
January 13, 2021
Verified Purchase
Let’s more light in than original!
Very easy repair. The updated plastic lets more light through than the original lens, which broke. Small issue with having it shipped to the correct address, so we had to cancel the first order, then placed a second order. Ship time was reasonable, even with CoVid.
Guest -
October 27, 2020
Verified Purchase
Great fit
Had part for 20year old kitchen stove exhaust fan, arrived in four days, fit perfect.
Guest -
October 21, 2020
Verified Purchase
Just what was needed to replace the broken lens
Web description, dimensions, were exact. The lens arrived in exactly the amount of time promised.
Guest -
June 13, 2020
Verified Purchase
t
t
t -
t days ago
Verified Purchase
eReplacementParts Team
t
Questions & Answers ?
Our customer Service team is at the ready daily to answer your part and product questions.

Ask our Team
We have a dedicated staff with decades of collective experience in helping customers just like you purchase parts to repair their products.
Does this fit my product?Questions & Answers for Obe1208 Srv Asm Lens,light
Looking for a replacement lens plate. Clip broke on the one I have. Thanks
Chuck
for model number 75.000-C
asked on 2022-02-05
Hello Chuck, thank you for your question. The light lens plate is S97013316. Good luck with your repair.
eReplacementParts Team February 05, 2022
Customer Repair Instructions ?
All our customer repair instructions are solicited directly from other customers just like you who have purchased and replaced this exact part.
Original cover clip had broken
Byron - October 14, 2021
Tool Type
Range
Difficulty
Easy
Time
Less than 15 minutes
Tools Used
Parts Used
Removed old cover, slid new cover into place with the grooved side 1st then pressing opposite side clip into position until a click heard.
Did you find this story helpful?
Thanks for voting and helping fellow customers!
Lens cover broke/0 years old
Lewis - March 3, 2019
Tool Type
Range
Difficulty
Easy
Time
Less than 15 minutes
Tools Used
Screwdriver
Parts Used
A simple replacement part delivered very quickly !
Did you find this story helpful?
Thanks for voting and helping fellow customers!
Lens was made of plastic and it because very brittle and cracked into pieces.
JOYCE - February 20, 2019
Tool Type
Range
Difficulty
Easy
Time
Less than 15 minutes
Tools Used
, No tool required. The part just snapped in.
Parts Used
Removed light bulb lens for range hood out of mail package and snapped it into place. It was that easy. No tools required. I was amazed I could still get the part because my range hood is 31 years old. It was installed when we (my husband & I and a lot of friend) built our home.
Did you find this story helpful?
Thanks for voting and helping fellow customers!
Nothing. Satisfied..., parts fit well.. product was as described.
Kenneth - January 22, 2019
Tool Type
Range
Difficulty
Easy
Time
Less than 15 minutes
Tools Used
, No tools required
Parts Used
Merely attached to hood in kitchen.
Did you find this story helpful?
Thanks for voting and helping fellow customers!
Lens was clip broke so needed new one.
JODY - July 26, 2018
Tool Type
Range
Difficulty
Easy
Time
Less than 15 minutes
Tools Used
, No tools needed.
Parts Used
1. Took new lens out of package.
2. Put new lens in place on the range.
3. Repair work was finished.
2. Put new lens in place on the range.
3. Repair work was finished.
Did you find this story helpful?
Thanks for voting and helping fellow customers!
Vent hood light lens was broken. Filter elements needed replacement
Howard - May 30, 2018
Tool Type
Range
Difficulty
Easy
Time
Less than 15 minutes
Tools Used
Screwdriver
1. Vent hood light lens unsnaps. No tools required.
2. Vent filter - remove one screw per filter (two filters required).
3. Bend new filter to 90 degrees as marked.
4. Insert filter element and secure with screw.
2. Vent filter - remove one screw per filter (two filters required).
3. Bend new filter to 90 degrees as marked.
4. Insert filter element and secure with screw.
Did you find this story helpful?
Thanks for voting and helping fellow customers!
Broken latch on the lens.
Robert - September 12, 2017
Tool Type
Range
Difficulty
Easy
Time
Less than 15 minutes
Tools Used
Parts Used
Replaced with the new lens. No tools required.
Did you find this story helpful?
Thanks for voting and helping fellow customers!
Broken lens, and non carbon filters
Richard - September 1, 2017
Tool Type
Range
Difficulty
Easy
Time
Less than 15 minutes
Tools Used
Screwdriver
1. Replaced lens
2. Removed old filter, removing screw.
3. Inserted new filter and replaced screw
2. Removed old filter, removing screw.
3. Inserted new filter and replaced screw
Did you find this story helpful?
Thanks for voting and helping fellow customers!
Light socket in range hood no longer worked and plastic lens cover had disintegrated
James - July 21, 2017
Tool Type
Range
Difficulty
Medium
Time
30-60 minutes
Tools Used
Screwdriver, Pliers, Wrench Set, electrical tape
1) Removed the four machine screws on underside outer covering of range hood.
2) Thoroughly cleaned inside of cover, which had become caked with old grease residue and dust.
3) Turned off power to range hood (this probably should have been step 1).
4) Removed inside black covering by removing the single large machine screw. This revealed wiring to the lamp holder.
5) Removed light switch from range hood using the following procedure:
A) pulled knob straight back to remove it from spindle
B) Used adjustable wrench to remove keeper nut from front side of switch
C) Switch assembly was now free to move from inside of range hood, allowing me to access wire slot on switch
6) Removed existing lamp holder wire from switch, by inserting micro-screw driver into wire slot to release tension on the wire so it could be pulled free
7) Removed existing lamp holder wire from bundle of three white wires that had been revealed after removing inside black covering.
8) Removed old lamp holder by pinching together the two steel springs and pulling the old holder body out.
9) Connected white wire from new lamp holder with existing two white wires using a screw-on plastic connector cap to ensure a good connection
10) Secured three-wire assembly and cap with electrical tape to ensure solid connection and no bare wires
11) Connected other wire from new lamp holder into wire slot on switch by simply pushing the bare-end of the wire into the spring holder until no bare wire could be seen any longer
12) Attached switch back onto hood using reverse of procedure described above in step 5
13) With new lamp holder unconnected to hood, I screwed in a new light bulb, restored power and tested the new holder and circuit to ensure that bulb lit up and that there was no arcing or short circuits.
14) Test was successful, we cut power again to the system.
15) After a successful test and with power turned off again, the new lamp holder was placed into its location on the hood by depressing the two springs and inserting the holder in the hole (this was somewhat difficult to accomplish due to the strength of the springs, the tightness of the space and the size of my hands. A little patience and a firm, but gentle grip on the springs helped align the assembly properly and led to successful insertion of the lamp holder)
16) Cleaned grease residue and debris from black inside cover and then re-attached it using the single large machine screw
17) Replaced outer, underside cover using the four machine screws. We installed the corners of the cover in a criss-cross pattern (left front, right rear, right front, left rear) and tightened them incrementally in a criss-cross pattern, snugging them by hand, but ensuring that they were not over tight.
18) Screwed light bulb into lamp holder
19) Installed new replacement lens
20) Restored power to system and tested switch again.
21) Toasted our success with an appropriate adult beverage!
Did you find this story helpful?
Thanks for voting and helping fellow customers!
Lens tab broken off: Filters bent out of shape.
Evart - July 9, 2017
Tool Type
Range
Difficulty
Easy
Time
Less than 15 minutes
Tools Used
, No tools required
Removed broken and bent pieces and replaced.
Did you find this story helpful?
Thanks for voting and helping fellow customers!
Load More Install Stories
OEM stands for Original Equipment Manufacturer and means the part you’re buying is sourced directly from the manufacturer who made your product. At eReplacementParts, we sell only genuine OEM parts, guaranteeing the part you’re purchasing is of better design and of higher quality than aftermarket parts.
Our product descriptions are a combination of data sourced directly from the manufacturers who made your product as well as content researched and curated by our content & customer service teams. This content is edited and reviewed internally before being made public to customers.
Our customer service team are at the ready daily to answer your part and product questions. We have a dedicated staff with decades of collective experience in helping customers just like you purchase parts to repair their products.
All our part reviews are solicited directly from other customers who have purchased this exact part. While we moderate these reviews for profanity, offensive language or personally identifiable information, these reviews are posted exactly as submitted and no alterations are made by our team.
All our customer repair instructions are solicited directly from other customers just like you who have purchased and replaced this exact part. While we moderate these reviews for profanity, offensive language or personally identifiable information, these reviews are posted exactly as submitted and no alterations are made by our team.
Based on data from past customer purchasing behaviors, these parts are most commonly purchased together along with the part you are viewing. These parts may be necessary or helpful to replace to complete your current repair.
All our installation videos are created and produced in collaboration with our in-house repair technician, Mark Sodja, who has helped millions of eReplacementParts customers over the last 13 years repair their products. Mark has years of experience in selling and repairing both commercial and residential products with a specialty in gas-powered equipment.
This data is collected from customers who submitted a repair instruction after replacing this exact part. Customers can rate how easy the repair was to complete and how long it took. We aggregate this data to provide a repair rating that allows customers to quickly determine the difficulty and time needed to perform their own repair.