
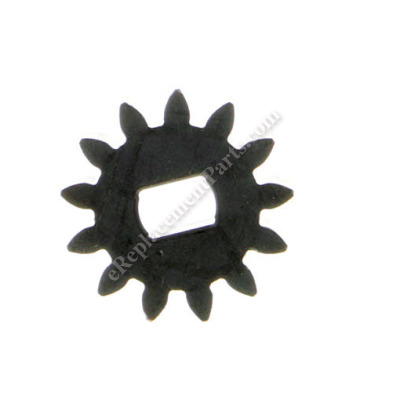


This part is an OEM sourced directly from the manufacturer for use in Toro lawn mowers. The pinion gear attaches to the wheel cover. It might require a set of pliers and a wrench to replace this part. It will need to be replaced if it becomes broken or stripped. This item is sold individually and is made of metal.
Gear-pinion, 13t 131-0896
OEM part for: Toro, Lawn Boy
Part Number: 131-0896
$7.38
In Stock
Jump To:
Frequently Purchased Together ?


Compatibility
This part will fit the following 74 machines
Toro
20330 (290000001-290999999)(2009) Lawn Mower View Diagrams & Manuals
20330 (310000001-310008917)(2010) Lawn Mower View Diagrams & Manuals
20330 (310008918-310999999)(2010) Lawn Mower View Diagrams & Manuals
20330C (290000001-290999999)(2009) Lawn Mower View Diagrams & Manuals
20330C (310000001-310999999)(2010) Lawn Mower View Diagrams & Manuals
20331 (290000001-290999999)(2009) Lawn Mower View Diagrams & Manuals
20331 (310000001-310006219)(2010) Lawn Mower View Diagrams & Manuals
20331 (310006220-310999999)(2010) Lawn Mower View Diagrams & Manuals
20331C (290000001-290999999)(2009) Lawn Mower View Diagrams & Manuals
20331C (310000001-310999999)(2010) Lawn Mower View Diagrams & Manuals
20350 (290000001-290999999)(2009) Lawn Mower View Diagrams & Manuals
20350 (310000001-310001316)(2010) Lawn Mower View Diagrams & Manuals
20350 (310001317-310999999)(2010) Lawn Mower View Diagrams & Manuals
20351 (290000001-290999999)(2009) Lawn Mower View Diagrams & Manuals
20351 (310000001-310002364)(2010) Lawn Mower View Diagrams & Manuals
20351 (310002365-310999999)(2010) Lawn Mower View Diagrams & Manuals
20370 22" Walk Behind Mower View Diagrams & Manuals
20371 (313000001-313999999) Whirlwind Lawnmower View Diagrams & Manuals
20371 (312000001-312999999) Whirlwind Lawnmower View Diagrams & Manuals
20377 (2012) 22in Recycler Lawn Mower Serial No. 312000001 And Up View Diagrams & Manuals
20377 (2013) 22in Recycler Lawn Mower Serial No. 313000001 And Up View Diagrams & Manuals
20377 (2014) 22in Recycler Lawn Mower Serial No. 313000001 And Up View Diagrams & Manuals
20339 (314000001 - 314999999) 22in Recycler Lawn Mower with SmartStow View Diagrams & Manuals
20339C (314000001 - 314999999) 22in Recycler Lawn Mower with SmartStow View Diagrams & Manuals
20370 (312000001 - 312999999) 22in Recycler Lawn Mower View Diagrams & Manuals
20370 (313000001 - 313999999) 22in Recycler Lawn Mower View Diagrams & Manuals
20370 (314000001 - 314200000) 22in Recycler Lawn Mower View Diagrams & Manuals
20370 (314200001 - 314999999) 22in Recycler Lawn Mower View Diagrams & Manuals
20371 (314000001 - 314200000) 22in Recycler Lawn Mower View Diagrams & Manuals
20371 (314200001 - 314999999) 22in Recycler Lawn Mower View Diagrams & Manuals
20377 (314000001 - 314200000) 22in Recycler Lawn Mower View Diagrams & Manuals
20377 (314200001 - 314999999) 22in Recycler Lawn Mower View Diagrams & Manuals
20378 (312000001 - 312999999) 22in Recycler Lawn Mower View Diagrams & Manuals
20378 (313000001 - 313999999) 22in Recycler Lawn Mower View Diagrams & Manuals
20378 (314000001 - 314200000) 22in Recycler Lawn Mower View Diagrams & Manuals
20378 (314200001 - 314999999) 22in Recycler Lawn Mower View Diagrams & Manuals
20339 (400000000-999999999) 22in Recycler Lawn Mower with SmartStow View Diagrams & Manuals
20353 (400000000-999999999) 22in Recycler Lawn Mower View Diagrams & Manuals
20353 (315000001-315999999) 22in Recycler Lawn Mower, 2015 View Diagrams & Manuals
20353 (316000001-316003328) 22in Recycler Lawn Mower, 2016 View Diagrams & Manuals
20353 (316003329-316999999) 22in Recycler Lawn Mower, 2016 View Diagrams & Manuals
20370 (316000001-316999999) 22in Recycler Lawn Mower View Diagrams & Manuals
20371 (316000001-316999999) 22in Recycler Lawn Mower View Diagrams & Manuals
20377 (400000000-999999999) 22in Recycler Lawn Mower View Diagrams & Manuals
20378 (400000000-999999999) 22in Recycler Lawn Mower View Diagrams & Manuals
20954 (400000000-999999999) 55cm Recycler Lawn Mower View Diagrams & Manuals
20960 (400000000-999999999) 55cm Recycler Lawn Mower View Diagrams & Manuals
20960 (315000001-315999999) 55cm Recycler Lawn Mower, 2015 View Diagrams & Manuals
20960 (316000001-316999999) 55cm Recycler Lawn Mower, 2016 View Diagrams & Manuals
20379 (400000000-401999999) 22in Recycler Lawn Mower View Diagrams & Manuals
20379 (402000000-999999999) 22in Recycler Lawn Mower View Diagrams & Manuals
20349 (400000000-404319999) 21in Recycler Lawn Mower View Diagrams & Manuals
20349 (404320000-999999999) 21in Recycler Lawn Mower View Diagrams & Manuals
21766 (400000000-999999999) 55cm Recycler Lawn Mower View Diagrams & Manuals
20339 (407820000-999999999) 20339, 22in Recycler Lawn Mower With Smartstow, (Sn 407820000-999999999) View Diagrams & Manuals
20339C (314000001-314999999)(2014) 20339c, 22in Recycler Lawn Mower With Smartstow, 2014 (Sn 314000001-314999999) View Diagrams & Manuals
20349 (404320000-405999999) 20349, 21in Recycler Lawn Mower, (Sn 404320000-405999999) View Diagrams & Manuals
20353 (402100000-404399999) 20353, 22in Recycler Lawn Mower, (Sn 402100000-404399999) View Diagrams & Manuals
20370 (314200001-314999999)(2014) 20370, 22in Recycler Lawn Mower, 2014 (Sn 314200001-314999999) View Diagrams & Manuals
20371 (314200001-314999999)(2014) 20371, 22in Recycler Lawn Mower, 2014 (Sn 314200001-314999999) View Diagrams & Manuals
20377 (404320000-405539999) 20377, 22in Recycler Lawn Mower, (Sn 404320000-405539999) View Diagrams & Manuals
20378 (314000001-314200000)(2014) 20378, 22in Recycler Lawn Mower, 2014 (Sn 314000001-314200000) View Diagrams & Manuals
20379 (407810000-999999999) 20379, 22in Recycler Lawn Mower, (Sn 407810000-999999999) View Diagrams & Manuals
20954 (402000000-404319999) 20954, 55cm Recycler Lawn Mower, (Sn 402000000-404319999) View Diagrams & Manuals
20959 (402100000-404319999) 20959, 55cm Recycler Smartstow Lawn Mower, (Sn 402100000-404319999) View Diagrams & Manuals
20960 (402100000-999999999) 20960, 55cm Recycler Lawn Mower, (Sn 402100000-999999999) View Diagrams & Manuals
21378 (400000000-407819999) 21378, 22in Recycler Lawn Mower, (Sn 400000000-407819999) View Diagrams & Manuals
21472 (400000000-408899999) 21472, 22in Recycler Lawn Mower, (Sn 400000000-408899999) View Diagrams & Manuals
21761 (400000000-999999999) 21761, 55cm Recycler Smartstow Lawn Mower, (Sn 400000000-999999999) View Diagrams & Manuals
21774 (400000000-999999999) 21774, 55cm Recycler Lawn Mower With Smartstow, (Sn 400000000-999999999) View Diagrams & Manuals
CODE346A (400000001-999999999)(2021) Code346a, 53cm Lawn Mower, 2021 (Sn 400000001-999999999) View Diagrams & Manuals
Lawn Boy
10739 (316000001 - 316999999) )(2016) 21 Inch Walk-Behind Mower View Diagrams & Manuals
17739 (316000001 - 316999999) )(2016) 21 Inch Walk-Behind Mower View Diagrams & Manuals
17739 (400000000 - 404319999) 21 Inch Walk-Behind Mower View Diagrams & Manuals
Show More Compatible Models
This item works with the following types of products:
- Lawn Mower Parts
This part replaces obsolete part #: 115-4665
Questions & Answers ?
Our customer Service team is at the ready daily to answer your part and product questions.

Ask our Team
We have a dedicated staff with decades of collective experience in helping customers just like you purchase parts to repair their products.
Does this fit my product?Questions & Answers for Gear-pinion, 13t
No questions have been asked yet
Customer Repair Instructions ?
All our customer repair instructions are solicited directly from other customers just like you who have purchased and replaced this exact part.
Shaft bearings bad and pinion gears worn on front wheel drive assembly
Charles - December 5, 2019
Tool Type
Lawn Mower
Difficulty
Medium
Time
30-60 minutes
Tools Used
Screwdriver, Pliers, Wrench Set, Snap ring pliers
Parts Used
Removed wheels, pinion gears and bearings
Reverse order to reassemble
Reverse order to reassemble
Did you find this story helpful?
Thanks for voting and helping fellow customers!
Power.drive transmission failed-gearbox locked up
Mike - March 26, 2019
Tool Type
Lawn Mower
Difficulty
Easy
Time
30-60 minutes
Tools Used
Screwdriver, Socket set, Wrench Set, Snap ring pliers, hammer, punch, roberts bit driver
1. Remove plugg wire so engine can't start
2. Remove remains of drive belt. You have to remove a bracket umder the engine and on top of the transmission to do this. This involves removing 2 of the engine mount bolts. The bracket on the transmission uses Roberts bolts requiring a special driver. This will disconnect the control cable also.
3. Remove the drive wheels.
4. Remove the pinion gears. This requires a snap ring pliers.
5. Remove the axle bearing assemblie from the frame. The transmission will now fall out.
6. If new bearings are going to be installed, use a hammer and pu ch to drive the old bearings out.
7. Use a vise, press or hammer to press in the new bearings.
8. Hold the transmission in place and install the axle bearing assemblies.
9. Install the pinion gears.
10. Install the drive wheels.
11. Install the drive belt.
12. Install the bracket on the transmission.
13. Install the bracket under the engine to retain the belt.
14. Reconnect the plug wire.
Did you find this story helpful?
Thanks for voting and helping fellow customers!
OEM stands for Original Equipment Manufacturer and means the part you’re buying is sourced directly from the manufacturer who made your product. At eReplacementParts, we sell only genuine OEM parts, guaranteeing the part you’re purchasing is of better design and of higher quality than aftermarket parts.
Our product descriptions are a combination of data sourced directly from the manufacturers who made your product as well as content researched and curated by our content & customer service teams. This content is edited and reviewed internally before being made public to customers.
Our customer service team are at the ready daily to answer your part and product questions. We have a dedicated staff with decades of collective experience in helping customers just like you purchase parts to repair their products.
All our part reviews are solicited directly from other customers who have purchased this exact part. While we moderate these reviews for profanity, offensive language or personally identifiable information, these reviews are posted exactly as submitted and no alterations are made by our team.
All our customer repair instructions are solicited directly from other customers just like you who have purchased and replaced this exact part. While we moderate these reviews for profanity, offensive language or personally identifiable information, these reviews are posted exactly as submitted and no alterations are made by our team.
Based on data from past customer purchasing behaviors, these parts are most commonly purchased together along with the part you are viewing. These parts may be necessary or helpful to replace to complete your current repair.
All our installation videos are created and produced in collaboration with our in-house repair technician, Mark Sodja, who has helped millions of eReplacementParts customers over the last 13 years repair their products. Mark has years of experience in selling and repairing both commercial and residential products with a specialty in gas-powered equipment.
This data is collected from customers who submitted a repair instruction after replacing this exact part. Customers can rate how easy the repair was to complete and how long it took. We aggregate this data to provide a repair rating that allows customers to quickly determine the difficulty and time needed to perform their own repair.