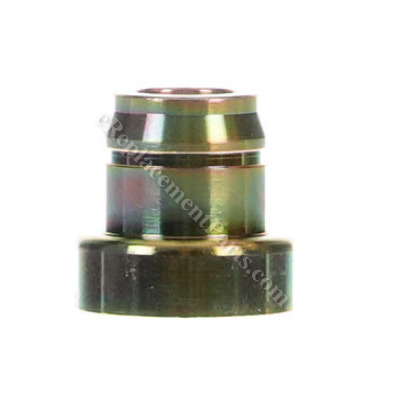
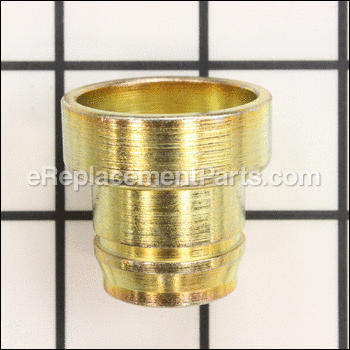
This is an authentic part assembled by the original manufacturer. It is compatible with many models of Toro and Lawn Boy lawn mowers. It connects to the transmission assembly in conjunction with a ball bearing. Bearings help moving parts move freely and with less friction. They also buffer moving parts from damaging each other during motion. They secure parts so that movement stays in the correct direction. Bearings are a high-wear part that should need to be replaced often. This item is sold individually.
Bearing Retainer 104-8698
OEM part for: Toro, Lawn Boy
Part Number: 104-8698
Jump To:
Frequently Purchased Together ?
Compatibility
This part will fit the following 232 machines
Toro
Lawn Boy
This item works with the following types of products:
- Lawn Mower Parts
Customer Part Reviews ?
- 1
Questions & Answers ?
Our customer Service team is at the ready daily to answer your part and product questions.

Ask our Team
We have a dedicated staff with decades of collective experience in helping customers just like you purchase parts to repair their products.
Does this fit my product?Questions & Answers for Bearing Retainer
Customer Repair Instructions ?
All our customer repair instructions are solicited directly from other customers just like you who have purchased and replaced this exact part.
Bearings wore out, needed a new wheel
Tool Type
Lawn Mower
Difficulty
Easy
Time
15-30 minutes
Tools Used
Pliers, Socket set, Nutdriver
Replaced the ball bearing and the retainer bearing
Replace all of the rest of the parts and tightened the new wheel on with the bolt
Left wheel bearing was worn out
Tool Type
Lawn Mower
Difficulty
Medium
Time
15-30 minutes
Tools Used
Screwdriver, Pliers, Socket set, Wrench Set
2. Replaced with new one
ball bearings worn out allowing axel to flop around and not engage drive wheel correctly.
Tool Type
Lawn Mower
Difficulty
Hard
Time
More than 2 hours
Tools Used
Screwdriver, Pliers, Socket set, retaining ring removal pliers, c clamps.
rear wheel drive was worn out. needed new drive gears on rear wheels
Tool Type
Lawn Mower
Difficulty
Medium
Time
30-60 minutes
Tools Used
Screwdriver, Pliers, Socket set, Wrench Set, snap ring pliers
bad bearing
Tool Type
Lawn Mower
Difficulty
Medium
Time
1-2 hours
Tools Used
Screwdriver, Pliers, Wrench Set, Adjustable Wrench
Power assist not working
Tool Type
Lawn Mower
Difficulty
Medium
Time
More than 2 hours
Tools Used
Screwdriver, Pliers, Socket set, Wrench Set, Nutdriver
The bearings on the rear drive wheels were worn and caused the mower to be sluggish.
Tool Type
Lawn Mower
Difficulty
Hard
Time
More than 2 hours
Tools Used
Screwdriver, Pliers, Socket set, Wrench Set, Snap ring pliers, hammer
Note: keep components separated by side they were removed from.
Note: note which way the small gear comes off the shaft. It must be reassembled back
the same direction or the drive wheels will not operate properly.
2. Remove the grass shute for access to the drive pulley and gearbox.
3. Remove the belt and pulley on this Lawnboy Model 10685.
4. Remove large snap rings that hold the bearing adapters in place.
5. Maneuver the gearbox-driveshaft assembly by sliding the shaft out of one side bearing/adapter, then the other side.
6. Remove the old bearings/adapters.
7. Press or drive the new bearings in the adapters.
8. Reassembly the gearbox-driveshaft into the bearing adapter assemblies.
9. Align the bearing-adapters in the mower housing and reinstall the large snap rings.
10. Reassemble the remaining components in the reverse order.
11. Clean and recreate the small drive gears which are located behind the rear wheels before installing the rear wheels.
Front wheel drive stopped pulling
Tool Type
Lawn Mower
Difficulty
Hard
Time
1-2 hours
Tools Used
Screwdriver, Socket set, Wrench Set, Spring clip pliers
Lawn mower would not self propel
Tool Type
Lawn Mower
Difficulty
Medium
Time
15-30 minutes
Tools Used
Pliers, Socket set
Rear wheel dangling loose - replaced retainer bearing.
Tool Type
Lawn Mower
Difficulty
Medium
Time
30-60 minutes
Tools Used
Screwdriver, Pliers, Socket set, Wrench Set, Adjustable Wrench
Step one - assembled retainer bearing and bearing ball by hammering together. It slid together uneven at first, had to use some WD40 and gentle hammering (to not damage the pieces) to put together.
The toughest part was removing the cover panel that held the transmission rod that the bearing fit onto. That little panel holds a lot of parts together on the machine including the handle-bar assembly. Unscrewing it is easy but its a two person job to put it back together. It helped to take the starter rope pull off the handle part to make it easy to maneuver things back together.
It is key to have a tool to be able to reach the bolt that's furthest in (or up depending how you look at it)- again having two people helped. For reassembly, I held the nut and washer using a long adjustable type wrench that held the nut with the washer resting on top. My mom started the screw from the top. Once it caught a couple of turns it was all down hill.
OEM stands for Original Equipment Manufacturer and means the part you’re buying is sourced directly from the manufacturer who made your product. At eReplacementParts, we sell only genuine OEM parts, guaranteeing the part you’re purchasing is of better design and of higher quality than aftermarket parts.
Our product descriptions are a combination of data sourced directly from the manufacturers who made your product as well as content researched and curated by our content & customer service teams. This content is edited and reviewed internally before being made public to customers.
Our customer service team are at the ready daily to answer your part and product questions. We have a dedicated staff with decades of collective experience in helping customers just like you purchase parts to repair their products.
All our part reviews are solicited directly from other customers who have purchased this exact part. While we moderate these reviews for profanity, offensive language or personally identifiable information, these reviews are posted exactly as submitted and no alterations are made by our team.
All our customer repair instructions are solicited directly from other customers just like you who have purchased and replaced this exact part. While we moderate these reviews for profanity, offensive language or personally identifiable information, these reviews are posted exactly as submitted and no alterations are made by our team.
Based on data from past customer purchasing behaviors, these parts are most commonly purchased together along with the part you are viewing. These parts may be necessary or helpful to replace to complete your current repair.
All our installation videos are created and produced in collaboration with our in-house repair technician, Mark Sodja, who has helped millions of eReplacementParts customers over the last 13 years repair their products. Mark has years of experience in selling and repairing both commercial and residential products with a specialty in gas-powered equipment.
This data is collected from customers who submitted a repair instruction after replacing this exact part. Customers can rate how easy the repair was to complete and how long it took. We aggregate this data to provide a repair rating that allows customers to quickly determine the difficulty and time needed to perform their own repair.


