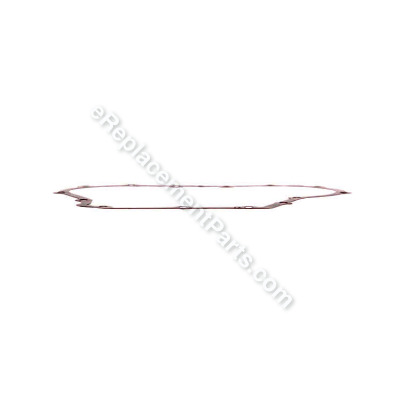


This item is an authentic OEM sourced part that is intended to be used with lawnmower engines from Kohler and Toro. The gasket is used to seal the connection between the cover plate and the crankcase assembly. This item is sold as an individual replacement part.
Closure Plate Gasket 20 041 21-S
OEM part for: Kohler, Toro, Cub Cadet, MTD
Part Number: 20 041 21-S
$8.52
In Stock
Jump To:
Frequently Purchased Together ?


Compatibility
This Closure Plate Gasket will fit the following 470 machines. Confirm this part works with your model, and view the detailed model diagrams and repair help we have to offer.
Toro
Kohler
Cub Cadet
MTD
Show More Compatible ModelsThis item works with the following types of products:
- Lawn Tractor Parts
- Engine Parts
This part replaces obsolete part #: KH-20-041-21-S, KH-20-041-01-S, 17 468 19-S, 2004101-S, 20-041-01-S
Customer Part Reviews ?
Average Rating (out of 5):
Click to filter by ratings:
5 stars
5
4 stars
0
3 stars
0
2 stars
0
1 stars
0
< PREV
- 1
good
fast
Guest -
April 23, 2020
Verified Purchase
easy repair
Ordered two gaskets and they arrived in much larger box than the size of the gaskets with bubble wrap inside. The gaskets were in perfect condition.
Guest -
April 17, 2020
Verified Purchase
Excellent Service
Difficult to source these parts in the UK, however this seller offers a very efficient overseas delivery service. many thanks
iGlobal -
September 21, 2019
Verified Purchase
Excellent service
The parts arrived quickly and fit my Kohler engine perfectly. The gasket kit came with detailed instructions. Great company and wonderful selection.
Guest -
August 25, 2019
Verified Purchase
GOOD PARTS
EASY TO FIND AND ORDER PARTS,NICE PEOP[LE TO TALK TO, AND QUICK DELIVERY. I WOULD RECOMMEND TO FRIENDS.
Guest -
July 9, 2019
Verified Purchase
Questions & Answers ?
Our customer Service team is at the ready daily to answer your part and product questions.

Ask our Team
We have a dedicated staff with decades of collective experience in helping customers just like you purchase parts to repair their products.
Does this fit my product?Questions & Answers for Closure Plate Gasket
No questions have been asked yet
Customer Repair Instructions ?
All our customer repair instructions are solicited directly from other customers just like you who have purchased and replaced this exact part.
Broke internal governor
Thomas - October 10, 2016
👍 5 of 5 people found this instruction helpful
Tool Type
Lawn Tractor
Difficulty
Hard
Time
More than 2 hours
Tools Used
Screwdriver, Pliers, Socket set, Wrench Set, Nutdriver, `Torque Wrench
Remove hood and other covers . Remove wiring harness, starter, elect. module, remove fly wheel cover, remove fly wheel ,remove, closure plate remove cam gears , drain oil, clean & inspect engine block. Replace cam gears assemble governor reassemble & torque cover plate & fly wheel reassemble all other covers , parts ,carb. linkage, battery cables, & safeties . Replace oil start & run , check operation. YOU MUST BE SURE THE ENGINE IS TIMED BEFORE REPLACING CAM GEARS !!
Did you find this story helpful?
Thanks for voting and helping fellow customers!
Governor gear broke
Mike - August 30, 2018
👍 2 of 2 people found this instruction helpful
Tool Type
Engine
Difficulty
Easy
Time
30-60 minutes
Tools Used
Socket set, Wrench Set
Parts Used
Replaced governor (no instructions ANYWHERE on internet, nor in the repair manual). The only instructions included how to adjust governor).
Removed all residue of old gasket, applied gasket sealer, installed new cover plate gasket.
Reassembled all motor components.
Reset governor, started engine, fine tuned throttle control (very touchy). Successful repair.
Note: new governor gear and pin have to be reassembled together before installing on shaft of cover plate. Pin must be located on underside of butterflies, then gear with pin in place must be pushed onto shaft until the three polymer "tits" lock into groove on shaft. Very simple, but there is no instruction ANYWHERE in maintenance or repair manual from Kohler!
Did you find this story helpful?
Thanks for voting and helping fellow customers!
Lawn mower engine was leaking oil.
Jerry - September 11, 2017
👍 2 of 2 people found this instruction helpful
Tool Type
Engine
Difficulty
Medium
Time
1-2 hours
Tools Used
Screwdriver, Wrench Set, Socket set and ratchet
1. Removed the engine.
2. Disassembled the engine.
3. Replaced the seals.
4. Reassembled the engine.
5. Reinstalled the engine.
2. Disassembled the engine.
3. Replaced the seals.
4. Reassembled the engine.
5. Reinstalled the engine.
Did you find this story helpful?
Thanks for voting and helping fellow customers!
dipstick broke inside engine grrr Kohler SV540
David - December 26, 2022
👍 1 of 1 people found this instruction helpful
Tool Type
Lawn Tractor
Difficulty
Hard
Time
More than 2 hours
Tools Used
Screwdriver, Pliers, Socket set, Wrench Set, Nutdriver, flywheel puller heat gun
pulled closure plate,
be sure to look at the cams, levers and valve stems before reassembly,
read the entire instructions in the manual before starting...
and check those cam gears for proper alignment
don't over torque closure plate.
be sure to look at the cams, levers and valve stems before reassembly,
read the entire instructions in the manual before starting...
and check those cam gears for proper alignment
don't over torque closure plate.
Did you find this story helpful?
Thanks for voting and helping fellow customers!
Starter would not turn engine, Automatic Compression Release now working
David - November 14, 2021
Tool Type
Lawn Tractor
Difficulty
Hard
Time
More than 2 hours
Tools Used
Screwdriver, Pliers, Socket set, Wrench Set
I removed all of the parts on my tractor to allow me to remove the closure plate on top of the engine. Removed the closure plate and found the broken ACR spring. Turned the engine by hand until the timing marks on the camshafts and crankshaft were lined up. Removed the exhaust camshaft, removed the broken ACR spring and replaced it with the new spring. Before I put the closure plate back on the top of the engine, I turned the engine by hand to ensure that the ACR was working, the exhaust valve was opening slightly on the top dead center stroke. At this point, I finished putting my garden tractor back together. Starts and runs great after the repair.
Did you find this story helpful?
Thanks for voting and helping fellow customers!
Automatic compression release was not engaging.
Curt - August 22, 2016
Tool Type
Engine
Difficulty
Medium
Time
1-2 hours
Tools Used
Screwdriver, Socket set, Wrench Set, Nutdriver
I disassembled to motor and installed the above mentioned parts. While reassembling I also set the valves.That particular problem was easily solved but unfortunately seems a waste of time on this particular engine.
Did you find this story helpful?
Thanks for voting and helping fellow customers!
Screw holding the Stator down, broke and caused the engine to keep blowing the fuse because it shorted out the engine and the screw could not be removed
Middleton - April 23, 2017
👍 0 of 1 people found this instruction helpful
Tool Type
Engine
Difficulty
Medium
Time
1-2 hours
Tools Used
Screwdriver, Power Drill, Socket set
Parts Used
1. Took the cover off.
2. Removed the flywheel and the stator.
3. Removed the closure cover and installed the new closure cover with a gasket.
4. Put the new stator, the flywheel and the wiring on.
5. Tightened everything down.
6. Put in a new fuse and started the engine.
2. Removed the flywheel and the stator.
3. Removed the closure cover and installed the new closure cover with a gasket.
4. Put the new stator, the flywheel and the wiring on.
5. Tightened everything down.
6. Put in a new fuse and started the engine.
Did you find this story helpful?
Thanks for voting and helping fellow customers!
OEM stands for Original Equipment Manufacturer and means the part you’re buying is sourced directly from the manufacturer who made your product. At eReplacementParts, we sell only genuine OEM parts, guaranteeing the part you’re purchasing is of better design and of higher quality than aftermarket parts.
Our product descriptions are a combination of data sourced directly from the manufacturers who made your product as well as content researched and curated by our content & customer service teams. This content is edited and reviewed internally before being made public to customers.
Our customer service team are at the ready daily to answer your part and product questions. We have a dedicated staff with decades of collective experience in helping customers just like you purchase parts to repair their products.
All our part reviews are solicited directly from other customers who have purchased this exact part. While we moderate these reviews for profanity, offensive language or personally identifiable information, these reviews are posted exactly as submitted and no alterations are made by our team.
All our customer repair instructions are solicited directly from other customers just like you who have purchased and replaced this exact part. While we moderate these reviews for profanity, offensive language or personally identifiable information, these reviews are posted exactly as submitted and no alterations are made by our team.
Based on data from past customer purchasing behaviors, these parts are most commonly purchased together along with the part you are viewing. These parts may be necessary or helpful to replace to complete your current repair.
All our installation videos are created and produced in collaboration with our in-house repair technician, Mark Sodja, who has helped millions of eReplacementParts customers over the last 13 years repair their products. Mark has years of experience in selling and repairing both commercial and residential products with a specialty in gas-powered equipment.
This data is collected from customers who submitted a repair instruction after replacing this exact part. Customers can rate how easy the repair was to complete and how long it took. We aggregate this data to provide a repair rating that allows customers to quickly determine the difficulty and time needed to perform their own repair.