
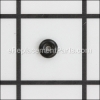
Cylinder Assembly 9R205236
OEM part for: Bostitch, Porter Cable
Part Number: 9R205236
Install
Videos!

Watch The
Repair Video
Repair Video
$8.68
In Stock
Jump To:
Frequently Purchased Together ?


Compatibility
This part will fit the following 2 machines
Porter Cable
TS056 (Type 1) Pneumatic Stapler View Diagrams & Manuals
Bostitch
BTFP71875 (Type 1) Pneumatic Stapler View Diagrams & Manuals
This item works with the following types of products:
- Stapler Parts
Questions & Answers ?
Our customer Service team is at the ready daily to answer your part and product questions.

Ask our Team
We have a dedicated staff with decades of collective experience in helping customers just like you purchase parts to repair their products.
Does this fit my product?Questions & Answers for Cylinder Assembly
No questions have been asked yet
Customer Repair Instructions ?
All our customer repair instructions are solicited directly from other customers just like you who have purchased and replaced this exact part.
The air cylinder was broken
Stanley - March 24, 2024
Tool Type
Stapler
Difficulty
Medium
Time
15-30 minutes
Tools Used
Pliers, Amen wrench
Parts Used
Backed out the retaining screws. Took the top half of the stapler off. Remove the air cylinder, pin and air cylinder, then replace the air cylinder and close the stapler back up.
Did you find this story helpful?
Thanks for voting and helping fellow customers!
The barb end on the cylinder Assembly broke.
Tommy - August 15, 2023
Tool Type
Stapler
Difficulty
Medium
Time
15-30 minutes
Tools Used
Screwdriver, Pliers, Heat gun
1. Un screwed and Split the stapler case in half
2. Removed the cylinder tube
3. Unpinned the cylinder assembly and removed
4. Replaced the cylinder assembly with new one
5. Installed retaining pin
6. Used a heat gun to soften and shape the cylinder tube. (It was to stiff to install out of the bag)
7. Installed the cylinder tube.
8. Then put the stapler halfs back together
9. Tested and worked like new.
Did you find this story helpful?
Thanks for voting and helping fellow customers!
air cylinder was damaged that pushes the striker of stapler
Paul - May 21, 2021
Tool Type
Stapler
Difficulty
Medium
Time
1-2 hours
Tools Used
Screwdriver, Pliers
Parts Used
new model of cylinder was wider than original had to grind down part of the frame for new model to fit
Did you find this story helpful?
Thanks for voting and helping fellow customers!
Stapler stopped cycling, only blew air when I pulled the trigger
LANCE - June 5, 2020
Tool Type
Stapler
Difficulty
Easy
Time
15-30 minutes
Tools Used
Screwdriver, Pliers, Nutdriver, heat gun
1. Open the stapler by removing the Torx screws and sliding the pivot pin for the main trigger out. Beware the rubber o-ring used to hold this in place, it will try to run away.
2. Drive the pin attaching the cylinder to the drive mechanism out, keep the clear plastic retainer.
3. Remove the cylinder by removing the large pin from the closed end and disconnecting the hose.
4. Remove the valve by disconnecting the hoses.
5. Apply heat to the hose ends to make pushing them on easier and less likely to break off the nipples. Connect the valve and the cylinder
6. Position the cylinder, route the hose where it was when you opened the unit, push the large silver pin back to retain the cylinder in position.
7. Align the cylinder rod with the mechanism and slide the pin up to connect the cylinder to the drive mechanism, put the clear plastic ring around the pin to retain it.
8. Reassemble the unit with the Torx screws - pay close attention to aligning the drive mechanism in the slots before you close the shell and tighten.
9. Install the main trigger by positioning it in the stapler and pushing the pivot rod through, retain the rod with the small black o-ring that came off the unit when you took it apart.
Load with staples and test. My unit was a little sticky on reassembly, so I took it back apart and used molybdenum disulfide (MoS2) grease on the drive mechanism slots in the housing and reassembled. Works perfectly now.
Did you find this story helpful?
Thanks for voting and helping fellow customers!
Stapler had rotted o rings
David - July 8, 2018
Tool Type
Stapler
Difficulty
Easy
Time
30-60 minutes
Tools Used
Screwdriver, Pliers
1. Disassembled by removing the cover
2. Saw the broken air in-let to the trigger
3. Replaced the trigger and actuator at the same time.
4. Ops checked good.
Note: The label says NO OIL on the rear in black on black plastic . I did NOT see that until I was taking it apart. I know why the o rings were bad! I oiled the machine before I put it away last time I used it.
Did you find this story helpful?
Thanks for voting and helping fellow customers!
OEM stands for Original Equipment Manufacturer and means the part you’re buying is sourced directly from the manufacturer who made your product. At eReplacementParts, we sell only genuine OEM parts, guaranteeing the part you’re purchasing is of better design and of higher quality than aftermarket parts.
Our product descriptions are a combination of data sourced directly from the manufacturers who made your product as well as content researched and curated by our content & customer service teams. This content is edited and reviewed internally before being made public to customers.
Our customer service team are at the ready daily to answer your part and product questions. We have a dedicated staff with decades of collective experience in helping customers just like you purchase parts to repair their products.
All our part reviews are solicited directly from other customers who have purchased this exact part. While we moderate these reviews for profanity, offensive language or personally identifiable information, these reviews are posted exactly as submitted and no alterations are made by our team.
All our customer repair instructions are solicited directly from other customers just like you who have purchased and replaced this exact part. While we moderate these reviews for profanity, offensive language or personally identifiable information, these reviews are posted exactly as submitted and no alterations are made by our team.
Based on data from past customer purchasing behaviors, these parts are most commonly purchased together along with the part you are viewing. These parts may be necessary or helpful to replace to complete your current repair.
All our installation videos are created and produced in collaboration with our in-house repair technician, Mark Sodja, who has helped millions of eReplacementParts customers over the last 13 years repair their products. Mark has years of experience in selling and repairing both commercial and residential products with a specialty in gas-powered equipment.
This data is collected from customers who submitted a repair instruction after replacing this exact part. Customers can rate how easy the repair was to complete and how long it took. We aggregate this data to provide a repair rating that allows customers to quickly determine the difficulty and time needed to perform their own repair.