
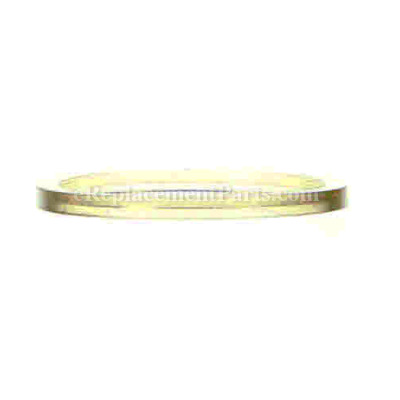


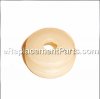
This is a genuine item that is supplied by the original equipment manufacturer for use with Ridgid nailers. It is a special component that is utilized to provide a tight seal for the valve, unfortunately, over time the material will wear out and it may begin to fail eventually requiring a replacement. Please make sure to refer to the appropriate diagrams of your model for the correct location and application of this hardware. Keep in mind this high-quality item is made of durable rubber and is sold individually.
Collar 079002001015
OEM part for: Ridgid
Part Number: 079002001015
$5.19
Usually ships in 7 - 12 business days
7 - 12 business days
Jump To:
Frequently Purchased Together ?


Compatibility
This part will fit the following 3 machines
Ridgid
R350CHA Clipped Head Framing Nailer View Diagrams & Manuals
R350RHA Full Round Head Framing Nailer View Diagrams & Manuals
R350RHD Full Round Head Framing Nailer View Diagrams & Manuals
This item works with the following types of products:
- Nailer Parts
Questions & Answers ?
Our customer Service team is at the ready daily to answer your part and product questions.

Ask our Team
We have a dedicated staff with decades of collective experience in helping customers just like you purchase parts to repair their products.
Does this fit my product?Questions & Answers for Collar
No questions have been asked yet
Customer Repair Instructions ?
All our customer repair instructions are solicited directly from other customers just like you who have purchased and replaced this exact part.
Leaking out back
Deborah - August 9, 2021
Tool Type
Nailer
Difficulty
Easy
Time
Less than 15 minutes
Tools Used
, Allen wrenches
Parts Used
Super simple repair. Disassembled, removed shrapnel from previous collar, snapped on new collar, re-assembled. Went nailing 😊.
Did you find this story helpful?
Thanks for voting and helping fellow customers!
Nail gun blowing air from the head
michael - July 7, 2020
Tool Type
Nailer
Difficulty
Easy
Time
15-30 minutes
Tools Used
, Allen wrench, lube grease
Pretty easy talking apart only (4) Allen nuts. pull out all parts carefully to remember how it goes back in. In reverse of taking it out. Grease everything good while installing after you clean it all first . With a little patience you are back in business.
Did you find this story helpful?
Thanks for voting and helping fellow customers!
Framing nailer leaking air from top
CHRIS - June 13, 2020
Tool Type
Nailer
Difficulty
Easy
Time
30-60 minutes
Tools Used
Screwdriver, Allen set
Ordered suggested part, common for this problem, replaced broken seals that were in plain sight 30 - 45 min.
Did you find this story helpful?
Thanks for voting and helping fellow customers!
Air leak
Les - March 6, 2020
Tool Type
Nailer
Difficulty
Easy
Time
Less than 15 minutes
Tools Used
, Allan wrench
Parts Used
Removed top cap. Cleaned out air chamber. Replaced seal and collar. Reassemble.
Did you find this story helpful?
Thanks for voting and helping fellow customers!
Leaking air from piston area. Nailed would not function.
Colby - May 2, 2019
Tool Type
Nailer
Difficulty
Medium
Time
15-30 minutes
Tools Used
, Allen wrench
Removed 4 Allen screws/bolts
Removed piston cap
Removed Allen screw in center (use caution Allen screw holding piston valve center has spring and is under tension)
Press out valve and Hd. Valve piston Piston
Press in new parts
Insert Allen screw in center (again use caution as center will be under tension from the spring)
Attach piston cap
Insert 4 Allen screws/bolts
Job complete
Did you find this story helpful?
Thanks for voting and helping fellow customers!
Air leaking
Peter - January 28, 2017
Tool Type
Nailer
Difficulty
Easy
Time
1-2 hours
Tools Used
Screwdriver, Pliers
Parts Used
- Cylinder Cap Seal - 079002001009
- Compression Spring - 079002001010
- O-ring (43.5 X 2.62) - 079002001011
- O-ring (60.2 X 3.1) - 079002001012
- O-ring (47.8 X 2.62) - 079002001013
- Hd.valve Piston - 079002001014
- Collar - 079002001015
- Seal - 079002001016
- Valve - 079002001017
- Press Ring - 079002001019
- Press Ring - 079002001020
- Piston Ring - 079002001021
In short. I removed all of the parts inside of the gun that looked worn or maybe causing an air leak. The parts diagram the ereplacements was a great help on putting the parts in the correct place. Thank you
Did you find this story helpful?
Thanks for voting and helping fellow customers!
Seals dried out
David - December 25, 2016
Tool Type
Nailer
Difficulty
Easy
Time
Less than 15 minutes
Tools Used
, Allen wrench
Parts Used
Removed the end cap, cleaned oils seal crumbs out. Oil and reassembled.
Did you find this story helpful?
Thanks for voting and helping fellow customers!
Leaking air and wouldn't nail,
JUAN - May 25, 2016
Tool Type
Nailer
Difficulty
Easy
Time
15-30 minutes
Tools Used
, Allen bit
Parts Used
Remove the four bolts that hold the top cap on the nail gun. Remove the worn seal and collar. Install the new parts an clean the internal parts of the gun and oil it.
Did you find this story helpful?
Thanks for voting and helping fellow customers!
Nailer leaked from the top
Timothy - February 19, 2016
Tool Type
Nailer
Difficulty
Medium
Time
15-30 minutes
Tools Used
, Allen wrench
Parts Used
Remove top of gun (4) screws, then remove the screw from inside of the top, then replaced collar and seal, clean inside and lubricate seals with pneumatic oil. Reassemble.
Did you find this story helpful?
Thanks for voting and helping fellow customers!
OEM stands for Original Equipment Manufacturer and means the part you’re buying is sourced directly from the manufacturer who made your product. At eReplacementParts, we sell only genuine OEM parts, guaranteeing the part you’re purchasing is of better design and of higher quality than aftermarket parts.
Our product descriptions are a combination of data sourced directly from the manufacturers who made your product as well as content researched and curated by our content & customer service teams. This content is edited and reviewed internally before being made public to customers.
Our customer service team are at the ready daily to answer your part and product questions. We have a dedicated staff with decades of collective experience in helping customers just like you purchase parts to repair their products.
All our part reviews are solicited directly from other customers who have purchased this exact part. While we moderate these reviews for profanity, offensive language or personally identifiable information, these reviews are posted exactly as submitted and no alterations are made by our team.
All our customer repair instructions are solicited directly from other customers just like you who have purchased and replaced this exact part. While we moderate these reviews for profanity, offensive language or personally identifiable information, these reviews are posted exactly as submitted and no alterations are made by our team.
Based on data from past customer purchasing behaviors, these parts are most commonly purchased together along with the part you are viewing. These parts may be necessary or helpful to replace to complete your current repair.
All our installation videos are created and produced in collaboration with our in-house repair technician, Mark Sodja, who has helped millions of eReplacementParts customers over the last 13 years repair their products. Mark has years of experience in selling and repairing both commercial and residential products with a specialty in gas-powered equipment.
This data is collected from customers who submitted a repair instruction after replacing this exact part. Customers can rate how easy the repair was to complete and how long it took. We aggregate this data to provide a repair rating that allows customers to quickly determine the difficulty and time needed to perform their own repair.