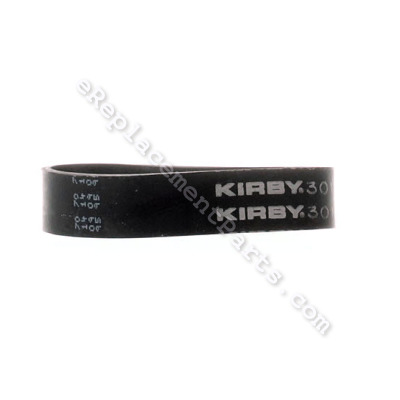


Genuine Kirby replacement part, this part is sold individually. This belt is used on the Kirby Carpet Shampoo System. This is the belt that drives the Shampoo Brushroll Assembly. Over time belts will stretch and crack. Depending on how often this is used. It may be a good idea to order an extra one to keep on hand.
Belt K-301289
OEM part for: Kirby
Part Number: K-301289
$4.99
In Stock
Jump To:
Frequently Purchased Together ?

Compatibility
This Belt will fit the following 18 machines. Confirm this part works with your model, and view the detailed model diagrams and repair help we have to offer.
This item works with the following types of products:
- Vacuum Parts
Customer Part Reviews ?
Average Rating (out of 5):
Click to filter by ratings:
5 stars
3
4 stars
0
3 stars
0
2 stars
0
1 stars
0
< PREV
- 1
The tailight we order fit just right with no problems, thank you.
The taillight we order was great and fit just right, Thank you,
Guest -
December 9, 2021
Verified Purchase
The part is working perfectly!
The belts for my Kirby sweeper arrived quickly and in great condition. Very impressed with eReplacementParts. We will definitely use this company again.
Guest -
May 13, 2021
Verified Purchase
Complete Satisfaction
Everyone needs to attain satisfaction in all areas of their lives and Weather Tech floor mats has met ours. They are not only precise and perfect in every way for our Subaru Impresa but they have also made my wife ecstatically happy. A side note, they arrived faster than I expected via ground mail.
Guest -
April 25, 2019
Verified Purchase
Questions & Answers ?
Our customer Service team is at the ready daily to answer your part and product questions.

Ask our Team
We have a dedicated staff with decades of collective experience in helping customers just like you purchase parts to repair their products.
Does this fit my product?Questions & Answers for Belt
No questions have been asked yet
Customer Repair Instructions ?
All our customer repair instructions are solicited directly from other customers just like you who have purchased and replaced this exact part.
The old tube tire causing dirt and dust to fly into the air
Robert - May 10, 2023
Tool Type
Vacuum
Difficulty
Easy
Time
15-30 minutes
Tools Used
, Wire cutter
Removed the vacuum bag
Removed the torn tube
Fasten the tube on the bottom end by screwing the end around the plastic end. Then attaching the top end to the plastic piece and installing the zip tie around that end. Very easy.
Removed the torn tube
Fasten the tube on the bottom end by screwing the end around the plastic end. Then attaching the top end to the plastic piece and installing the zip tie around that end. Very easy.
Did you find this story helpful?
Thanks for voting and helping fellow customers!
neutral pedal came loose from machine
Gene - January 10, 2023
Tool Type
Vacuum
Difficulty
Medium
Time
30-60 minutes
Tools Used
Screwdriver, Pliers, Power Drill, Socket set, Wrench Set
disassembled vacuum complete to replace broken neutral pedal assembly, motor brushes, main drive belt, and worn suction fan.
Did you find this story helpful?
Thanks for voting and helping fellow customers!
the vac just needed some care
Larry - December 8, 2021
Tool Type
Vacuum
Difficulty
Medium
Time
15-30 minutes
Tools Used
Screwdriver, Power Drill, Socket set
the headlight bulb was first then the fan put all together replaced belts new bag and put to the test all went well
Did you find this story helpful?
Thanks for voting and helping fellow customers!
Belt stretched
Thomas - December 24, 2020
Tool Type
Vacuum
Difficulty
Easy
Time
Less than 15 minutes
Tools Used
, no tools were used to change the belt
Parts Used
Removed the brush roller from the head, then removed the belt.
Installed new belt over roller, and installed roller into head.
Installed new belt over roller, and installed roller into head.
Did you find this story helpful?
Thanks for voting and helping fellow customers!
Fan broke and headlight was burned out
DONALD - March 21, 2019
Tool Type
Vacuum
Difficulty
Medium
Time
15-30 minutes
Tools Used
Screwdriver, Power Drill
Watched the video on how to repair part - very helpful.
1. Removed screws holding housing assembly. 1 screw was difficult to remove - had to drill out head. Also removed vacuum bag.
2. Removed old fan blade,
3. Replaced fan blade
4. Reassembled housing.
5. Removed screws on headlight cover
6. Removed burned out headlight
7. Replaced with new headlight
8. Reattached headlight cover
Did you find this story helpful?
Thanks for voting and helping fellow customers!
Had wrong size drive belt
Jimmy - February 27, 2019
Tool Type
Vacuum
Difficulty
Easy
Time
Less than 15 minutes
Tools Used
, No tools needed
Parts Used
Replaced the belt by sliding it over the brushes
Did you find this story helpful?
Thanks for voting and helping fellow customers!
Brush didn't turn
JOHN - November 7, 2018
I had to figure out how the belt was installed. You have to take the brush off. When it is on you have to turn the front knob to take up the slack. Then turn the knob the opposite direction to put the belt on the drive shaft. It is easy once you have done this.
Did you find this story helpful?
Thanks for voting and helping fellow customers!
OEM stands for Original Equipment Manufacturer and means the part you’re buying is sourced directly from the manufacturer who made your product. At eReplacementParts, we sell only genuine OEM parts, guaranteeing the part you’re purchasing is of better design and of higher quality than aftermarket parts.
Our product descriptions are a combination of data sourced directly from the manufacturers who made your product as well as content researched and curated by our content & customer service teams. This content is edited and reviewed internally before being made public to customers.
Our customer service team are at the ready daily to answer your part and product questions. We have a dedicated staff with decades of collective experience in helping customers just like you purchase parts to repair their products.
All our part reviews are solicited directly from other customers who have purchased this exact part. While we moderate these reviews for profanity, offensive language or personally identifiable information, these reviews are posted exactly as submitted and no alterations are made by our team.
All our customer repair instructions are solicited directly from other customers just like you who have purchased and replaced this exact part. While we moderate these reviews for profanity, offensive language or personally identifiable information, these reviews are posted exactly as submitted and no alterations are made by our team.
Based on data from past customer purchasing behaviors, these parts are most commonly purchased together along with the part you are viewing. These parts may be necessary or helpful to replace to complete your current repair.
All our installation videos are created and produced in collaboration with our in-house repair technician, Mark Sodja, who has helped millions of eReplacementParts customers over the last 13 years repair their products. Mark has years of experience in selling and repairing both commercial and residential products with a specialty in gas-powered equipment.
This data is collected from customers who submitted a repair instruction after replacing this exact part. Customers can rate how easy the repair was to complete and how long it took. We aggregate this data to provide a repair rating that allows customers to quickly determine the difficulty and time needed to perform their own repair.