
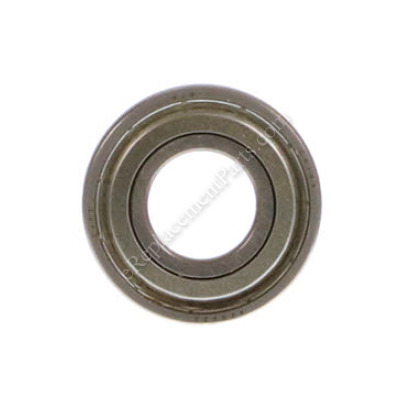


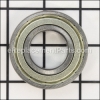
This is an Genuine Manufacturer Authorized replacement part used on variety of power tools. Ball bearings are used to reduce friction between rotating parts. The balls or rollers take the load and spin, distributing the weight evenly while the minimal contact area of the ball reduces friction. This reduces wear on the tool and allows it to run smoothly. Bearings experience constant wear when the tool is in operation from pressure, heat, vibration and friction. Because of this, many Bearings need periodic maintenance or replacement.
Ball Bearing BB-6202ZZ
OEM part for: Powermatic, Jet, Wilton
Part Number: BB-6202ZZ
$43.95
In Stock
Jump To:
Frequently Purchased Together ?


Compatibility
This Ball Bearing will fit the following 87 machines. Confirm this part works with your model, and view the detailed model diagrams and repair help we have to offer.
Powermatic
Jet
Wilton
Show More Compatible ModelsThis item works with the following types of products:
- Jointer Parts
- Planer Parts
- Band Saw Parts
- Saw Parts
- Drill Parts
- Drill Press Parts
- Bench Grinder Parts
- Sander Parts
- Grinder Parts
- Table Saw Parts
- Lathe Parts
This part replaces obsolete part #: BB-6202Z, 5640291
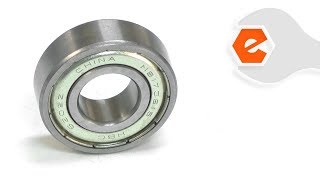
Repair Videos ?
Watch the Repair Video for
Ball Bearing
Customer Part Reviews ?
Average Rating (out of 5):
Click to filter by ratings:
5 stars
5
4 stars
0
3 stars
0
2 stars
0
1 stars
0
< PREV
- 1
Fix for a 40 year old jointer
Bearings were perfect size and got them installed in no time! Making sawdust and I’m a happy guy again!
Guest -
March 14, 2024
Verified Purchase
Parts for planer
Parts came as ordered.
Guest -
December 31, 2020
Verified Purchase
fast service
delivered on time and in good condition great service will use again
Guest -
July 26, 2019
Verified Purchase
First class service
Order received exactly as requested.
Delivery to Australian address was only a fee days. Excellent company to deal with
iGlobal -
July 21, 2019
Verified Purchase
Quick delivery
Arrived on time and in good condition. Have not installed yet but they should work fine.
Guest -
July 6, 2019
Verified Purchase
Questions & Answers ?
Our customer Service team is at the ready daily to answer your part and product questions.

Ask our Team
We have a dedicated staff with decades of collective experience in helping customers just like you purchase parts to repair their products.
Does this fit my product?Questions & Answers for Ball Bearing
No questions have been asked yet
Customer Repair Instructions ?
All our customer repair instructions are solicited directly from other customers just like you who have purchased and replaced this exact part.
Band Saw upper wheel bearing failure
Thomas - July 21, 2018
👍 1 of 1 people found this instruction helpful
Tool Type
Band Saw
Difficulty
Easy
Time
15-30 minutes
Tools Used
Wrench Set, Hammer, scrap block of hard wood
Parts Used
1. Place new bearing in freezer over night
2. Remove upper wheel
3. Tap old bearing out
4. Place wheel in the sun to warm it up. (Note: the wheel is cast aluminum so do not heat with a torch or any other heating device. Warming in the sun is good enough)
5. Apply thin layer of machine oil to bearing housing of wheel
6. Start frozen bearing into bearing housing as far as it will go.
7. Use a piece of scrap hard wood and a hammer to completely seat the bearing.
8. Re-install upper wheel.
9. Re-install blade.
Did you find this story helpful?
Thanks for voting and helping fellow customers!
Roller bearing on blade guide wore out and wouldn't spin causing blade to spark from friction
Jeffrey - January 27, 2023
Tool Type
Band Saw
Difficulty
Medium
Time
15-30 minutes
Tools Used
Screwdriver, Pliers, Wrench Set, Adjustable Wrench
Parts Used
I removed the main table and then disassemble the guides holding the bearings. Then I removed the bearings from the guide by releasing the snap rings, sliding the bearings off the shaft and replacing them with new ones along with the bearing spacers. Then I reassembled the bearing assembly and reinstalled the main table.
Did you find this story helpful?
Thanks for voting and helping fellow customers!
Jointer bearing failure
david - January 25, 2019
Tool Type
Jointer
Difficulty
Easy
Time
30-60 minutes
Tools Used
Socket set, Wrench Set
Removed jointer knife head assembly.
Pressed old bearings from assembly carefully marking right and left bearing mounts before removal.
Pressed new bearings into assembly.
Mounted assembly back into jointer base.
Checked alinement and bold torques.
Made final jointer table alinement adjustments and started jointer.
Pressed old bearings from assembly carefully marking right and left bearing mounts before removal.
Pressed new bearings into assembly.
Mounted assembly back into jointer base.
Checked alinement and bold torques.
Made final jointer table alinement adjustments and started jointer.
Did you find this story helpful?
Thanks for voting and helping fellow customers!
Lower bearing bracket casting was cracked in half.
Brandon - November 28, 2017
Tool Type
Band Saw
Difficulty
Easy
Time
15-30 minutes
Tools Used
Screwdriver, Socket set, Allen keys, split ring pliers (but not nessary)
1. Removed the band saw blade.
2. Removed the table
3. Removed the bracket and the bearings.
4. Replaced the bracket and the bearings.
5. Repeated the steps in the reverse.
2. Removed the table
3. Removed the bracket and the bearings.
4. Replaced the bracket and the bearings.
5. Repeated the steps in the reverse.
Did you find this story helpful?
Thanks for voting and helping fellow customers!
Excessive noise
D - June 29, 2016
👍 1 of 2 people found this instruction helpful
Tool Type
Jointer
Difficulty
Easy
Time
1-2 hours
Tools Used
Screwdriver, Socket set, Wrench Set, Hammer, bearing puller
Parts Used
Remove the cutterhead from the jointer. Remove the pulley from the cutterhead by loosening the set screws and pulling on the pulley and removing the shaft key. Use a bearing puller to remove the old bearings. Then use a socket the same size as the inner race of the new bearing to tap the socket with the hammer, to seat the bearing on the cutterhead. Then install the pulley and the cutterhead back on the jointer.
Did you find this story helpful?
Thanks for voting and helping fellow customers!
OEM stands for Original Equipment Manufacturer and means the part you’re buying is sourced directly from the manufacturer who made your product. At eReplacementParts, we sell only genuine OEM parts, guaranteeing the part you’re purchasing is of better design and of higher quality than aftermarket parts.
Our product descriptions are a combination of data sourced directly from the manufacturers who made your product as well as content researched and curated by our content & customer service teams. This content is edited and reviewed internally before being made public to customers.
Our customer service team are at the ready daily to answer your part and product questions. We have a dedicated staff with decades of collective experience in helping customers just like you purchase parts to repair their products.
All our part reviews are solicited directly from other customers who have purchased this exact part. While we moderate these reviews for profanity, offensive language or personally identifiable information, these reviews are posted exactly as submitted and no alterations are made by our team.
All our customer repair instructions are solicited directly from other customers just like you who have purchased and replaced this exact part. While we moderate these reviews for profanity, offensive language or personally identifiable information, these reviews are posted exactly as submitted and no alterations are made by our team.
Based on data from past customer purchasing behaviors, these parts are most commonly purchased together along with the part you are viewing. These parts may be necessary or helpful to replace to complete your current repair.
All our installation videos are created and produced in collaboration with our in-house repair technician, Mark Sodja, who has helped millions of eReplacementParts customers over the last 13 years repair their products. Mark has years of experience in selling and repairing both commercial and residential products with a specialty in gas-powered equipment.
This data is collected from customers who submitted a repair instruction after replacing this exact part. Customers can rate how easy the repair was to complete and how long it took. We aggregate this data to provide a repair rating that allows customers to quickly determine the difficulty and time needed to perform their own repair.