
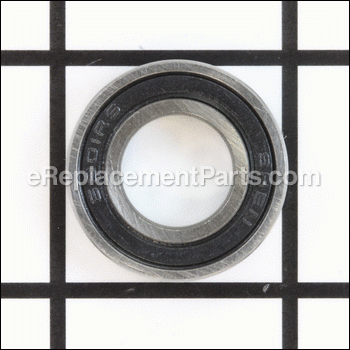
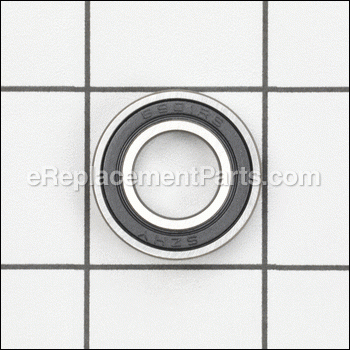
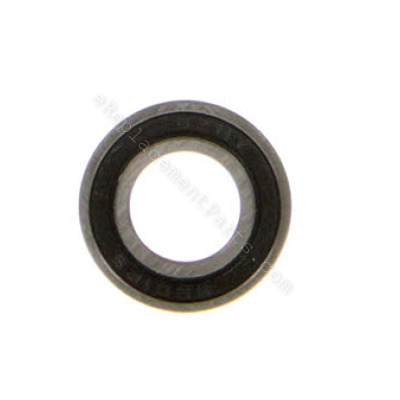


This authentic replacement part is specially designed for use with Black and Decker lawn edgers. Ball bearings are used to reduce the friction between rotating parts, over time the rollers may wear out and begin to fail eventually requiring a replacement to ensure peak performance. This part is made of high-quality metal and it is sold individually.
Ball Bearing 90559833
OEM part for: Black and Decker, Porter Cable
Part Number: 90559833
$3.99
In Stock
Jump To:
Frequently Purchased Together ?

Compatibility
This part will fit the following 22 machines
Black and Decker
LE750 Type 5 Edge Hog View Diagrams & Manuals
EH1000 Type 5 12 AMP Lawn Edger View Diagrams & Manuals
LST540 (Type 1) 40v Brushless String View Diagrams & Manuals
LST540B (Type 1) 40v Brushless String View Diagrams & Manuals
LE750 (Type 6) Next Generation Edger-Edg Power Tool View Diagrams & Manuals
LE750 (Type 7) Next Generation Edger-Edg Power Tool View Diagrams & Manuals
Porter Cable
PCC790B (Type 1) 20v Max 18 Ga Brad Nailer View Diagrams & Manuals
PCC790B (Type 2) 20v Max 18 Ga Brad Nailer View Diagrams & Manuals
PCC790LA (Type 1) 20v 18ga Brad Nailer View Diagrams & Manuals
PCC790LA (Type 2) 20v 18ga Brad Nailer View Diagrams & Manuals
PCC791B (Type 1) 20v 18ga Narrow Crow View Diagrams & Manuals
PCC791LA (Type 1) 20v 18ga Narrow Crow View Diagrams & Manuals
PCC792B (Type 1) 20v 16ga Strght Fini View Diagrams & Manuals
PCC792LA (Type 1) 20v 16ga Strt Fin Na View Diagrams & Manuals
PCC790B (Type 3) 20v Max 18 Ga Brad Nailer Power Tool View Diagrams & Manuals
PCC790LA (Type 3) 20v 18ga Brad Nailer Power Tool View Diagrams & Manuals
PCC792B (Type 2) 20v 16ga Strght Fini Power Tool View Diagrams & Manuals
PCC792LA (Type 2) 20v 16ga Strt Fin Na Power Tool View Diagrams & Manuals
PCC791B (Type 2) 20v 18ga Narrow Crow Power Tool View Diagrams & Manuals
PCC791B (Type 3) 20v 18ga Narrow Crow Power Tool View Diagrams & Manuals
PCC791LA (Type 2) 20v 18ga Narrow Crow Power Tool View Diagrams & Manuals
PCC791LA (Type 3) 20v 18ga Narrow Crow Power Tool View Diagrams & Manuals
Show More Compatible Models
This item works with the following types of products:
- Grass Trimmer Parts
- Trimmer Parts
- Edger Parts
This part replaces obsolete part #: 330003-99
Customer Part Reviews ?
Average Rating (out of 5):
Click to filter by ratings:
5 stars
4
4 stars
0
3 stars
0
2 stars
0
1 stars
0
< PREV
- 1
Worked as expected
The right part for my B&D Edgehog. Repair tip section was very helpful. Runs like new again.
Guest -
September 14, 2023
Verified Purchase
The part was the exact replacement and and the equipment is working perfectly.
The replacement arrived soon enough. I am glad I fixed the edger myself. I save some money.
Guest -
July 5, 2022
Verified Purchase
Bearing replacement
Bearing was the exact fit. Very happy with purchase.
Guest -
September 23, 2021
Verified Purchase
Quick and easy !
If a person had a 3 way gear puller it would've been a bit easier . I used a 4 inch diamond cutter to remove the inner ring and then pried it off and a socket to install the new one . I found it not fitting at first when I tried to reassemble it but a bit more down the shaft and she fit well . I replaced the motor bushings also and it was about a half hour job . My Black and Decker electric edger works great again !
Guest -
July 6, 2021
Verified Purchase
t
t
t -
t days ago
Verified Purchase
eReplacementParts Team
t
Questions & Answers ?
Our customer Service team is at the ready daily to answer your part and product questions.

Ask our Team
We have a dedicated staff with decades of collective experience in helping customers just like you purchase parts to repair their products.
Does this fit my product?Questions & Answers for Ball Bearing
No questions have been asked yet
Customer Repair Instructions ?
All our customer repair instructions are solicited directly from other customers just like you who have purchased and replaced this exact part.
Excessive Vibration and Noise with my Edger
Kevin - August 9, 2018
👍 1 of 1 people found this instruction helpful
Tool Type
Trimmer
Difficulty
Medium
Time
1-2 hours
Tools Used
Screwdriver, Socket set, Bearing/pulley puller
Parts Used
1) Took cover off of the motor compartment
2) Visually inspected the edger and found that the rear ball bearing had failed and broke apart
3) Ordered new ball bearing
4) Removed plastic bearing housing that also holds the motor brushes and took the brushes out
5) Used a bearing/pulley puller to remove what was left of the old bearing from the motor shaft
6) Removed the other left over part of the old bearing from the plastic bearing housing
7) Placed new bearing on motor shaft and used socket and hammer to tap the bearing down the motor shaft - tap the inner ring of the bearing and never the outer ring or the bearing will be damaged
8) Once the new bearing was at the correct place on the shaft, I replaced the plastic bearing housing, and then put the brushes back in the housing. You will know that the bearing is at the correct spot on the shaft when the bearing fits into the bearing housing and the housing is flush with the motor housing
9) Screwed the outer cover back
Did you find this story helpful?
Thanks for voting and helping fellow customers!
Rear bearing in the motor failed causing a lot of racket and poor performance
John - April 29, 2018
👍 1 of 1 people found this instruction helpful
Tool Type
Trimmer
Difficulty
Easy
Time
15-30 minutes
Tools Used
Screwdriver, impact wrench with torx bits
Disassembled the housing and removed the motor housing. Tapped the old bearing off of the motor shaft. I then replaced the brush holders with new as a maintenance item. I then replaced the blade and edge guide during the rest of the reassembly process. It all went well and since I cleaned everything up as I went, the edger now looks and runs as good as new. The whole process was facilitated by the exploded part view shown on the ereplacement parts website.
Did you find this story helpful?
Thanks for voting and helping fellow customers!
Black and Decker Edge Hog stopped working
scott - June 26, 2022
Tool Type
Grass Trimmer
Difficulty
Medium
Time
30-60 minutes
Tools Used
Screwdriver, Pliers, Torx drivers, bearing puller, nail set, socket
Parts Used
Once I removed the orange motor cover, I determined that the ball bearing assembly had failed.
The most complicated part of the repair was (1) removing the outer race from the brush housing, which I did by disconnecting the wires from the brushes and then removing the 4 screws that hold the brush housing to the edger housing so it was now a separate part (I used a nail set and gently tapped the old outer race out of the brush housing being careful not to break the plastic brush housing) and (2) removing the inner race from the motor shaft - which required borrowing a bearing puller. Note that the motor shaft DOES NOT have a bearing seat and you can drive the new bearing down too far on the shaft - so make sure that you put a mark on the shaft at the bottom of the old inner race before you pull the old inner race off of the shaft, so you know how far down on the shaft to install the new bearing assembly.
Once the inner and outer races were removed, I installed the new bearing onto the motor shaft using a socket and tapping on the top of the socket with a hammer to drive the bearing on the motor shaft. This was a trick from someone on the internet - if you don't have the appropriate press to install the bearing on the shaft. Select a socket size just larger than the shaft so it will slide over the shaft and with the edge of the socket that will rest just on the inner race of the bearing (and not the bearing seal between the inner and outer races). This is critical so you don't damage the bearing assembly when you hammer the socket to drive the bearing on the shaft - and only as far down on the shaft until the bottom of the new bearing inner race meets the mark on the shaft that you made before pulling the old inner race off of the motor shaft.
The brush housing slid down over the outer race pretty easily and did not need to be forced by tapping with a hammer or other tool. I reinstalled the 4 screws and reconnected the wires to the brushes and then reassembled the cover to the edger housing to complete the repair. the Edger works like new.
Did you find this story helpful?
Thanks for voting and helping fellow customers!
OEM stands for Original Equipment Manufacturer and means the part you’re buying is sourced directly from the manufacturer who made your product. At eReplacementParts, we sell only genuine OEM parts, guaranteeing the part you’re purchasing is of better design and of higher quality than aftermarket parts.
Our product descriptions are a combination of data sourced directly from the manufacturers who made your product as well as content researched and curated by our content & customer service teams. This content is edited and reviewed internally before being made public to customers.
Our customer service team are at the ready daily to answer your part and product questions. We have a dedicated staff with decades of collective experience in helping customers just like you purchase parts to repair their products.
All our part reviews are solicited directly from other customers who have purchased this exact part. While we moderate these reviews for profanity, offensive language or personally identifiable information, these reviews are posted exactly as submitted and no alterations are made by our team.
All our customer repair instructions are solicited directly from other customers just like you who have purchased and replaced this exact part. While we moderate these reviews for profanity, offensive language or personally identifiable information, these reviews are posted exactly as submitted and no alterations are made by our team.
Based on data from past customer purchasing behaviors, these parts are most commonly purchased together along with the part you are viewing. These parts may be necessary or helpful to replace to complete your current repair.
All our installation videos are created and produced in collaboration with our in-house repair technician, Mark Sodja, who has helped millions of eReplacementParts customers over the last 13 years repair their products. Mark has years of experience in selling and repairing both commercial and residential products with a specialty in gas-powered equipment.
This data is collected from customers who submitted a repair instruction after replacing this exact part. Customers can rate how easy the repair was to complete and how long it took. We aggregate this data to provide a repair rating that allows customers to quickly determine the difficulty and time needed to perform their own repair.