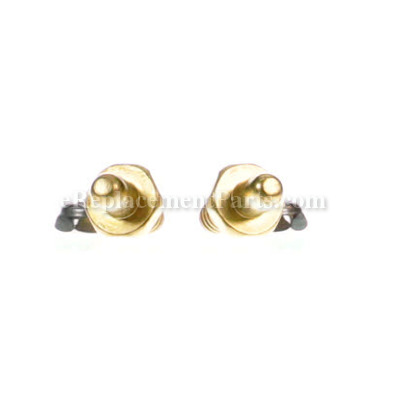
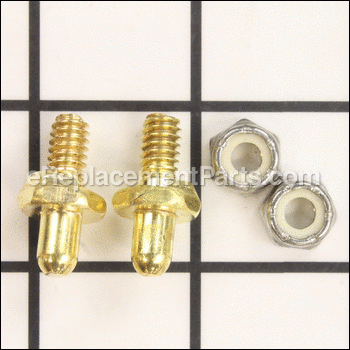
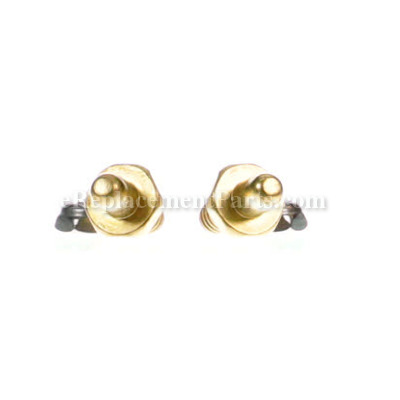
This is a genuine Weber part used with the Genesis, Summit, and Spirit grills. Each pack includes two hinge bolts and two nuts; each pack has the hardware for one door. The top pin of the screws fit into pre-drilled holes in the frame of the front doors. They are held onto the doors with the provided bolts.
Adjustable Door Hinge 70332
OEM part for: Weber
Part Number: 70332
Jump To:
Frequently Purchased Together ?
Compatibility
This Adjustable Door Hinge will fit the following 429 machines. Confirm this part works with your model, and view the detailed model diagrams and repair help we have to offer.
Weber
Show More Compatible ModelsThis item works with the following types of products:
Repair Videos ?
|
Having trouble getting your grill to light up? A common cause of this issue is a defective ignition switch. We'll sho...
November 08, 2012
|
|
Step-by-step instructions for removing and installing the adjustable door hinges on your Weber grill....
September 01, 2017
|
Customer Part Reviews ?
- 1
- 2
Questions & Answers ?
Our customer Service team is at the ready daily to answer your part and product questions.

Ask our Team
We have a dedicated staff with decades of collective experience in helping customers just like you purchase parts to repair their products.
Does this fit my product?Questions & Answers for Adjustable Door Hinge
Customer Repair Instructions ?
All our customer repair instructions are solicited directly from other customers just like you who have purchased and replaced this exact part.
The bottom hinge pin broke on the right door of my Webber grill.
Tool Type
Outdoor Grill
Difficulty
Easy
Time
Less than 15 minutes
Tools Used
Wrench Set
Parts Used
The adjustable door hinge was broken on the bottom.
Tool Type
Outdoor Grill
Difficulty
Easy
Time
Less than 15 minutes
Tools Used
Wrench Set
Parts Used
The part came with "picture and written instructions", which was awesome!!
Weber grill door came off
Tool Type
Outdoor Grill
Difficulty
Medium
Time
15-30 minutes
Tools Used
Screwdriver, Socket set, Wrench Set, Adjustable Wrench, None
Parts Used
2. Tipped grill backwards to lay it on its back, to gain better access to bottom where the adjustable door hinge would be placed.
3. Installed hinge into slotted flange that holds it.
4. Installed door while using flat blade screw driver to hold spring loaded, top hinge down to retract top hinge into body of door.
5. Fit bottom of door onto newly installed hinge.
6. Removed screw driver after checking for proper alignment of top hinge, insuring that it popped into round hole in grill body. This is under the panel where the burner dials are located.
7. Checked alignment of door and slid new hinge slightly in flange to make an even gap between the 2 doors.
8. Snugly tightened the new adjustable hinge.
9. Returned grill to upright position.
10. Reinstalled tank and other loose parts.
11. Ignited all 3 burners to verify proper functioning of grill. Job done!
Note: It was difficult to tell whether the nut and hinge body (where wrench is placed) are metric or SAE. I hate using adjustable wrenches, but that’s what I used to finish the tightening. Maybe instructions included that info, but I did not bother to read them!
Original door hinge fell off.
Tool Type
Outdoor Grill
Difficulty
Easy
Time
30-60 minutes
Tools Used
Screwdriver, Wrench Set
Parts Used
Hinge rusted
Tool Type
Outdoor Grill
Difficulty
Easy
Time
Less than 15 minutes
Tools Used
Wrench Set
Parts Used
Old hinge had broken and was missing.
Tool Type
Outdoor Grill
Difficulty
Easy
Time
Less than 15 minutes
Tools Used
Wrench Set
Parts Used
2. Put hinge in place.
3. Put door back in place.
4. Tightened hinge.
Refurbishing doors that Faded and tarnished
Tool Type
Outdoor Grill
Difficulty
Easy
Time
Less than 15 minutes
Tools Used
Socket set, Wrench Set
Parts Used
Tightened the post closed doors and then loosened the post to adjust the doors square to each other and even out the gaps.
Hinge went missing.
Tool Type
Outdoor Grill
Difficulty
Easy
Time
Less than 15 minutes
Tools Used
Wrench Set
Parts Used
Door hinge was broken
Tool Type
Outdoor Grill
Difficulty
Easy
Time
Less than 15 minutes
Tools Used
Wrench Set
Parts Used
Bottom and both side panels rusted badly causing one door to fall off, the other about to and large holes in the bottom of the cabinet. The back panel was also rusted but I was able to sand and paint
Tool Type
Outdoor Grill
Difficulty
Medium
Time
More than 2 hours
Tools Used
Screwdriver, Pliers, Socket set, Adjustable Wrench
2. Disconnect natural gas supply.
3. Remove the fire box control panel, internals and drip trays to lighten the assembly.
4. Attempted to separate the lid from the firebox by removing the hinge pins. However, the pins were seized to one side of the hinge and would not slide out even with WD40 and gentle persuasion. I left the lid attached as I feared breaking the hinge.
5. Removed the lid/firebox assembly. (I should have had a helper. It is not too heavy but is awkward.)
6. Remove the back from the grill cart - clean, remove surface rust and paint.
7. Assemble new grill cart using new sides, bottom and old back.
8. Reassemble the rest of the grill in reverse order of disassembly.
OEM stands for Original Equipment Manufacturer and means the part you’re buying is sourced directly from the manufacturer who made your product. At eReplacementParts, we sell only genuine OEM parts, guaranteeing the part you’re purchasing is of better design and of higher quality than aftermarket parts.
Our product descriptions are a combination of data sourced directly from the manufacturers who made your product as well as content researched and curated by our content & customer service teams. This content is edited and reviewed internally before being made public to customers.
Our customer service team are at the ready daily to answer your part and product questions. We have a dedicated staff with decades of collective experience in helping customers just like you purchase parts to repair their products.
All our part reviews are solicited directly from other customers who have purchased this exact part. While we moderate these reviews for profanity, offensive language or personally identifiable information, these reviews are posted exactly as submitted and no alterations are made by our team.
All our customer repair instructions are solicited directly from other customers just like you who have purchased and replaced this exact part. While we moderate these reviews for profanity, offensive language or personally identifiable information, these reviews are posted exactly as submitted and no alterations are made by our team.
Based on data from past customer purchasing behaviors, these parts are most commonly purchased together along with the part you are viewing. These parts may be necessary or helpful to replace to complete your current repair.
All our installation videos are created and produced in collaboration with our in-house repair technician, Mark Sodja, who has helped millions of eReplacementParts customers over the last 13 years repair their products. Mark has years of experience in selling and repairing both commercial and residential products with a specialty in gas-powered equipment.
This data is collected from customers who submitted a repair instruction after replacing this exact part. Customers can rate how easy the repair was to complete and how long it took. We aggregate this data to provide a repair rating that allows customers to quickly determine the difficulty and time needed to perform their own repair.


