eReplacementParts.com
877-346-4815
DeWALT Parts

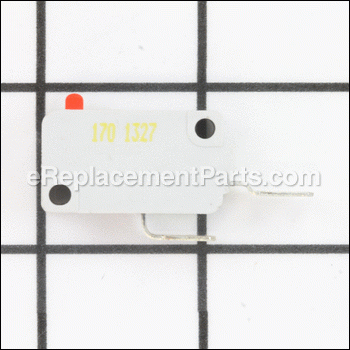
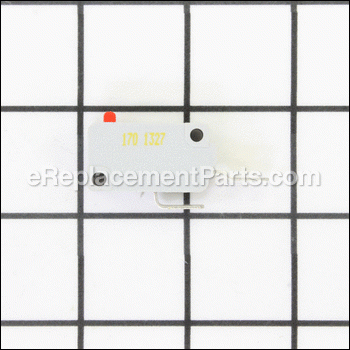
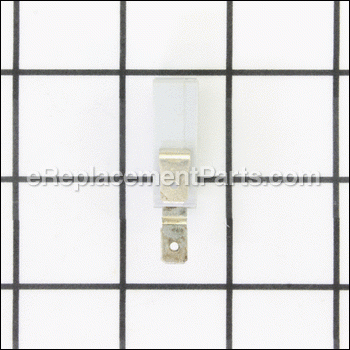
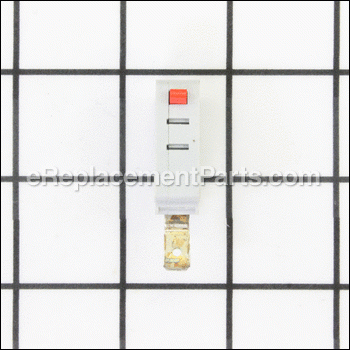
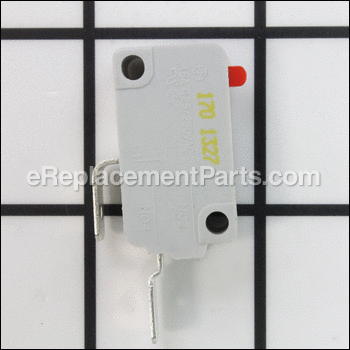
Switch 90552860

OEM part for: DeWALT, Black and Decker, Craftsman

Part Number: 90552860


Install
Videos!
Grid squares measure 1x1 inch
Switch - 90552860:DeWALTSwitch - 90552860:DeWALTSwitch - 90552860:DeWALTSwitch - 90552860:DeWALTSwitch - 90552860:DeWALT
In Stock
Ships within 1 business day
Easy 15-30 minutes (14 rated repairs)?
OEM: Original Equipment Manufacturer ?
DeWALTBlack and DeckerCraftsman
Does this d-block d-md-none fit my product?

Product Description ?

This replacement switch is a high quality item that is specially manufactured for Black and Decker and Dewalt handheld lawn and garden equipment. Switches are a commonly replaced part which controls on/off function of the power tool. Over time mechanical components tend to wear out and begin to fail eventually requiring replacement. This durable plastic switch is sold individually, to replace it you will need a screwdriver.

  • Classification: Part
  • Weight: 0.01 lbs.
  • Shipping: Ships Worldwide

Compatibility

This part will fit the following 23 machines

Black and Decker

RS600 Type 1 Reciprocating Saw View Diagrams & Manuals
NST2018 Type 1 18 Volt 12" Cordless GRASSHOG Trimmer / Edger View Diagrams & Manuals
CST800 12 Volt 8" Cordless String Trimmer View Diagrams & Manuals
CST1100 Type 1 9" Cordless Trimmer Edger View Diagrams & Manuals
CST1100 Type 2 9" Cordless Trimmer Edger View Diagrams & Manuals
CST1200 12 Volt 10" Cordless Trimmer / Edger View Diagrams & Manuals
78354 Type 1 9 Cordless Trimmer / Edger View Diagrams & Manuals
78354 Type 3 9 Cordless Trimmer / Edger View Diagrams & Manuals
78354 Type 4 9 Cordless Trimmer / Edger View Diagrams & Manuals
CST1000 Type 1 Cordless String Trimmer View Diagrams & Manuals
CST1000 Type 2 Cordless String Trimmer View Diagrams & Manuals
CST1000 Type 4 Cordless String Trimmer View Diagrams & Manuals
CST1000 Type 3 Cordless String Trimmer View Diagrams & Manuals
CST1000 Type 5 Cordless String Trimmer View Diagrams & Manuals
CST2000 Type 1 12 Inch Cless String Trimmer View Diagrams & Manuals
QP5000 Type 1 HPP Quantum Pro Reciprocating Saw View Diagrams & Manuals
RS600K Type 1 Reciprocating Saw View Diagrams & Manuals
CST1200 (Type 1) Grass Trimmer Power Tool View Diagrams & Manuals
CST1200 (Type 2) Grass Trimmer Power Tool View Diagrams & Manuals
CST800 (Type 1) 8in Trimmer Power Tool View Diagrams & Manuals

Craftsman

900783540 Trimmer View Diagrams & Manuals
900783542 Trimmer View Diagrams & Manuals
900783543 Trimmer View Diagrams & Manuals
Show More Compatible Models
Don't see yours? Try searching our site for :

This item works with the following types of products:

  • Reciprocating Saw Parts
  • Saw Parts
  • Grass Trimmer Parts
  • Trimmer Parts
  • Edger Parts

This part replaces obsolete part #: 243614-00

Customer Part Reviews ?

5
Average Rating (out of 5):
2 Reviews
Click to filter by ratings:
5 stars
2
4 stars
0
3 stars
0
2 stars
0
1 stars
0
  • Highest Rating
  • Most Recent
< PREV
  • 1
NEXT >
  • Works again
    Fast shipping! Part was a direct replacement and was an easy install. Will use E again.
    Guest - May 31, 2022 Verified Purchase
    Easy repair for B&D leaf blower
    Order this as it looked exactly like the switch in my B&D leaf blower. It fit and works perfectly.
    Guest - September 24, 2019 Verified Purchase
    t
    t
    t - t days ago Verified Purchase
    eReplacementParts Team
    t

    Questions & Answers ?

    Our customer Service team is at the ready daily to answer your part and product questions.

    photo of team member
    Ask our Team

    We have a dedicated staff with decades of collective experience in helping customers just like you purchase parts to repair their products.

    Does this fit my product?

    Questions & Answers for Switch


    No questions have been asked yet

    Customer Repair Instructions ?

    All our customer repair instructions are solicited directly from other customers just like you who have purchased and replaced this exact part.

    Easy 15-30 minutes (14 rated repairs)?

    The internal switch, activated by the trigger on the grass trimmer failed.

    Loren - May 18, 2016
    👍 4 of 4 people found this instruction helpful
    Tool Type

    Trimmer

    Difficulty

    Easy

    Time

    Less than 15 minutes

    Tools Used

    Screwdriver

    Remove the screws holding the two halves of the handle/trigger housing. Pry halves apart, noting how trigger, trigger lock, and springs fit in the housing. Unplug the two wires on the switch mechanism (needle nose pliers will help), remove old switch, plug wires into the new switch, drop the new switch back over the two pins that secure it and then put the two halves of the housing back together ( this is the most difficult part-lining up the trigger, springs, etc. Have patience and don't force anything. It will go together easily when properly aligned. TIP: when starting the screws that hold the housing together, turn counterclockwise until you feel it start, then clockwise to tighten. Otherwise the screw may cross thread in the plastic and fail to tighten or crack open the screw hole.
    Did you find this story helpful?
    Thanks for voting and helping fellow customers!

    Black & Decker 20V Lithium Hand Vacuum -Power Switch broke uses same as other B&D yard tools

    Guy - February 6, 2019
    👍 1 of 1 people found this instruction helpful
    Tool Type

    Trimmer

    Difficulty

    Medium

    Time

    15-30 minutes

    Tools Used

    Screwdriver, soldering iron

    1. Removed screws.
    2. Separated covers.
    3. Removed battery.
    4. Cut switch wires at switch.
    5. Soldered wires to switch.
    6. Followed reverse assembly steps.
    Did you find this story helpful?
    Thanks for voting and helping fellow customers!

    Weed wacker would not start

    Margaret - October 9, 2016
    👍 1 of 1 people found this instruction helpful
    Tool Type

    Grass Trimmer

    Difficulty

    Easy

    Time

    Less than 15 minutes

    Tools Used

    Screwdriver, Pliers, Pry Bar to separate cover

    I did not complete my repair. After replacing the starter the weed wacker still did not start and is not yet functioning. I think I have given up trying to repair the thing.
    Did you find this story helpful?
    Thanks for voting and helping fellow customers!

    This was actually for an obsolete leaf blower. The switch would not shut off.

    STEPHEN - December 30, 2021
    Tool Type

    Grass Trimmer

    Difficulty

    Easy

    Time

    Less than 15 minutes

    Tools Used

    Screwdriver

    1. Removed Battery.
    2. Removed all housing screws with a screw gun.
    3. Disconnected old switch from wires.
    4. Replaced identical switch by reconnecting wires.
    4. Replaced housing screws with a screw gun.
    5. Replaced battery.
    Very simple.
    Did you find this story helpful?
    Thanks for voting and helping fellow customers!

    Bad Switch

    Richard - May 10, 2020
    Tool Type

    Grass Trimmer

    Difficulty

    Easy

    Time

    15-30 minutes

    Tools Used

    Screwdriver

    The male connectors on the new switch I received has wider connectors than the original connectors on my existing switch on the tool. In order for me to use the new switch I would have to change the female connectors on my tool to be able to make connection.
    Did you find this story helpful?
    Thanks for voting and helping fellow customers!

    String trimmer wouldn’t start

    Keith - March 31, 2020
    Tool Type

    Grass Trimmer

    Difficulty

    Easy

    Time

    Less than 15 minutes

    Tools Used

    Screwdriver, Pliers, Needle nose pliers

    Opened housing
    Removed old switches using needle nose pliers
    Closed housing
    Did you find this story helpful?
    Thanks for voting and helping fellow customers!

    switch broke apart

    George - July 24, 2019
    Tool Type

    Trimmer

    Difficulty

    Easy

    Time

    15-30 minutes

    Tools Used

    Screwdriver

    dissembled trimmer removed switch, replaced switch, and reassembled.
    Did you find this story helpful?
    Thanks for voting and helping fellow customers!

    Trimmer would not go.

    Sandra - July 20, 2017
    Tool Type

    Trimmer

    Difficulty

    Medium

    Time

    15-30 minutes

    Tools Used

    Socket set

    Replaced the switch. I watched a video and it walked me through the steps.
    Did you find this story helpful?
    Thanks for voting and helping fellow customers!

    Old parts replaced

    William - July 11, 2017
    Tool Type

    Grass Trimmer

    Difficulty

    Easy

    Time

    15-30 minutes

    Tools Used

    Screwdriver

    Remove the screws from the housing and carefully separate. Make note how the switch is positioned along with both of the springs. Remove the leads from the old switch and connect them to the new switch. Remove the springs, then carefully install them. Then screw the housing back together.
    Did you find this story helpful?
    Thanks for voting and helping fellow customers!

    Grass trimmer switch was bad.

    Edward - June 29, 2017
    Tool Type

    Grass Trimmer

    Difficulty

    Easy

    Time

    Less than 15 minutes

    Tools Used

    Screwdriver

    Opened the handle and replaced the switch. Reassembled.
    Did you find this story helpful?
    Thanks for voting and helping fellow customers!

    OEM stands for Original Equipment Manufacturer and means the part you’re buying is sourced directly from the manufacturer who made your product. At eReplacementParts, we sell only genuine OEM parts, guaranteeing the part you’re purchasing is of better design and of higher quality than aftermarket parts.

    Our product descriptions are a combination of data sourced directly from the manufacturers who made your product as well as content researched and curated by our content & customer service teams. This content is edited and reviewed internally before being made public to customers.

    Our customer service team are at the ready daily to answer your part and product questions. We have a dedicated staff with decades of collective experience in helping customers just like you purchase parts to repair their products.

    All our part reviews are solicited directly from other customers who have purchased this exact part. While we moderate these reviews for profanity, offensive language or personally identifiable information, these reviews are posted exactly as submitted and no alterations are made by our team.

    All our customer repair instructions are solicited directly from other customers just like you who have purchased and replaced this exact part. While we moderate these reviews for profanity, offensive language or personally identifiable information, these reviews are posted exactly as submitted and no alterations are made by our team.

    Based on data from past customer purchasing behaviors, these parts are most commonly purchased together along with the part you are viewing. These parts may be necessary or helpful to replace to complete your current repair.

    All our installation videos are created and produced in collaboration with our in-house repair technician, Mark Sodja, who has helped millions of eReplacementParts customers over the last 13 years repair their products. Mark has years of experience in selling and repairing both commercial and residential products with a specialty in gas-powered equipment.

    This data is collected from customers who submitted a repair instruction after replacing this exact part. Customers can rate how easy the repair was to complete and how long it took. We aggregate this data to provide a repair rating that allows customers to quickly determine the difficulty and time needed to perform their own repair.

    eReplacementParts.com
    7174 South 400 West
    Suite 5
    Midvale, UT 84047
    visa mastercard discover american express PayPal