
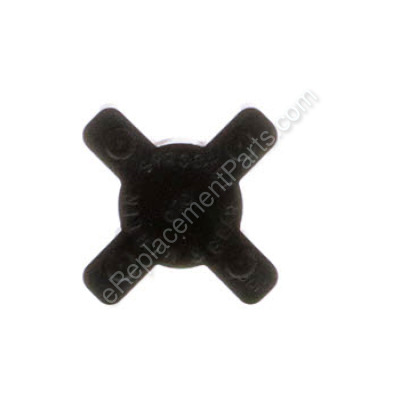


This coupling spider is available as an individual replacement part. To replace this part you may need an Allen wrench. It is made of hard rubber and attaches to two drum shaft couplings on both sides. This spider is an original part from Jet and used in sanders.
Spider 50-2209
OEM part for: Jet
Part Number: 50-2209
$14.79
Usually ships in 7 - 12 business days
7 - 12 business days
Jump To:
Frequently Purchased Together ?

Compatibility
This part will fit the following 2 machines
Jet
16-32 Plus (629004K) Sander View Diagrams & Manuals
22-44 Plus Sander View Diagrams & Manuals
This item works with the following types of products:
- Sander Parts
Customer Part Reviews ?
Average Rating (out of 5):
Click to filter by ratings:
5 stars
7
4 stars
0
3 stars
0
2 stars
0
1 stars
0
< PREV
- 1
Great part
Part was exactly what I ordered and a perfect replacement.
Guest -
August 3, 2021
Verified Purchase
Prompt delivery to New Zealand
In a COVID compromised world the shipment process, order through tracking and delivery was outstanding.
iGlobal -
February 16, 2021
Verified Purchase
16/32 Drum Sander
Order a few parts, for my 16/32 perfomax drum sander. The parts came within a few days. Parts are much better than the original . This will definitely be my go to place for parts.
TJ
Terry -
June 18, 2020
Verified Purchase
Nice to be able to find the correct part
Fast shipping and the part fit perfectly. My drum sander is back in operation.
Guest -
November 5, 2019
Verified Purchase
Great
Works great.
Mary -
October 4, 2019
Verified Purchase
Get the metal hubs also.
Replaced both adaptors and this, worked great
Guest -
August 5, 2019
Verified Purchase
worked as expected
fast shipping part fit as should great company to deal with,I would order again from them
Guest -
May 2, 2019
Verified Purchase
t
t
t -
t days ago
Verified Purchase
eReplacementParts Team
t
Questions & Answers ?
Our customer Service team is at the ready daily to answer your part and product questions.

Ask our Team
We have a dedicated staff with decades of collective experience in helping customers just like you purchase parts to repair their products.
Does this fit my product?Questions & Answers for Spider
No questions have been asked yet
Customer Repair Instructions ?
All our customer repair instructions are solicited directly from other customers just like you who have purchased and replaced this exact part.
Couplers had loosened to the point where the spider was torn to shreds
Bryan - February 26, 2017
👍 1 of 1 people found this instruction helpful
Tool Type
Sander
Difficulty
Easy
Time
Less than 15 minutes
Tools Used
Socket set, Allen keys
Parts Used
Loosened the 4 motor mounting bolts with a socket set. Removed both couplers with allen keys. Replaced sanding drum side with the new coupler and then motor side. Fit spider in the sanding drum side coupler and remounted motor back into place matching both couplers to each other. Closed any gaps between couplers and tightened with allen keys. Good as new!
Did you find this story helpful?
Thanks for voting and helping fellow customers!
Spider gear and one half of the drum shaft coupling broke/sheared off
John - March 4, 2022
Tool Type
Sander
Difficulty
Easy
Time
1-2 hours
Tools Used
Socket set
Parts Used
1. Lowered the drum to rest on two pieces of 2x4 lumber.
2. Removed the bolts that attach the drum carriage to the motor slide.
3. Pulled the drum carriage away from the motor slide to separate the two halves of the drum shaft coupling.
4. Loosened the set screws in the broken half of the drum shaft coupling and removed the coupling and the spider.
5. Installed a new half of the drum shaft coupling and tightened the set screws.
6. Installed the spider between the two halves of the drum shaft coupling and pushed the drum carriage back into contact with the motor slide.
7. Installed and tightened the bolts connecting the drum carriage to the motor slide.
8. Followed the instructions in the owners manual to reset the level of the drum in relation to the feed belt.
Did you find this story helpful?
Thanks for voting and helping fellow customers!
Jet 22-44 Plus made a clunk at start and rattle during operation. Broken drive couplings and spider.
Loren - November 28, 2021
Tool Type
Sander
Difficulty
Medium
Time
30-60 minutes
Tools Used
Screwdriver, Pliers, Wrench Set, Adjustable Wrench, Metric Allen wrenches
Parts Used
WD-40 on all bolts and set screws.
Loosened set screws on couplings.
Elevated drum head with crank for better bottom motor mount screws.
Put boards under motor for support
Remove motor screws and remove motor
Pry off couplings and keys
Clean up drum an motor shafts with emery cloth
Replace couplings and insert spider in drum couplings
Reattach motor, aligning the couplings and tighten bolts
Check couplings position and tighten set screws.
Now it works silently
Did you find this story helpful?
Thanks for voting and helping fellow customers!
Spider coupling tore
Curtis - July 7, 2021
Tool Type
Sander
Difficulty
Easy
Time
Less than 15 minutes
Tools Used
Socket set, Alan wrench
Parts Used
The parts were used on a Supermax 16-32. There are four bolts on the drum side to the frame that will need to be removed. The couplings have two alan set screw's that will need to be removed. The couplings slide off easy / some have said they had to use a puller (I did not). The replacement of these parts also solved the clicking noise that I had since the first day of getting my "NEW" Supermax 16-32. I would not recommend replacing the spider without the couplings (2). Careful examination will show that they have damage and cause the new spider coupling to go bad. Total time was less than 15 minutes.
Did you find this story helpful?
Thanks for voting and helping fellow customers!
Vibration due to warn rubber spider
Richard - March 3, 2019
Tool Type
Sander
Difficulty
Medium
Time
15-30 minutes
Tools Used
Socket set, Wrench Set
Parts Used
Unbolted motor and sanding drum to be able to insert spider between drive cogs.
Be sure to support moter when unbolting.
Be sure to support moter when unbolting.
Did you find this story helpful?
Thanks for voting and helping fellow customers!
Spider and coupling shattered over time (16 yrs.)
John - February 15, 2019
Tool Type
Sander
Difficulty
Medium
Time
15-30 minutes
Tools Used
Socket set, Wrench Set
Parts Used
The thing that really helped was building an carriage cradle to hold the motor and another one for the drum & housing, to keep them positioned in the correct plane. And that facilitated the removal of the bolts holding them all together without them crashing apart as the bolts came loose.
This technique was especially helpful when reinstalling the unit after the repair was done to install the now repaired shaft coupler and spider.
This technique was especially helpful when reinstalling the unit after the repair was done to install the now repaired shaft coupler and spider.
Did you find this story helpful?
Thanks for voting and helping fellow customers!
Spider wore out on motor/drum coupler.
Matthew - February 8, 2018
Tool Type
Sander
Difficulty
Easy
Time
15-30 minutes
Tools Used
Socket set, Wrench Set
Parts Used
Unbolt motor from drum,put in new spider, attach motor to drum. VERY IMPORTANT, must have good grip / support on motor. I thought bolt was still in motor housing, I sneezed,dropped motor on floor, and jammed shaft. Now have to have motor rebuilt or replaced. $500.00 accident.
Did you find this story helpful?
Thanks for voting and helping fellow customers!
Spider gear cracked........16-32 Performax sander is at least 15 years old
leslie - February 7, 2018
Tool Type
Sander
Difficulty
Medium
Time
15-30 minutes
Tools Used
Socket set, Wrench Set
Parts Used
4 bolts removed to dismount both ends of the "transmission" and removed motor as well
as sanding drum....spider gear sits between them. Replaced gear and recalibrated sanding
head for level sanding.
Spider gear a perfect fit....
as sanding drum....spider gear sits between them. Replaced gear and recalibrated sanding
head for level sanding.
Spider gear a perfect fit....
Did you find this story helpful?
Thanks for voting and helping fellow customers!
Spider cushion (coupler between motor and drum) was worn out and vibrating badly.
Darrell - November 13, 2017
1. Remove the extension table.
2. Remove the drive belt and the motor assembly.
3. Remove the entire drum head and the motor assembly from the stand.
4. Break the drum assembly and the motor apart.
5. Insert the new spider cushion, the motor, and the drum assembly back together.
6. Replace the drive belt assembly and the extension table.
7. Reset the parallel position of the drum relative to the table.
Not any really hard steps, just a lot of them. They also have to be done in this order. You can't get the drive belt off until you remove the extension table, and you can't get the motor and drum sander off until you remove the drive belt. There is not a way I know to get the spider in without separating the motor from the drum.
Did you find this story helpful?
Thanks for voting and helping fellow customers!
The threads on the original motor mount were worn out, could not adjust height of sander
David - May 9, 2016
Tool Type
Sander
Difficulty
Easy
Time
15-30 minutes
Tools Used
Socket set, Wrench Set
Parts Used
Removed motor and spider from original mount, replaced them with the new ones. Everything now works like new again.
Did you find this story helpful?
Thanks for voting and helping fellow customers!
Load More Install Stories
OEM stands for Original Equipment Manufacturer and means the part you’re buying is sourced directly from the manufacturer who made your product. At eReplacementParts, we sell only genuine OEM parts, guaranteeing the part you’re purchasing is of better design and of higher quality than aftermarket parts.
Our product descriptions are a combination of data sourced directly from the manufacturers who made your product as well as content researched and curated by our content & customer service teams. This content is edited and reviewed internally before being made public to customers.
Our customer service team are at the ready daily to answer your part and product questions. We have a dedicated staff with decades of collective experience in helping customers just like you purchase parts to repair their products.
All our part reviews are solicited directly from other customers who have purchased this exact part. While we moderate these reviews for profanity, offensive language or personally identifiable information, these reviews are posted exactly as submitted and no alterations are made by our team.
All our customer repair instructions are solicited directly from other customers just like you who have purchased and replaced this exact part. While we moderate these reviews for profanity, offensive language or personally identifiable information, these reviews are posted exactly as submitted and no alterations are made by our team.
Based on data from past customer purchasing behaviors, these parts are most commonly purchased together along with the part you are viewing. These parts may be necessary or helpful to replace to complete your current repair.
All our installation videos are created and produced in collaboration with our in-house repair technician, Mark Sodja, who has helped millions of eReplacementParts customers over the last 13 years repair their products. Mark has years of experience in selling and repairing both commercial and residential products with a specialty in gas-powered equipment.
This data is collected from customers who submitted a repair instruction after replacing this exact part. Customers can rate how easy the repair was to complete and how long it took. We aggregate this data to provide a repair rating that allows customers to quickly determine the difficulty and time needed to perform their own repair.