Shim 5140011-28 - OEM DeWALT - eReplacementParts.com
eReplacementParts.com
877-346-4815
DeWALT Parts

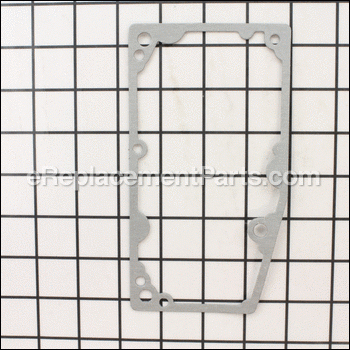
Shim 5140011-28

OEM part for: DeWALT

Part Number: 5140011-28


Install
Videos!
Grid squares measure 1x1 inch
$8.83
In Stock
Ships within 1 business day
Medium 30-60 minutes (3 rated repairs)?
OEM: Original Equipment Manufacturer ?
DeWALT
Does this fit my product?

Product Description ?

  • Classification: Part
  • Weight: 0.03 lbs.
  • Shipping: Ships Worldwide

Compatibility

This Shim will fit the following 2 machines. Confirm this part works with your model, and view the detailed model diagrams and repair help we have to offer.

DeWALT

Don't see yours? Try searching our site for :

This item works with the following types of products:

  • Planer Parts

Questions & Answers ?

Our customer Service team is at the ready daily to answer your part and product questions.

photo of team member
Ask our Team

We have a dedicated staff with decades of collective experience in helping customers just like you purchase parts to repair their products.

Does this fit my product?

Questions & Answers for Shim


No questions have been asked yet

Customer Repair Instructions ?

All our customer repair instructions are solicited directly from other customers just like you who have purchased and replaced this exact part.

Medium 30-60 minutes (3 rated repairs)?

Gear box shim (gasket) old and broke apart when removing gear box cover.

Tim - June 28, 2020
Tool Type

Planer

Difficulty

Medium

Time

30-60 minutes

Tools Used

Screwdriver, Hex wrench

Removed source of energy (unplugged the planer from outlet) before working on machine.
1. Removed plastic safety cover.
2. Removed C clip then sprocket and chain.
3. Removed gear box cover.
4. Carefully removed necessary gears noting all washers and placement.
5. Remove shim/gasket and cleaning up any peices left on gear box and cover.
6. Put new shim/gasket in place.
7. Replaced cover.
8. Replaced chain washer and sprocket.
9. Replaced c clamp
10. Replaced plastic guard
11. Turned planer on, ran good!
Did you find this story helpful?
Thanks for voting and helping fellow customers!

broke the shim while dismantling the gearbox

David - May 12, 2020
Tool Type

Planer

Difficulty

Easy

Time

15-30 minutes

Tools Used

Screwdriver, allen wrench

popped the cover off and cleaned the surface, then laid in the new one and reassembled.
Did you find this story helpful?
Thanks for voting and helping fellow customers!

Feed rollers froze up and would not allow material to be passed through planer.

Nicholas - February 21, 2018
Tool Type

Planer

Difficulty

Medium

Time

More than 2 hours

Tools Used

Screwdriver, Snap ring pliers, hex wrench set

Talked to DeWalt repair center and explained my problem. Tech and I agreed problem was more than likely faulty roller bearings. Ordered those from him and when they arrived, after tearing planer down to the point of being able to remove the old bearings, found out that one of the feed roller sprockets had also broken. If I had done this tear down first before just blindly ordering the bearings, I would have had all the parts I needed at one time. Because I did not have the foresight to do this, I had to wait the additional time before getting the new sprockets. I replaced all four sprockets instead of just the broken one. It's easy to do and I wanted the peace of mind that all of the damaged parts connected to the feed rollers were brand new. I think what caused the whole problem in the first place was running a rough sawn board through the planer that had a hidden screw head embedded in it. The screw put two nicks into all three cutting blades (I ran the board through the planer twice before realizing what was happening). All the boards I ran through the planer after that blunder had two raised ridges on their surfaces where the blades were nicked. This in turn caused the boards to begin feeding through the planer at a diagonal, instead of straight in. I tried to correct that by pushing against the end of the board at the feed end. The added pressure on the cutting blades and feed rollers caused the bearings on both ends of both rollers to begin to be cut out internally (the bearings are cube shaped pieces of of a softer metal than the roller ends with a round receiving hole milled into them) and this action quickly wore out an elliptical grove inside the bearings and caused the rollers to rotate unevenly and eventually become jammed into the bearings. It was kind of like driving a car with the emergency brake on. The force of the rollers suddenly coming to a dead stop also snapped the retaining tab off of the damaged sprocket. This is all a guess on my part but seems plausible. At any rate, once I had all the replacement parts, the repair went smoothly. You will need a pair of snap ring pliers to remove the snap rings on one side of both rollers. The hex head wrench that comes with the planer removes most of the screws to effect the repair. A slightly smaller sized one is needed for a few screws further into the repair. A #2 Phillips head screwdriver takes out the rest of the screws. Download the PDF exploded view of the planer you have; it shows you where everything goes and it is very self explanatory. Grease all four feed roller ends before placing them into the bearing holes. Before doing this particular repair, turn your planer upside down on your workbench. The reason for this is that the bearing "cubes" are held in place with small springs that are next to impossible to hold in place while simultaneously attempting to screw down the small plates that hold the springs tight against the bearings if the planer is right side up. If you replace the bearings, pay attention to how the originals were seated. There is an embossed line on one side of the bearing cube. The new bearing needs to be placed with the line side exactly in the same location as the old bearing. This seems to be because the drilled hole in the bearing is not exactly centered in the end of the cube. Pay attention to this part of the repair as I believe it could cause future bearing failure if not followed. Ask your local tech about this. When you remove the sprockets from both ends of both rollers, one side is held on by #2 Phillips head screws, the other side by snap rings. The chain going around the sprockets (looks like a bicycle chain or a chainsaw chain) will go back on much easier if you put it on the sprockets and then insert the sprockets back onto their spindle posts at the same time. Line up the interior tabs on the sprockets with the grooves cut into the spindle posts and they should push easily into place. If you have to replace your cutting blades like I did, do this repair with the planer in the upright position. The blades are easy to get to and are double sided so you get two chances per blade to damage them with a hidden screw! They are sharp as hell so handle with care. Take your time, place all your parts in relevant piles, use the PDF as a guide, put on some good music and you too will have the satisfaction of fixing your own expensive toys. Good luck.
Did you find this story helpful?
Thanks for voting and helping fellow customers!

OEM stands for Original Equipment Manufacturer and means the part you’re buying is sourced directly from the manufacturer who made your product. At eReplacementParts, we sell only genuine OEM parts, guaranteeing the part you’re purchasing is of better design and of higher quality than aftermarket parts.

Our product descriptions are a combination of data sourced directly from the manufacturers who made your product as well as content researched and curated by our content & customer service teams. This content is edited and reviewed internally before being made public to customers.

Our customer service team are at the ready daily to answer your part and product questions. We have a dedicated staff with decades of collective experience in helping customers just like you purchase parts to repair their products.

All our part reviews are solicited directly from other customers who have purchased this exact part. While we moderate these reviews for profanity, offensive language or personally identifiable information, these reviews are posted exactly as submitted and no alterations are made by our team.

All our customer repair instructions are solicited directly from other customers just like you who have purchased and replaced this exact part. While we moderate these reviews for profanity, offensive language or personally identifiable information, these reviews are posted exactly as submitted and no alterations are made by our team.

Based on data from past customer purchasing behaviors, these parts are most commonly purchased together along with the part you are viewing. These parts may be necessary or helpful to replace to complete your current repair.

All our installation videos are created and produced in collaboration with our in-house repair technician, Mark Sodja, who has helped millions of eReplacementParts customers over the last 13 years repair their products. Mark has years of experience in selling and repairing both commercial and residential products with a specialty in gas-powered equipment.

This data is collected from customers who submitted a repair instruction after replacing this exact part. Customers can rate how easy the repair was to complete and how long it took. We aggregate this data to provide a repair rating that allows customers to quickly determine the difficulty and time needed to perform their own repair.

eReplacementParts.com
7174 South 400 West
Suite 5
Midvale, UT 84047
visa mastercard discover american express PayPal