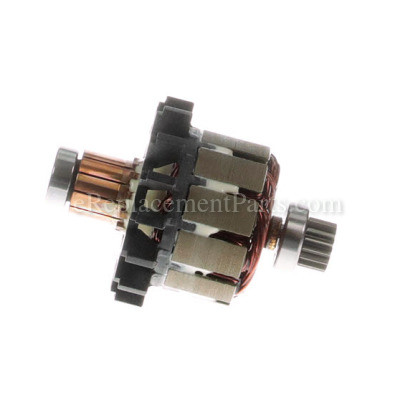
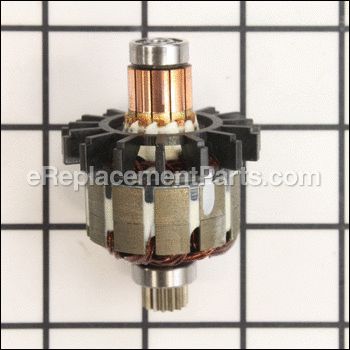
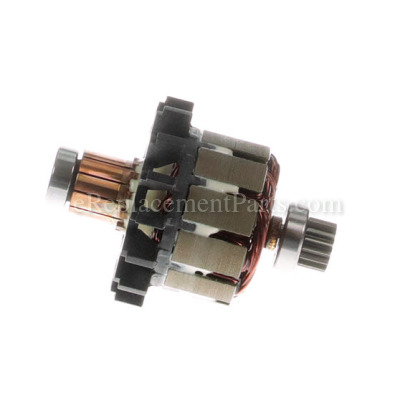
This is an Original OEM replacement Armature Assembly designed for use with Milwaukee Compact Hammer-Drills. This item includes an Armature, Fan, Armature Bearing and Commutator End Bearing.
Due to constant contact with Carbon Brushes armature will eventually wear out and would need to be replaced. It is highly recommended to replace both Carbon Brushes when replacing an armature.
Remember to be especially careful of the armature fan when you remove it, because if you break it, you will have to replace the entire armature.
To replace this Armature you would need a Torx T10 Screwdriver to remove the Case.
Armature Assembly 16-01-3015
OEM part for: Milwaukee
Part Number: 16-01-3015
Jump To:
Product Description ?
- Classification: Part
- Weight: 0.29 lbs.
- Shipping: Ships Worldwide
Frequently Purchased Together ?
Compatibility
This part will fit the following 5 machines
Milwaukee
This item works with the following types of products:
- Drill Parts
- Hammer Drill Parts
Repair Videos ?
|
Remove and install an armature in a Milwaukee drill. Step-by-step instructions show you how....
December 09, 2014
|
Customer Part Reviews ?
- 1
Questions & Answers ?
Our customer Service team is at the ready daily to answer your part and product questions.

Ask our Team
We have a dedicated staff with decades of collective experience in helping customers just like you purchase parts to repair their products.
Does this fit my product?Questions & Answers for Armature Assembly
Customer Repair Instructions ?
All our customer repair instructions are solicited directly from other customers just like you who have purchased and replaced this exact part.
Dc Motor
Tool Type
Hammer Drill
Difficulty
Easy
Time
15-30 minutes
Tools Used
Screwdriver
Parts Used
Overloaded service armature with damaged fan
Tool Type
Hammer Drill
Difficulty
Medium
Time
30-60 minutes
Tools Used
, T10 screwdriver
Parts Used
Gunk build up on old armature assembly so the drill would stink and smoke upon use.
Tool Type
Hammer Drill
Difficulty
Easy
Time
Less than 15 minutes
Tools Used
Screwdriver
Parts Used
2. Took off one side of the body to reveal innards
3. Pulled/Popped out the old armature assembly
4. Pushed/Popped in the new assembly
5. Made sure everything was seated correctly
6. Put the side body back in place
7. Snapped it all together
8. Replaced body screws
9. Tested the drill
10. Works like the day I got it again!:)
Thank you guys so much!!!
Overworked my drill and fried my armature
Tool Type
Hammer Drill
Difficulty
Easy
Time
15-30 minutes
Tools Used
, #10 torxs long 1/4\\
2. Draw a outline of your drill on card board
3. Remove the (4) #10 Torx screws (P/N: 06-82-7336) from end cap (P/N: 42-50-1060 ).
place all (4) screws on the card board sketch where they were on the drill.
4. Remove the (7) T10 M3 Handle screws (P/N: 06-82-6350) from the right side of drill
place all (7) screws on the card board sketch where they were on the drill.
5. Remove the (4) #10 Torx screws (P/N: 06-82-7336)
from the Service Gear case assembly (P/N: 14-29-0375).
place all (4) screws on the card board sketch where they were on the drill.
NOTE:
TRY TO LEAVE ALL UN NECESSARY PARTS UNTOUCHED
ON NEXT STEPS, LIKE THE SWITCH AND WIRING
6. Carefully lift off the side cover (ONLY THE COVER LEAVE ALL PARTS IN OTHER HALF).
7. Carefully pull up and out on the Service Gear case assembly (P/N: 14-29-0375). remove
and set aside.
8. Carefully lift up on the brush card assembly (P/N:14-46-2012)
and armature (P/N: 16-01-3015) and service field (P/N:18-01-3010), as 1 piece until the
Brush Card Assembly can be slid off from the Armature Shaft
careful not to loose the (2) rubber slugs (P/N:45-30-0270),
NOTE: THEY MOUNT INSIDE OF THE HANDLE COVER (2 PER SIDE).
9. NOTE which direction the Service Field is mounted to the Armature because it is keyed then
Dispose of old Armature and old Service Field
10. Slide the new Service Field over the new Armature
11. Reverse procedure to install.
Lay aside the old armature and service field
Burned out smoking
Tool Type
Hammer Drill
Difficulty
Easy
Time
15-30 minutes
Tools Used
Screwdriver
Parts Used
Cordless hammer drill stopped working
Tool Type
Hammer Drill
Difficulty
Medium
Time
1-2 hours
Tools Used
Screwdriver, Soldering iron
Armature burned up.
Tool Type
Hammer Drill
Difficulty
Medium
Time
15-30 minutes
Tools Used
Screwdriver, Torx bits
Parts Used
The motor in the drill overheated and smoked due to a short in the winding
Tool Type
Hammer Drill
Difficulty
Easy
Time
15-30 minutes
Tools Used
Screwdriver, T10 Torx bit
Parts Used
2. Use the screwdriver to release the brush springs from the brushes.
3. Use the T10 torx and remove the 4 screws from the gearbox.
4. Use the T10 to remove the 5 screws from the handle and battery area.
5. Carefully split the two halves. Watch the light, and the brush wire routing.
6. Remove the brush card from the end of the motor.
7. The motor and the field will come out of the handle half. Note the position/location of the notches on the field housing.
8. Remove the motor and field from the gearbox.
9. Remove the field from the armature.
10. Installation is the reverse of the steps above.
11. Ensure the notches in the field housing sit in the tabs in the handle halves
12. Ensure the brush card is in the slots in the handle halves.
13. Ensure the light and the brush wiring are routed correctly while putting the 2 halves together.
Armature was burnt
Tool Type
Hammer Drill
Difficulty
Easy
Time
15-30 minutes
Tools Used
Screwdriver, Pliers
Parts Used
My Milwaukee hammer drill would get hot and quit running till it cooled.
Tool Type
Hammer Drill
Difficulty
Medium
Time
30-60 minutes
Tools Used
Screwdriver, soldering gun and wire nippers
OEM stands for Original Equipment Manufacturer and means the part you’re buying is sourced directly from the manufacturer who made your product. At eReplacementParts, we sell only genuine OEM parts, guaranteeing the part you’re purchasing is of better design and of higher quality than aftermarket parts.
Our product descriptions are a combination of data sourced directly from the manufacturers who made your product as well as content researched and curated by our content & customer service teams. This content is edited and reviewed internally before being made public to customers.
Our customer service team are at the ready daily to answer your part and product questions. We have a dedicated staff with decades of collective experience in helping customers just like you purchase parts to repair their products.
All our part reviews are solicited directly from other customers who have purchased this exact part. While we moderate these reviews for profanity, offensive language or personally identifiable information, these reviews are posted exactly as submitted and no alterations are made by our team.
All our customer repair instructions are solicited directly from other customers just like you who have purchased and replaced this exact part. While we moderate these reviews for profanity, offensive language or personally identifiable information, these reviews are posted exactly as submitted and no alterations are made by our team.
Based on data from past customer purchasing behaviors, these parts are most commonly purchased together along with the part you are viewing. These parts may be necessary or helpful to replace to complete your current repair.
All our installation videos are created and produced in collaboration with our in-house repair technician, Mark Sodja, who has helped millions of eReplacementParts customers over the last 13 years repair their products. Mark has years of experience in selling and repairing both commercial and residential products with a specialty in gas-powered equipment.
This data is collected from customers who submitted a repair instruction after replacing this exact part. Customers can rate how easy the repair was to complete and how long it took. We aggregate this data to provide a repair rating that allows customers to quickly determine the difficulty and time needed to perform their own repair.


