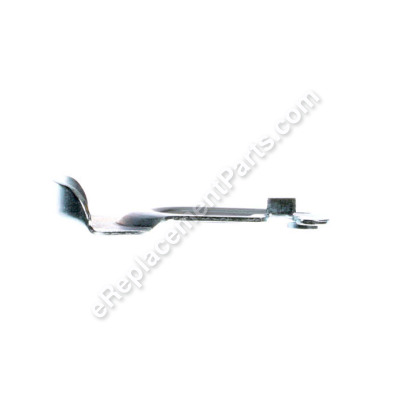
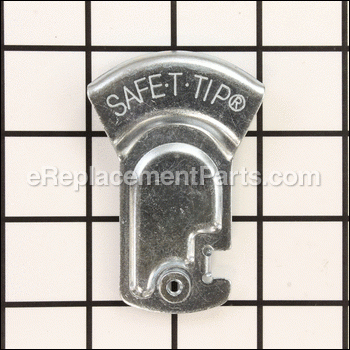


It is a genuine item that is supplied by the original equipment manufacturer for use with The Safe-T-Tip® Anti-Kickback Nose Guard is an attachment provided on the end of the guide bar to prevent the chain on the end of the guide bar from contacting the wood. It provides an identical replacement for a missing or a faulty component that was included with a new unit. Please make sure to refer to the owners manual for the correct application of this part. Keep in mind this high-quality Safe-T-Tip is made of durable metal and is sold individually.
Safe-t-tip 308949004
OEM part for: Homelite
Part Number: 308949004
$3.99
Usually ships in 7 - 12 business days
7 - 12 business days
Jump To:
Frequently Purchased Together ?

Compatibility
This part will fit the following 10 machines
Homelite
UT43100A Electric Chainsaw View Diagrams & Manuals
UT43120A Electric Chainsaw View Diagrams & Manuals
UT10517 Chainsaw View Diagrams & Manuals
UT43100 14'' Electric Chainsaw View Diagrams & Manuals
UT43120 16'' Electric Chainsaw View Diagrams & Manuals
UT43102 Electric Chainsaw View Diagrams & Manuals
UT43122 Electric Chainsaw View Diagrams & Manuals
UT10514 33cc Chainsaw View Diagrams & Manuals
UT10516 33cc Chainsaw View Diagrams & Manuals
UT43103 Electric Chain Saw View Diagrams & Manuals
Show More Compatible Models
This item works with the following types of products:
- Chain Saw Parts
- Saw Parts
This part replaces obsolete part #: 308949001
Customer Part Reviews ?
Average Rating (out of 5):
Click to filter by ratings:
5 stars
3
4 stars
0
3 stars
0
2 stars
0
1 stars
0
< PREV
- 1
As described!
No brainer to install
Guest -
November 8, 2022
Verified Purchase
Reasonable Price!
eReplacement Parts was a great place to purchase from! My ordered part arrived quickly, fit perfectly and was a great price!
Guest -
June 17, 2021
Verified Purchase
A1A service
The machine was unsafe to operate without this part and buying it was just so easy delivery was prompt, great buy.
Guest -
July 15, 2020
Verified Purchase
t
t
t -
t days ago
Verified Purchase
eReplacementParts Team
t
Questions & Answers ?
Our customer Service team is at the ready daily to answer your part and product questions.

Ask our Team
We have a dedicated staff with decades of collective experience in helping customers just like you purchase parts to repair their products.
Does this fit my product?Questions & Answers for Safe-t-tip
No questions have been asked yet
Customer Repair Instructions ?
All our customer repair instructions are solicited directly from other customers just like you who have purchased and replaced this exact part.
Missing safety tip.
David - July 26, 2020
Tool Type
Chain Saw
Difficulty
Easy
Time
Less than 15 minutes
Tools Used
Screwdriver, Wrench Set
Installed new one.
Did you find this story helpful?
Thanks for voting and helping fellow customers!
Chain was dull and safety tip fell off during use
Ferdinand - June 20, 2019
Tool Type
Chain Saw
Difficulty
Medium
Time
15-30 minutes
Tools Used
Pliers
Loosen chain
Remove chain cover housing
Remove old chain
Replace new chain
Replace cover and tighten chain
Screw on new safety tip
Remove chain cover housing
Remove old chain
Replace new chain
Replace cover and tighten chain
Screw on new safety tip
Did you find this story helpful?
Thanks for voting and helping fellow customers!
Safety tip was missing
Kerry - September 8, 2018
Tool Type
Chain Saw
Difficulty
Easy
Time
Less than 15 minutes
Tools Used
Wrench Set
1.) Simply align the rectangular 'wing' (or flange?) that's sticking out on the replacement Safe-T-Tip part, with the little open rectangular-shaped slot that's located at the nose-end of the chainsaw bar.
2.) Insert the replacement Screw (which lacked the advertised "Washer" portion of 'eReplacementParts' listing) through the corresponding (i.e., ONLY) hole in the chainsaw's bar that it could possibly go through.
3.) Tighten the aforementioned Screw with a wrench.
*Note: If you want to apply a screw thread tightening agent - such as "Loctite" to the Screw's threads, that would be advisable considering the amount of vibration that the chainsaw bar undergoes during normal use. Additionally, there were enough threads of the newly purchased Screw, that were sticking out of the other side of the Safe-T-Tip after I screwed it in, upon which to install / fasten a nut as (a sort of 'backup'). This, in order to further insure that it doesn't back out and get lost during use.
Did you find this story helpful?
Thanks for voting and helping fellow customers!
Tip came loose and was lost somewhere
Walter - May 25, 2018
Tool Type
Chain Saw
Difficulty
Easy
Time
Less than 15 minutes
Tools Used
Wrench Set
Positioned tip on bar.
Secured with screw.
Put some Loctite on screw this time
Secured with screw.
Put some Loctite on screw this time
Did you find this story helpful?
Thanks for voting and helping fellow customers!
OEM stands for Original Equipment Manufacturer and means the part you’re buying is sourced directly from the manufacturer who made your product. At eReplacementParts, we sell only genuine OEM parts, guaranteeing the part you’re purchasing is of better design and of higher quality than aftermarket parts.
Our product descriptions are a combination of data sourced directly from the manufacturers who made your product as well as content researched and curated by our content & customer service teams. This content is edited and reviewed internally before being made public to customers.
Our customer service team are at the ready daily to answer your part and product questions. We have a dedicated staff with decades of collective experience in helping customers just like you purchase parts to repair their products.
All our part reviews are solicited directly from other customers who have purchased this exact part. While we moderate these reviews for profanity, offensive language or personally identifiable information, these reviews are posted exactly as submitted and no alterations are made by our team.
All our customer repair instructions are solicited directly from other customers just like you who have purchased and replaced this exact part. While we moderate these reviews for profanity, offensive language or personally identifiable information, these reviews are posted exactly as submitted and no alterations are made by our team.
Based on data from past customer purchasing behaviors, these parts are most commonly purchased together along with the part you are viewing. These parts may be necessary or helpful to replace to complete your current repair.
All our installation videos are created and produced in collaboration with our in-house repair technician, Mark Sodja, who has helped millions of eReplacementParts customers over the last 13 years repair their products. Mark has years of experience in selling and repairing both commercial and residential products with a specialty in gas-powered equipment.
This data is collected from customers who submitted a repair instruction after replacing this exact part. Customers can rate how easy the repair was to complete and how long it took. We aggregate this data to provide a repair rating that allows customers to quickly determine the difficulty and time needed to perform their own repair.