
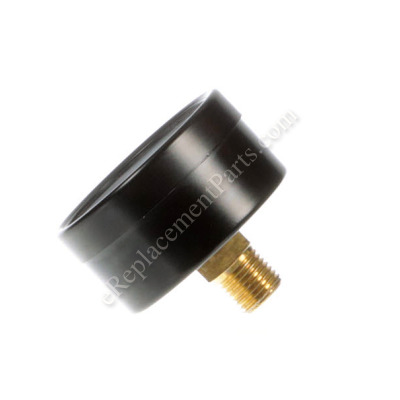


It is an authentic OEM sourced item which is specially produced for use with Bostitch air compressors. The pressure gauge connects to the pressure switch valve and measures the air pressure inside the tank. You may need a socket set, a set of pliers, and a screwdriver when replacing this part. It will need to be replaced if it becomes broken. Keep in mind this high-quality part is sold individually.
Pressure Gauge 50 AB-9052091
OEM part for: Bostitch
Part Number: AB-9052091
$9.68
In Stock
Jump To:
Frequently Purchased Together ?

Compatibility
This part will fit the following 6 machines
Bostitch
CAP2040P-OF Air Compressor View Diagrams & Manuals
CAP60P-OF Air Compressor View Diagrams & Manuals
CAP60PB-OF Air Compressor View Diagrams & Manuals
CAP2040P-OF (Type 0) Air Compressor Power Tool View Diagrams & Manuals
CAP60P-OF (Type 0) Air Compressor Power Tool View Diagrams & Manuals
CAP60PB-OF (Type 0) Air Compressor Power Tool View Diagrams & Manuals
Show More Compatible Models
This item works with the following types of products:
- Compressor Parts
Customer Part Reviews ?
Average Rating (out of 5):
Click to filter by ratings:
5 stars
1
4 stars
0
3 stars
0
2 stars
0
1 stars
2
< PREV
- 1
part worked well
air compressor working well again
Guest -
December 2, 2021
Verified Purchase
The 2 gauges were replaced fine, but he reducing valve body is very flimsy
The reducing valve body is very flimsy. When I tried to fit it with a standard wrench, the body got a fine hairline crack. How is this possible?
Guest -
October 1, 2021
Verified Purchase
eReplacementParts Team
Hi Joseph,
Thank you for your review. Please accept our apologies for this situation. We will be in touch with you shortly regarding your order.
Packaging
When I received my pressure gage, not only was the nipple with threads was the wrong size, was 3/8" and not 1/4", the lens on the gage was cracked. It was packaged in an ordinary small bubbled envelope which did not protect the glass on the gage.
Guest -
August 11, 2021
Verified Purchase
eReplacementParts Team
Hello Bob, Thank you for leaving a review on the part ordered. Checking the order I am showing you have already contacted us to address the issue. Please let us know if there is anything else we can assist you with.
t
t
t -
t days ago
Verified Purchase
eReplacementParts Team
t
Questions & Answers ?
Our customer Service team is at the ready daily to answer your part and product questions.

Ask our Team
We have a dedicated staff with decades of collective experience in helping customers just like you purchase parts to repair their products.
Does this fit my product?Questions & Answers for Pressure Gauge 50
No questions have been asked yet
Customer Repair Instructions ?
All our customer repair instructions are solicited directly from other customers just like you who have purchased and replaced this exact part.
Not working...
Richard - April 1, 2016
👍 4 of 4 people found this instruction helpful
Tool Type
Compressor
Difficulty
Hard
Time
1-2 hours
Tools Used
Screwdriver, Pliers, Socket set, Wrench Set, Nutdriver, Adjustable Wrench, thin open end wrench..2 dfferent sizes needed.
Tag / label everything you remove ... be careful , be patient removing and replacing what you need to replace or remove or transfer to your new part.... Mark, tag, color coat wiring and switch for easy reassembling... A vice/ liquid wrench and loctite is useful to have on hand. Take your time it took me two (2) hours straight from start to finish... 2 Thin open end wrenches needed to remove gauge and nipple.... hope this helps.
Did you find this story helpful?
Thanks for voting and helping fellow customers!
Pressure gauge not showing any pressure.
Aaron - December 11, 2018
👍 1 of 1 people found this instruction helpful
Tool Type
Compressor
Difficulty
Easy
Time
Less than 15 minutes
Tools Used
Wrench Set
Parts Used
Unscrewed old guage and screwed on replacement guage.
Did you find this story helpful?
Thanks for voting and helping fellow customers!
Compressor wouldn't maintain air pressure and pressure gauge glass was cracked & leaking
Dorinda - February 4, 2018
👍 1 of 1 people found this instruction helpful
Tool Type
Compressor
Difficulty
Medium
Time
30-60 minutes
Tools Used
Wrench Set, Adjustable Wrench, Teflon Tape, Brass wire brush
1.) Carefully removed old air chuck,pressure gauges, and 3/8 double threaded piece from pressure reducer and cleaned threads of any parts that you intend to re-use, like in my case,the air chuck and pressure gauge that screws into pressure reducer with brass wire brush.
2.) Wrap each threaded piece clockwise with Teflon tape.
3.) Before installing new Pressure reducer, pay attention to arrow on bottom of reducer...this arrow should point toward air chuck when installed correctly.
4.) After CAREFULLY threading all parts back into reducer(you DO NOT want to put a lot of stress or pressure from a rubber jawed vise or vise-grips) on the reducer, so only tighten 1/4 turn past finger tight, or you will break the reducer...this thing is made from cast!)
5.) Reinstall complete assembly and check for leaks...done!
Did you find this story helpful?
Thanks for voting and helping fellow customers!
OEM stands for Original Equipment Manufacturer and means the part you’re buying is sourced directly from the manufacturer who made your product. At eReplacementParts, we sell only genuine OEM parts, guaranteeing the part you’re purchasing is of better design and of higher quality than aftermarket parts.
Our product descriptions are a combination of data sourced directly from the manufacturers who made your product as well as content researched and curated by our content & customer service teams. This content is edited and reviewed internally before being made public to customers.
Our customer service team are at the ready daily to answer your part and product questions. We have a dedicated staff with decades of collective experience in helping customers just like you purchase parts to repair their products.
All our part reviews are solicited directly from other customers who have purchased this exact part. While we moderate these reviews for profanity, offensive language or personally identifiable information, these reviews are posted exactly as submitted and no alterations are made by our team.
All our customer repair instructions are solicited directly from other customers just like you who have purchased and replaced this exact part. While we moderate these reviews for profanity, offensive language or personally identifiable information, these reviews are posted exactly as submitted and no alterations are made by our team.
Based on data from past customer purchasing behaviors, these parts are most commonly purchased together along with the part you are viewing. These parts may be necessary or helpful to replace to complete your current repair.
All our installation videos are created and produced in collaboration with our in-house repair technician, Mark Sodja, who has helped millions of eReplacementParts customers over the last 13 years repair their products. Mark has years of experience in selling and repairing both commercial and residential products with a specialty in gas-powered equipment.
This data is collected from customers who submitted a repair instruction after replacing this exact part. Customers can rate how easy the repair was to complete and how long it took. We aggregate this data to provide a repair rating that allows customers to quickly determine the difficulty and time needed to perform their own repair.