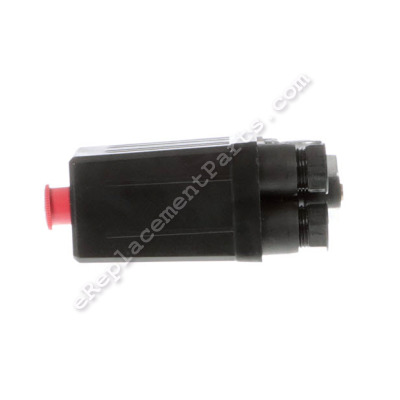


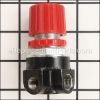
This is a genuine OEM sourced replacement part used on Bostitch air compressors. The press.sw.4W 3/8in valve ul is composed of intricate metal and plastic parts. The pressure switch component is fastened onto the compressor tank, and its cord to the pump assembly. This part is sold individually. An adjustable wrench is needed in making the replacement.
Press.sw.4w 3/8in Valve Ul AB-9063096
OEM part for: Bostitch, DeWALT
Part Number: AB-9063096
$64.99
In Stock
Jump To:
Frequently Purchased Together ?


Compatibility
This Press.sw.4w 3/8in Valve Ul will fit the following 13 machines. Confirm this part works with your model, and view the detailed model diagrams and repair help we have to offer.
Bostitch
DeWALT
Show More Compatible ModelsThis item works with the following types of products:
- Compressor Parts
Customer Part Reviews ?
Average Rating (out of 5):
Click to filter by ratings:
5 stars
5
4 stars
0
3 stars
0
2 stars
0
1 stars
0
< PREV
- 1
The Part Worked, but.....
The part worked, but no help on how to get it free to work on.
Ted -
November 6, 2023
Verified Purchase
Exact replacement, works great..
The parts arrived as expected and in great condition...
Guest -
May 9, 2022
Verified Purchase
it's working very well.
My air compressor is working very well like new one. I'm happy with it. Thank you~.
Facility -
January 18, 2022
Verified Purchase
compressor rebuild
the parts shipped quickly and was exactly as advertised and good quality
Guest -
February 5, 2021
Verified Purchase
Orders
Very helpful for what you need. Excellent
Guest -
April 20, 2020
Verified Purchase
Questions & Answers ?
Our customer Service team is at the ready daily to answer your part and product questions.

Ask our Team
We have a dedicated staff with decades of collective experience in helping customers just like you purchase parts to repair their products.
Does this fit my product?Questions & Answers for Press.sw.4w 3/8in Valve Ul
Will not turn on
Arthur
for model number CAP 60P-OF
asked on 2023-02-24
Hi Arthur,
Thank you for your question. If your air compressor will not come on, make sure that the air compressor is plugged directly into an electrical outlet. If it is plugged into an extension cord, it will not work correctly. Check and see if the circuit breaker has been tripped and replace the fuses if they have blown. You will also need to check the pressure switch. If you have too much or too little pressure, the pressure switch may be faulty. You should also check the gaskets, seals and valves to make sure that there are no leaks coming from them. If there are leaks coming from them, they will need to be replaced. You should also check the pressure reducer and the power cord. We hope this helps with the repair!
eReplacementParts Team February 24, 2023
Customer Repair Instructions ?
All our customer repair instructions are solicited directly from other customers just like you who have purchased and replaced this exact part.
There was not what you would call a problem. the fittings are glued so as not to leak this made them very hard to remove.
Clifford - November 30, 2015
👍 15 of 17 people found this instruction helpful
Tool Type
Compressor
Difficulty
Medium
Time
More than 2 hours
Tools Used
Screwdriver, Pliers, Wrench Set, teflon tape, new fittings between switch and reducer, vise.
Two things to be aware of for this repair:
1. Replace the fitting between the switch and reducer, if I would have known this I would have ordered it with the other two parts. This fitting as are the others are very difficult to remove, the glue and the amount of torque used to install them really contributes to it. I removed the switch from the compressor and mounted it in a vise by the metal part of it to remove.
2. Where the pressure tube goes into the switch there is a release which allows you to remove the fitting the tube goes into, this makes it easier to remove the tube.
But it's done and works great, I'm glad eReplacement parts was available, they had the exact replacement parts and priced very reasonably. I'm gonna have to keep them in mind.
Did you find this story helpful?
Thanks for voting and helping fellow customers!
Not working...
Richard - April 1, 2016
👍 3 of 3 people found this instruction helpful
Tool Type
Compressor
Difficulty
Hard
Time
1-2 hours
Tools Used
Screwdriver, Pliers, Socket set, Wrench Set, Nutdriver, Adjustable Wrench, thin open end wrench..2 dfferent sizes needed.
Tag / label everything you remove ... be careful , be patient removing and replacing what you need to replace or remove or transfer to your new part.... Mark, tag, color coat wiring and switch for easy reassembling... A vice/ liquid wrench and loctite is useful to have on hand. Take your time it took me two (2) hours straight from start to finish... 2 Thin open end wrenches needed to remove gauge and nipple.... hope this helps.
Did you find this story helpful?
Thanks for voting and helping fellow customers!
Would not turn on
dennis - March 4, 2016
👍 6 of 9 people found this instruction helpful
Tool Type
Compressor
Difficulty
Easy
Time
1-2 hours
Tools Used
Screwdriver, Socket set, Wrench Set, Nutdriver, Adjustable Wrench
To replace the pressure switch, I removed the parts that do not come with the new pressure switch. I removed the cover and noted how the wires were connected. Then remove the old pressure switch and installed the new one. I wired it the same as the old one , then installed the new pressure guage on it. I then connected the new pressure reducer to the switch, and used the parts from the old one and put them on the new one.
Did you find this story helpful?
Thanks for voting and helping fellow customers!
Switch spring had worn out
John - July 12, 2017
👍 1 of 1 people found this instruction helpful
Tool Type
Compressor
Difficulty
Hard
Time
1-2 hours
Tools Used
Wrench Set, Adjustable Wrench, Teflon tape
Parts Used
Remember to replace the fiber washer that connects to the tank or it will leak
Did you find this story helpful?
Thanks for voting and helping fellow customers!
Bearing on crank went bad had to pull it off, thought I would replace other parts while it was apart
ronnie - April 2, 2016
👍 1 of 1 people found this instruction helpful
Tool Type
Compressor
Difficulty
Easy
Time
30-60 minutes
Tools Used
Screwdriver, Socket set, Wrench Set, bearing puller
Piston is easy to put back if you take out the screw on top of piston and remove ring, install piston and then put ring in cylinder then replace round plate with screw!
Did you find this story helpful?
Thanks for voting and helping fellow customers!
Compressor don't turn off....turn off switch dint work
Boris - May 6, 2021
Tool Type
Compressor
Difficulty
Medium
Time
30-60 minutes
Tools Used
Screwdriver, Pliers, Power Drill, Socket set, Wrench Set, Nutdriver, Adjustable Wrench, None
Parts Used
Switch all psrt
Did you find this story helpful?
Thanks for voting and helping fellow customers!
Bad pressure switch
Randall - April 1, 2018
Tool Type
Compressor
Difficulty
Medium
Time
30-60 minutes
Tools Used
Screwdriver, Pliers, Adjustable Wrench
Parts Used
Removed the part from the old pressure switch, open the cover and removed the wires and made a wiring diagram. Installed the wires in the new switch and replaced the cover. Hooked up all of the parts to the switch
Did you find this story helpful?
Thanks for voting and helping fellow customers!
OEM stands for Original Equipment Manufacturer and means the part you’re buying is sourced directly from the manufacturer who made your product. At eReplacementParts, we sell only genuine OEM parts, guaranteeing the part you’re purchasing is of better design and of higher quality than aftermarket parts.
Our product descriptions are a combination of data sourced directly from the manufacturers who made your product as well as content researched and curated by our content & customer service teams. This content is edited and reviewed internally before being made public to customers.
Our customer service team are at the ready daily to answer your part and product questions. We have a dedicated staff with decades of collective experience in helping customers just like you purchase parts to repair their products.
All our part reviews are solicited directly from other customers who have purchased this exact part. While we moderate these reviews for profanity, offensive language or personally identifiable information, these reviews are posted exactly as submitted and no alterations are made by our team.
All our customer repair instructions are solicited directly from other customers just like you who have purchased and replaced this exact part. While we moderate these reviews for profanity, offensive language or personally identifiable information, these reviews are posted exactly as submitted and no alterations are made by our team.
Based on data from past customer purchasing behaviors, these parts are most commonly purchased together along with the part you are viewing. These parts may be necessary or helpful to replace to complete your current repair.
All our installation videos are created and produced in collaboration with our in-house repair technician, Mark Sodja, who has helped millions of eReplacementParts customers over the last 13 years repair their products. Mark has years of experience in selling and repairing both commercial and residential products with a specialty in gas-powered equipment.
This data is collected from customers who submitted a repair instruction after replacing this exact part. Customers can rate how easy the repair was to complete and how long it took. We aggregate this data to provide a repair rating that allows customers to quickly determine the difficulty and time needed to perform their own repair.