
Genuine OEM replacement part, this item is sold individually.
This part is used in various places in the compressors listed below.
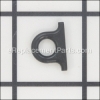
By its part name, it is used to clamp hoses onto certain parts on the compressors.
Hose Clamp CAC-1206-1
OEM part for: Porter Cable, Delta, DeWALT, DeVilbiss, Black and Decker, Bostitch
Part Number: CAC-1206-1
$3.99
In Stock
Jump To:
Product Description ?
- Classification: Part
- Weight: 0.01 lbs.
- Shipping: Ships Worldwide
Frequently Purchased Together ?


Compatibility
This Hose Clamp will fit the following 224 machines. Confirm this part works with your model, and view the detailed model diagrams and repair help we have to offer.
Porter Cable
Delta
DeWALT
DeVilbiss
Black and Decker
Bostitch
Show More Compatible ModelsThis item works with the following types of products:
- Compressor Parts
- Vacuum Parts
Repair Videos ?
Watch the Repair Video for
Hose Clamp

Articles:
|
Replacing a crimp-style hose clamp is simple when you have the right tool. This article shows you how....
November 21, 2014
|

Customer Part Reviews ?
Average Rating (out of 5):
Click to filter by ratings:
5 stars
5
4 stars
1
3 stars
0
2 stars
0
1 stars
0
< PREV
- 1
Work as expected.
Arrived quickly
Guest -
June 11, 2020
Verified Purchase
Repaired Compressor
The parts allowed me to repair and recover a Porter Cable compressor. Great delivery and perfect parts. Thanks!!
James -
March 30, 2020
Verified Purchase
A good as OME.
Fit well and simple to install
Guest -
December 2, 2019
Verified Purchase
Worked great
It worked great solved problem
Guest -
October 23, 2019
Verified Purchase
Easy to find what you need, fast service
The parts I ordered were quickly processed and shipped. It is great to have such a great source for repair parts.
Guest -
July 9, 2019
Verified Purchase
Fast & Easy
Shipping was super fast...the part fit exactly like factory...no worries here
Daniel -
January 21, 2020
Verified Purchase
Questions & Answers ?
Our customer Service team is at the ready daily to answer your part and product questions.

Ask our Team
We have a dedicated staff with decades of collective experience in helping customers just like you purchase parts to repair their products.
Does this fit my product?Questions & Answers for Hose Clamp
No questions have been asked yet
Customer Repair Instructions ?
All our customer repair instructions are solicited directly from other customers just like you who have purchased and replaced this exact part.
Air hose broken
steven - April 17, 2016
👍 4 of 4 people found this instruction helpful
Tool Type
Compressor
Difficulty
Easy
Time
Less than 15 minutes
Tools Used
Screwdriver, Pliers
Parts Used
I used a screwdriver to remove two screws holding the motor onto the frame. Then unscrewed four screws to open the motor housing. Then removed the broken hose. Attached the new hose and clamped the hose on each end to secure it. Simple. Just remember to route the motor power cord inside the motor housing along the edge when putting the housing back together to avoid the fan from striking the cord. Reverse procedure in reassembling
Did you find this story helpful?
Thanks for voting and helping fellow customers!
No problems
Thomas - March 20, 2019
👍 1 of 1 people found this instruction helpful
Tool Type
Compressor
Difficulty
Easy
Time
Less than 15 minutes
Tools Used
Screwdriver, Pliers, Adjustable Wrench, End cutter pliers
Watch a youtube video on how to rmove cover. Removed cover, removed damaged parts, installed new parts and re-assembled cover.
Did you find this story helpful?
Thanks for voting and helping fellow customers!
Air supply hose cracked
Peter - October 25, 2017
👍 1 of 1 people found this instruction helpful
Tool Type
Compressor
Difficulty
Easy
Time
15-30 minutes
Tools Used
Pliers
Parts Used
Remove the compressor housing - see YouTube videos for how to. Remove bad hose clamps by twisting hose clamps with pliers and install new hose and clamps
Did you find this story helpful?
Thanks for voting and helping fellow customers!
check valve leaking
Joe - September 2, 2020
Tool Type
Compressor
Difficulty
Easy
Time
15-30 minutes
Tools Used
Screwdriver, Pliers, Socket set, Nutdriver, impact gun
removed old clamp and hose removed old check valve with impact gun replaced in reverse order
Did you find this story helpful?
Thanks for voting and helping fellow customers!
Air hose had a hole and was leaking air
George - September 2, 2020
Tool Type
Compressor
Difficulty
Easy
Time
Less than 15 minutes
Tools Used
Screwdriver, Pliers
Parts Used
Removed cover. Removed 3 hose clamps and hose. Reinstalled new hose with new clamps. Reattached cover
Did you find this story helpful?
Thanks for voting and helping fellow customers!
Compressor was leaking air from the exhaust port in the head.
Russell - June 25, 2020
Tool Type
Compressor
Difficulty
Easy
Time
30-60 minutes
Tools Used
Pliers, Socket set, Diagonal cutter to remove old clamps
Parts Used
I've never made a repair on a pancake compressor before. I disassemble the housing and tried to determine where the leak was coming from. The design made it particularly difficult to ascertain what had failed. I initially thought the head gasket and maybe the valve plate were the cause. I changed those components and the compressor still leaked (significantly). It then became obvious the check valve was the culprit. I only noticed the hi pressure hose was worn and needed changing. Upon disassembly I found the check valve rusted inside and out. Once I changed those components and reassembled. The compressor operated as expected. It holds pressure just as I would expect.
Did you find this story helpful?
Thanks for voting and helping fellow customers!
Hose leak inside compressor
Bruce - September 24, 2019
Tool Type
Compressor
Difficulty
Medium
Time
30-60 minutes
Tools Used
Pliers, Power Drill, Snub nose end snips
Parts Used
1. Disconnected the motor from housing.
2. Disconnected wiring to open up the compressor unit.
3. Removed two hose clamps and replaced two hoses.
4. Reconnect wiring and reassemble compressor housing.
5. Plug in and test.
2. Disconnected wiring to open up the compressor unit.
3. Removed two hose clamps and replaced two hoses.
4. Reconnect wiring and reassemble compressor housing.
5. Plug in and test.
Did you find this story helpful?
Thanks for voting and helping fellow customers!
Regulator/manifold leaking.
Steven - August 5, 2019
Tool Type
Compressor
Difficulty
Medium
Time
15-30 minutes
Tools Used
Screwdriver, Pliers, Nutdriver, T-15 torx driver not long enough. Used T-15 bit.
Parts Used
1.Remove compressor from tank.
2. Unscrew old manifold from tank. Nipple remained in tank.
3. Easy-out removes nipple.
4. Assemble new manifold onto tank.Install compressor and hook up the hoses.
5. New manifold has hose barb in wrong spot, hard to contort the hose to fit.
2. Unscrew old manifold from tank. Nipple remained in tank.
3. Easy-out removes nipple.
4. Assemble new manifold onto tank.Install compressor and hook up the hoses.
5. New manifold has hose barb in wrong spot, hard to contort the hose to fit.
Did you find this story helpful?
Thanks for voting and helping fellow customers!
Compressor tank hose busted
Matthew - February 9, 2019
Tool Type
Compressor
Difficulty
Medium
Time
15-30 minutes
Tools Used
Screwdriver, Pliers, Power Drill
Parts Used
Swapped out hoses and clamps
Did you find this story helpful?
Thanks for voting and helping fellow customers!
air compressor hose burst
Tony - January 19, 2019
Tool Type
Compressor
Difficulty
Medium
Time
15-30 minutes
Tools Used
Screwdriver, Pliers, Socket set, Nutdriver
Parts Used
Needed to open up the housing on the compressor to remove one clamp at the end of the hose.
Removed the other clamp at the other end, removed the hose and did the reverse with the new hose and clamps.
Removed the other clamp at the other end, removed the hose and did the reverse with the new hose and clamps.
Did you find this story helpful?
Thanks for voting and helping fellow customers!
Load More Install Stories
OEM stands for Original Equipment Manufacturer and means the part you’re buying is sourced directly from the manufacturer who made your product. At eReplacementParts, we sell only genuine OEM parts, guaranteeing the part you’re purchasing is of better design and of higher quality than aftermarket parts.
Our product descriptions are a combination of data sourced directly from the manufacturers who made your product as well as content researched and curated by our content & customer service teams. This content is edited and reviewed internally before being made public to customers.
Our customer service team are at the ready daily to answer your part and product questions. We have a dedicated staff with decades of collective experience in helping customers just like you purchase parts to repair their products.
All our part reviews are solicited directly from other customers who have purchased this exact part. While we moderate these reviews for profanity, offensive language or personally identifiable information, these reviews are posted exactly as submitted and no alterations are made by our team.
All our customer repair instructions are solicited directly from other customers just like you who have purchased and replaced this exact part. While we moderate these reviews for profanity, offensive language or personally identifiable information, these reviews are posted exactly as submitted and no alterations are made by our team.
Based on data from past customer purchasing behaviors, these parts are most commonly purchased together along with the part you are viewing. These parts may be necessary or helpful to replace to complete your current repair.
All our installation videos are created and produced in collaboration with our in-house repair technician, Mark Sodja, who has helped millions of eReplacementParts customers over the last 13 years repair their products. Mark has years of experience in selling and repairing both commercial and residential products with a specialty in gas-powered equipment.
This data is collected from customers who submitted a repair instruction after replacing this exact part. Customers can rate how easy the repair was to complete and how long it took. We aggregate this data to provide a repair rating that allows customers to quickly determine the difficulty and time needed to perform their own repair.