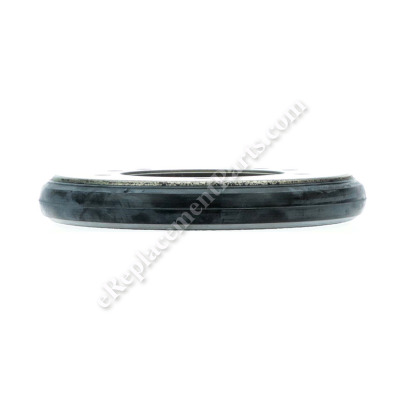
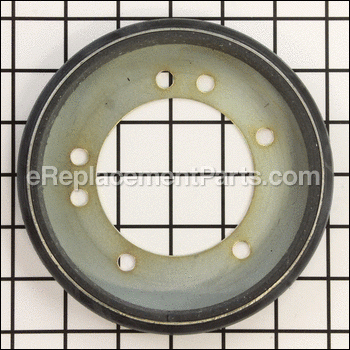
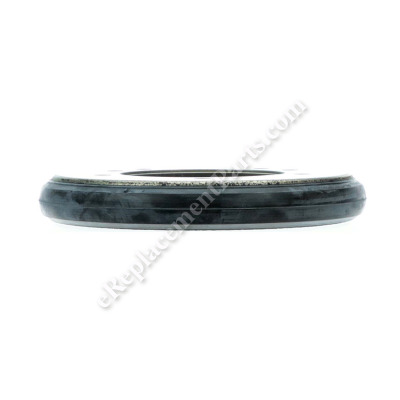
Genuine Manufacturer Sourced replacement part designed for use with a variety of Riding Lawn Mowers. This Friction Ring is an important part of a Smooth Clutch Assembly which helps to drive your mower. This item is made out of Metal and it is Sold Individually.
Kit, Friction Ring 7600135YP
OEM part for: Murray, Snapper
Part Number: 7600135YP
Jump To:
Frequently Purchased Together ?
Compatibility
This Kit, Friction Ring will fit the following 797 machines. Confirm this part works with your model, and view the detailed model diagrams and repair help we have to offer.
Murray
Snapper
Show More Compatible ModelsThis item works with the following types of products:
- Lawn Tractor Parts
This part replaces obsolete part #: 7057337, 7600135, 7053103, 7053103YP
Customer Part Reviews ?
- 1
- 2
Questions & Answers ?
Our customer Service team is at the ready daily to answer your part and product questions.

Ask our Team
We have a dedicated staff with decades of collective experience in helping customers just like you purchase parts to repair their products.
Does this fit my product?Questions & Answers for Kit, Friction Ring
Customer Repair Instructions ?
All our customer repair instructions are solicited directly from other customers just like you who have purchased and replaced this exact part.
Replaced the Friction Ring - the part that makes it go forward/reverse.
Tool Type
Lawn Tractor
Difficulty
Medium
Time
15-30 minutes
Tools Used
Wrench Set, Large screw driver for leverage.
Parts Used
2. Place the unit in neutral.
3. Using a 1/2" box end wrench and a large screw driver remove the four (4) retaining nuts on the Friction Ring. I use the screw driver to provide stopping leverage by placing in between two of the nuts while loosening one of the other free ones. This allows the user to loosen one nut while holding the Ring from turning while working on removing the nuts one at a time. Rotate the ring and repeat above until all four(4) retaining nuts have been removed. Note: Care should be given when using the screw drive to apply holding power on UN-protected threads near the end of the procedure.
4. If there is a circular fiber disk, be sure to reinstall it just as it came off.
5. Insure during re-installation the fore nuts are tightened.
6. Inspect your work. Correct anything that looks out of the ordinary.
7. Remove the unit from the upright position, turn gasoline one, or replace tank.
8. Enjoy!!! .....tee hee
Lawn tractor was not moving when engaging drive lever.
Tool Type
Lawn Tractor
Difficulty
Easy
Time
15-30 minutes
Tools Used
Socket set, Vise grips
Parts Used
2. Attached vise grip to keep friction ring from turning.
3. Removed 4 nuts with ratchet and socket.
4. Removed and replaced friction ring.
5. Attached vise grip to keep friction ring from turning.
6. Installed 4 nuts. Removed vise grip. Done.
Slipping friction ring on Snapper R-Mower
Tool Type
Lawn Mower
Difficulty
Easy
Time
15-30 minutes
Tools Used
Screwdriver, Socket set
Parts Used
Belt was bad, drive disk was bad, yoke was bad and blades were worn out.
Tool Type
Lawn Mower
Difficulty
Easy
Time
1-2 hours
Tools Used
Socket set, Wrench Set
replaced friction ring and thrust washer
Tool Type
Lawn Mower
Difficulty
Easy
Time
15-30 minutes
Tools Used
Socket set, vise grips
Shift lever broke
Tool Type
Lawn Tractor
Difficulty
Medium
Time
15-30 minutes
Tools Used
Pliers, Socket set, Wrench Set
Slipage in Drive mode.
Tool Type
Lawn Tractor
Difficulty
Medium
Time
30-60 minutes
Tools Used
Socket set, Wrench Set
Parts Used
Drive disc was worn. Would not move.
Tool Type
Lawn Tractor
Difficulty
Easy
Time
15-30 minutes
Tools Used
Screwdriver, Pliers, Socket set, Wrench Set
Parts Used
All steering bushings worn out. Friction disk was worn.
Tool Type
Lawn Mower
Difficulty
Easy
Time
More than 2 hours
Tools Used
Screwdriver, Pliers, Power Drill, Socket set, Wrench Set
Removed the steering wheel roll pin.
Removed the cutter pins from all steering joints.
Removed the steering shaft.
Replaced all bushings and cutter pins.
Friction Disk:
Removed 4 nuts holding the outer plate and paper thrust washer.
Replaced the friction disk.
Installed thrust washer and outer plate along with nuts.
Slipping in drive
Tool Type
Lawn Mower
Difficulty
Easy
Time
15-30 minutes
Tools Used
Socket set
OEM stands for Original Equipment Manufacturer and means the part you’re buying is sourced directly from the manufacturer who made your product. At eReplacementParts, we sell only genuine OEM parts, guaranteeing the part you’re purchasing is of better design and of higher quality than aftermarket parts.
Our product descriptions are a combination of data sourced directly from the manufacturers who made your product as well as content researched and curated by our content & customer service teams. This content is edited and reviewed internally before being made public to customers.
Our customer service team are at the ready daily to answer your part and product questions. We have a dedicated staff with decades of collective experience in helping customers just like you purchase parts to repair their products.
All our part reviews are solicited directly from other customers who have purchased this exact part. While we moderate these reviews for profanity, offensive language or personally identifiable information, these reviews are posted exactly as submitted and no alterations are made by our team.
All our customer repair instructions are solicited directly from other customers just like you who have purchased and replaced this exact part. While we moderate these reviews for profanity, offensive language or personally identifiable information, these reviews are posted exactly as submitted and no alterations are made by our team.
Based on data from past customer purchasing behaviors, these parts are most commonly purchased together along with the part you are viewing. These parts may be necessary or helpful to replace to complete your current repair.
All our installation videos are created and produced in collaboration with our in-house repair technician, Mark Sodja, who has helped millions of eReplacementParts customers over the last 13 years repair their products. Mark has years of experience in selling and repairing both commercial and residential products with a specialty in gas-powered equipment.
This data is collected from customers who submitted a repair instruction after replacing this exact part. Customers can rate how easy the repair was to complete and how long it took. We aggregate this data to provide a repair rating that allows customers to quickly determine the difficulty and time needed to perform their own repair.


