

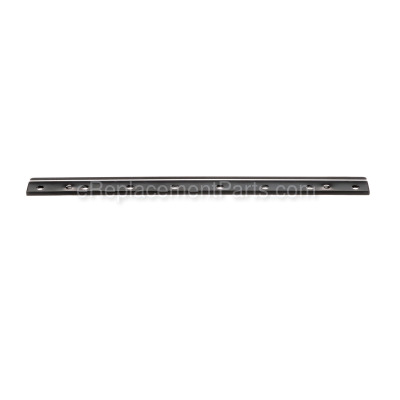


The blade clamp attaches to the planer blade with hex screws, which are sold separately. This is a DeWALT replacement part directly sourced from the manufacturer for use in planers. It is made out of metal and will need to be replaced if it breaks or bends. This part is available individually and will require an allen wrench to do the replacement.
Assembled Product Dimensions (L x W x H)
12.50 x 3.80 x 0.20 Inches
Blade Clamp 5140006-79
OEM part for: DeWALT
Part Number: 5140006-79
$25.93
In Stock
Jump To:
Product Description ?
- Classification: Part
- Weight: 0.20 lbs.
- Shipping: Ships Worldwide
Frequently Purchased Together ?

Compatibility
This part will fit the following 1 machine
DeWALT
DW734 Type 1 12-1/2 inch Planer View Diagrams & Manuals
This item works with the following types of products:
- Planer Parts
Repair Videos ?
Watch the Repair Video for
Blade Clamp

Articles:
|
Step-by-step instructions for removing and installing the blade clamp on your DeWALT planer....
January 29, 2018
|

Customer Part Reviews ?
Average Rating (out of 5):
Click to filter by ratings:
5 stars
4
4 stars
0
3 stars
0
2 stars
0
1 stars
1
< PREV
- 1
Blade clamp
Arrived as promised. Works great.
Guest -
January 18, 2023
Verified Purchase
Excellent
Part is exactly what I needed great company, helpful articles, etc. Highly recommend.
Guest -
March 20, 2022
Verified Purchase
Perfect fit
The blade clamps for my Dewalt planar arrived on-time, in good condition, and fit perfectly.
Guest -
December 6, 2021
Verified Purchase
It was easy finding the parts I needed. Quick ship
It was easy to find the parts I needed. Received what I needed and works great
Guest -
May 19, 2020
Verified Purchase
Disappointed
Did not have the spring on the back side to hold the blade in place. Not impressed.
Guest -
September 25, 2019
Verified Purchase
t
t
t -
t days ago
Verified Purchase
eReplacementParts Team
t
Questions & Answers ?
Our customer Service team is at the ready daily to answer your part and product questions.

Ask our Team
We have a dedicated staff with decades of collective experience in helping customers just like you purchase parts to repair their products.
Does this fit my product?Questions & Answers for Blade Clamp
No questions have been asked yet
Customer Repair Instructions ?
All our customer repair instructions are solicited directly from other customers just like you who have purchased and replaced this exact part.
Bent planner blade backing plate
Eric - April 4, 2016
👍 4 of 4 people found this instruction helpful
Tool Type
Planer
Difficulty
Easy
Time
Less than 15 minutes
Tools Used
Power Drill
Parts Used
Make certain that when you re-place dull planer knives (3) you properly torque the hold-screws or you will end up with the problem I did. Three screws apparently were not tightened properly, the planner blade shifted, caught and broke resulting in the machine coming to an immediate stop and bent the backing plate/bar to be bent beyond repair. Ordered a new backing plate/bar, received it within 3 days, cleaned machine, found broken-off planner blade in dust collection system, installed new planner blades along with backing plates and torqued screws properly - back running again.
I re-call replacing the dull planner blades and rushing through the process. It is not a time or labor consuming process but I rushed it and ultimately paid for it in down-time and could have easily torn up the machine beyond repair and potentially could have seriously hurt myself. TAKE THE TIME AND DO IT CORRECTLY THE FIRST TIME - enough said!
I re-call replacing the dull planner blades and rushing through the process. It is not a time or labor consuming process but I rushed it and ultimately paid for it in down-time and could have easily torn up the machine beyond repair and potentially could have seriously hurt myself. TAKE THE TIME AND DO IT CORRECTLY THE FIRST TIME - enough said!
Did you find this story helpful?
Thanks for voting and helping fellow customers!
Broken cutter and lade clamp
francis - October 23, 2017
👍 2 of 2 people found this instruction helpful
Tool Type
Planer
Difficulty
Easy
Time
1-2 hours
Tools Used
Socket set, Inch lb. Torque wrench
Parts Used
1.Removed all three cutter blades and blade clamps (24 type m6 metric torque head screws) 2. Cleaned and lightly buffed all mating surfaces
With very find sand paper. 3.Installed three new cutter blades 1 new and 2 original blade clamps. 4.I replaced the factory installed screws with high grad screw with allen heads, and torqued them to 70 inch pounds
With very find sand paper. 3.Installed three new cutter blades 1 new and 2 original blade clamps. 4.I replaced the factory installed screws with high grad screw with allen heads, and torqued them to 70 inch pounds
Did you find this story helpful?
Thanks for voting and helping fellow customers!
Screw holding blade assembly came loose and the blade clamp bent.
W - July 13, 2016
👍 2 of 2 people found this instruction helpful
Tool Type
Planer
Difficulty
Easy
Time
Less than 15 minutes
Tools Used
Screwdriver
Parts Used
Simply remove all the screws from the blade clamp as though you were changing blades. Replace blade and new blade clamp using a mix of the original screws and three new screws that replaced three lost screws that vibrated loose and were lost to the dust collector.
Incidentally, I also bought a blade sharpener made for planers and joiners and it worked great.
Incidentally, I also bought a blade sharpener made for planers and joiners and it worked great.
Did you find this story helpful?
Thanks for voting and helping fellow customers!
The screws were not torqued correctly, therefore, one backed out, causing the blade holder and blade to destroyed.
Jonathan - December 17, 2017
👍 1 of 1 people found this instruction helpful
Tool Type
Planer
Difficulty
Easy
Time
15-30 minutes
Tools Used
, cordless impact, T30 bit
Parts Used
1. Remove cover from blade area
2. Put on good quality leather gloves, blades are sharp!
3. Remove damaged blade cover and blade
4. Install new blade and cover
5. Use cordless impact driver to install screws in blade holder
6. After 30 minutes of use, check blade screw torque
2. Put on good quality leather gloves, blades are sharp!
3. Remove damaged blade cover and blade
4. Install new blade and cover
5. Use cordless impact driver to install screws in blade holder
6. After 30 minutes of use, check blade screw torque
Did you find this story helpful?
Thanks for voting and helping fellow customers!
Blades needed to be changed after changing them the blade shattered while in use causing the clamp to break ensuring off two screws Bending the hold down clamping blade
james - February 28, 2019
Tool Type
Planer
Difficulty
Easy
Time
Less than 15 minutes
Tools Used
Power Drill, Socket set
Parts Used
Change the blades and put new clamping blades with new screws That fix the problem the machine is now running excellent
Did you find this story helpful?
Thanks for voting and helping fellow customers!
Damaged the blade bar.
David - July 25, 2016
Tool Type
Planer
Difficulty
Easy
Time
Less than 15 minutes
Tools Used
Nutdriver
Parts Used
Simply placed a new planer blade on all 3 heads, reinstalled the new blade clamp along with.the other 2 existing ones,and was completed. Just remember the blades are extremely sharp and can cut you very badly if you're not careful!
Did you find this story helpful?
Thanks for voting and helping fellow customers!
OEM stands for Original Equipment Manufacturer and means the part you’re buying is sourced directly from the manufacturer who made your product. At eReplacementParts, we sell only genuine OEM parts, guaranteeing the part you’re purchasing is of better design and of higher quality than aftermarket parts.
Our product descriptions are a combination of data sourced directly from the manufacturers who made your product as well as content researched and curated by our content & customer service teams. This content is edited and reviewed internally before being made public to customers.
Our customer service team are at the ready daily to answer your part and product questions. We have a dedicated staff with decades of collective experience in helping customers just like you purchase parts to repair their products.
All our part reviews are solicited directly from other customers who have purchased this exact part. While we moderate these reviews for profanity, offensive language or personally identifiable information, these reviews are posted exactly as submitted and no alterations are made by our team.
All our customer repair instructions are solicited directly from other customers just like you who have purchased and replaced this exact part. While we moderate these reviews for profanity, offensive language or personally identifiable information, these reviews are posted exactly as submitted and no alterations are made by our team.
Based on data from past customer purchasing behaviors, these parts are most commonly purchased together along with the part you are viewing. These parts may be necessary or helpful to replace to complete your current repair.
All our installation videos are created and produced in collaboration with our in-house repair technician, Mark Sodja, who has helped millions of eReplacementParts customers over the last 13 years repair their products. Mark has years of experience in selling and repairing both commercial and residential products with a specialty in gas-powered equipment.
This data is collected from customers who submitted a repair instruction after replacing this exact part. Customers can rate how easy the repair was to complete and how long it took. We aggregate this data to provide a repair rating that allows customers to quickly determine the difficulty and time needed to perform their own repair.