
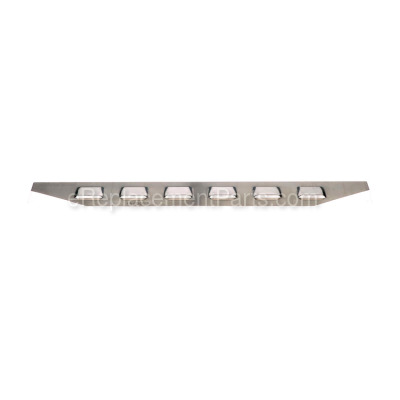


This vaporiser bar is a genuine Char-Broil replacement part. It is supplied from original equipment manufacturer for use with gas grills. Bars are designed to redirect grease away from the burner tubes. This would greatly cut down on flare ups. An extra benefit of these bars is that they help add extra flavor to your food. Unfortunately, over time bars might begin to rust due to a combination of heat and moisture. This metal vaporizer bar is sold individually.
Vaporiser Bar 4500291
OEM part for: Char-Broil
Part Number: 4500291
$21.17
In Stock
Jump To:
Product Description ?
- Dimensions
- 26-5/16" x Widest Point: 5-9/16"
- Classification: Part
- Weight: 1.50 lbs.
- Shipping: Ships Worldwide
Frequently Purchased Together ?

Compatibility
This part will fit the following 52 machines
Char-Broil
461832103 (2002-2003) Thermos Gas Grills View Diagrams & Manuals
461833803 (2002-2003) Thermos Gas Grills View Diagrams & Manuals
461833903 (2002-2003) Thermos Gas Grills View Diagrams & Manuals
462835203 (2002-2003) Thermos Gas Grill View Diagrams & Manuals
462835204 Quickset Traditional Grill View Diagrams & Manuals
462835205 Performance Series Grill View Diagrams & Manuals
462836203 (2002-2003) Thermos Gas Grill View Diagrams & Manuals
462845304 Quickset Traditional Grill View Diagrams & Manuals
462845404 Quickset Traditional Grill View Diagrams & Manuals
463811903 Gas Grill View Diagrams & Manuals
463811904 Quickset Grill View Diagrams & Manuals
463811905 Quickset Grill View Diagrams & Manuals
463820003 Gas Grill View Diagrams & Manuals
463822004 Quickset Grill View Diagrams & Manuals
463831003 Gas Grill View Diagrams & Manuals
463831403 Gas Grill View Diagrams & Manuals
463831503 Gas Grill View Diagrams & Manuals
463831703 Gas Grill View Diagrams & Manuals
463831803 Gas Grill View Diagrams & Manuals
463832003 Gas Grill View Diagrams & Manuals
463832004 Quickset Traditional Grill View Diagrams & Manuals
463832503 Gas Grill View Diagrams & Manuals
463834203 Gas Grill View Diagrams & Manuals
463834303 Gas Grill View Diagrams & Manuals
463834703 Gas Grill View Diagrams & Manuals
463839203 Gas Grill View Diagrams & Manuals
463840104 Quickset Traditional Grill View Diagrams & Manuals
463840204 Quickset Grill View Diagrams & Manuals
463840304 Quickset Traditional Grill View Diagrams & Manuals
463840604 Quickset Traditional Grill View Diagrams & Manuals
463840704 Quickset Traditional Grill View Diagrams & Manuals
463840904 Quickset Traditional Grill View Diagrams & Manuals
463841704 Quickset Traditional Grill View Diagrams & Manuals
463841804 Quickset Traditional Grill View Diagrams & Manuals
463842704 Quickset Traditional Grill View Diagrams & Manuals
463842904 Quickset Traditional Grill View Diagrams & Manuals
463845504 Quickset Grill View Diagrams & Manuals
463861906 Quickset Grill View Diagrams & Manuals
466834803 (2002-2003) Gas Grill View Diagrams & Manuals
466838703 (2002-2003) Gas Grill View Diagrams & Manuals
466838803 (2002-2003) Gas Grill View Diagrams & Manuals
466838903 (2002-2003) Gas Grill View Diagrams & Manuals
463862006 Quickset Traditional Grill View Diagrams & Manuals
463820004 Performance Series Grill View Diagrams & Manuals
463831004 Quickset Traditional Grill View Diagrams & Manuals
463841705 Quickset Traditional Grill View Diagrams & Manuals
466834803 Gas Grill View Diagrams & Manuals
466838703 Gas Grill View Diagrams & Manuals
466838803 Gas Grill View Diagrams & Manuals
466838903 Gas Grill View Diagrams & Manuals
466840804 Quickset Grill View Diagrams & Manuals
466860906 Quickset Traditional Grill View Diagrams & Manuals
Show More Compatible Models
This item works with the following types of products:
This part replaces obsolete part #: 4500327
Repair Videos ?

Articles:
|
Having trouble getting your grill to light up? A common cause of this issue is a defective ignition switch. We'll sho...
November 08, 2012
|

Customer Part Reviews ?
Average Rating (out of 5):
Click to filter by ratings:
5 stars
5
4 stars
0
3 stars
0
2 stars
0
1 stars
0
< PREV
- 1
Nice replacement part
Arrived fast fit perfect grille up and working
Guest -
July 20, 2021
Verified Purchase
vaporiser bar
works perfectly, quality item, bbq should last another 20 years
Guest -
February 9, 2021
Verified Purchase
Easiest website to find parts for old grill
Parts were a perfect match and priced very reasonable
Guest -
September 25, 2020
Verified Purchase
Easy repair, fair price
Purrfect fit
Guest -
April 23, 2020
Verified Purchase
grill parts
Was able to repair 2 grills with my order. Parts fit perfect.
Guest -
January 25, 2020
Verified Purchase
t
t
t -
t days ago
Verified Purchase
eReplacementParts Team
t
Questions & Answers ?
Our customer Service team is at the ready daily to answer your part and product questions.

Ask our Team
We have a dedicated staff with decades of collective experience in helping customers just like you purchase parts to repair their products.
Does this fit my product?Questions & Answers for Vaporiser Bar
No questions have been asked yet
Customer Repair Instructions ?
All our customer repair instructions are solicited directly from other customers just like you who have purchased and replaced this exact part.
Vaporiser bar was worn through from years of gas grilling
Harold - December 9, 2015
👍 3 of 3 people found this instruction helpful
Tool Type
Outdoor Grill
Difficulty
Easy
Time
Less than 15 minutes
Tools Used
, None
Parts Used
Lift and remove meat grille and set aside.
Remove and discard old vaporiser bar.
Using finger pressure, bend end flanges of new vaporiser bar outwards, so that it fits snugly between the walls of the grill.
Firmly seat new bar onto support protrusions
Rock the bar back and forth to ensure that it's down as low as it can go, and also not tilted.
Replace meat grille.
Did you find this story helpful?
Thanks for voting and helping fellow customers!
Vaporiser bar disintegrated.
Matthew - July 7, 2020
Tool Type
Outdoor Grill
Difficulty
Easy
Time
15-30 minutes
Tools Used
, None
Replaced used bar with new one.
Did you find this story helpful?
Thanks for voting and helping fellow customers!
vapor bar rusted thru
ROBERT - October 22, 2019
Tool Type
Outdoor Grill
Difficulty
Easy
Time
Less than 15 minutes
Tools Used
, none needed
Parts Used
inserted it in place
Did you find this story helpful?
Thanks for voting and helping fellow customers!
Burner assembly had a hole in it, propane leaked through it, grill did not light.
Steve - October 3, 2019
Tool Type
Outdoor Grill
Difficulty
Easy
Time
Less than 15 minutes
Tools Used
, No tools required.
Parts Used
Replaced burner assembly and vaporiser bar.
Did you find this story helpful?
Thanks for voting and helping fellow customers!
Aged, rusted parts replaced
Bradley - April 22, 2019
Tool Type
Outdoor Grill
Difficulty
Easy
Time
Less than 15 minutes
Tools Used
, None, my hands
Easily done by hand in minutes, but I would still like parts that are discontinued. Like the hood handle and screws.
Did you find this story helpful?
Thanks for voting and helping fellow customers!
The parts were just worn out
Michael - April 17, 2019
Tool Type
Outdoor Grill
Difficulty
Easy
Time
15-30 minutes
Tools Used
, Did not need any tools
I took all the old parts out then scraped the residue from the inside of the grill. Spray painted the outside with heat resistance paint, then installed the new parts. Looks like a new grill at less than half the cost.
Did you find this story helpful?
Thanks for voting and helping fellow customers!
Corroded Vaporiser Bar
GARY - January 29, 2018
Tool Type
Outdoor Grill
Difficulty
Easy
Time
Less than 15 minutes
Tools Used
Pliers
Parts Used
Simply removed the old vaporiser bar and installed the new one.
Did you find this story helpful?
Thanks for voting and helping fellow customers!
Vaporizer bar rusted out.
Stanley - June 18, 2016
Tool Type
Outdoor Grill
Difficulty
Easy
Time
Less than 15 minutes
Tools Used
Pliers
Parts Used
Removed the old rusted vaporizer bar. Placed the new bar over the burner.
Did you find this story helpful?
Thanks for voting and helping fellow customers!
Needed new parts
Cindy - May 21, 2016
Tool Type
Outdoor Grill
Difficulty
Medium
Time
30-60 minutes
Tools Used
Screwdriver
Parts Used
I removed the clips to the burner, then removed the wire. Then remove the burner, Install the new burner and replace the clips and wire. Remove the grate from the grill and remove the old vaporiser bar and replace with the new one.
Did you find this story helpful?
Thanks for voting and helping fellow customers!
Replaced burned out burner assembly and vaporiser bar
Hank - April 20, 2016
Tool Type
Outdoor Grill
Difficulty
Easy
Time
Less than 15 minutes
Tools Used
Pliers
Parts Used
Remove grill grate and old vaporiser bar. Unclip the two gas valve to burner tube clips. Detach the ignitor wire. Slide out the Burner/tube assembly. Clean debris from the bottom of the grill and clean burner tube holes. Install the Burner/tube assembly by guiding the tubes through their holes and over the gas valve outlets. Reinstall the two gas valve to burner tube clips. Reconnect the the ignitor wire. Install the vaporiser bar and grill grate. Turn on gas at tank, turn one gas valve to the "Ignite" position, and depress the ignitor button several times until gas ignites. Turn on other burner. Burn in new parts for about 15 minutes and Happy Grilling.
Did you find this story helpful?
Thanks for voting and helping fellow customers!
OEM stands for Original Equipment Manufacturer and means the part you’re buying is sourced directly from the manufacturer who made your product. At eReplacementParts, we sell only genuine OEM parts, guaranteeing the part you’re purchasing is of better design and of higher quality than aftermarket parts.
Our product descriptions are a combination of data sourced directly from the manufacturers who made your product as well as content researched and curated by our content & customer service teams. This content is edited and reviewed internally before being made public to customers.
Our customer service team are at the ready daily to answer your part and product questions. We have a dedicated staff with decades of collective experience in helping customers just like you purchase parts to repair their products.
All our part reviews are solicited directly from other customers who have purchased this exact part. While we moderate these reviews for profanity, offensive language or personally identifiable information, these reviews are posted exactly as submitted and no alterations are made by our team.
All our customer repair instructions are solicited directly from other customers just like you who have purchased and replaced this exact part. While we moderate these reviews for profanity, offensive language or personally identifiable information, these reviews are posted exactly as submitted and no alterations are made by our team.
Based on data from past customer purchasing behaviors, these parts are most commonly purchased together along with the part you are viewing. These parts may be necessary or helpful to replace to complete your current repair.
All our installation videos are created and produced in collaboration with our in-house repair technician, Mark Sodja, who has helped millions of eReplacementParts customers over the last 13 years repair their products. Mark has years of experience in selling and repairing both commercial and residential products with a specialty in gas-powered equipment.
This data is collected from customers who submitted a repair instruction after replacing this exact part. Customers can rate how easy the repair was to complete and how long it took. We aggregate this data to provide a repair rating that allows customers to quickly determine the difficulty and time needed to perform their own repair.