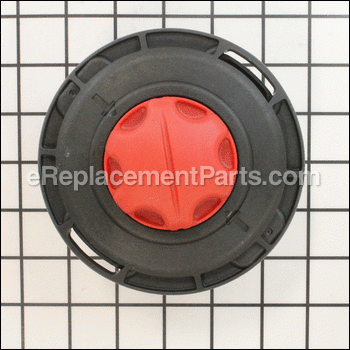

This an authentic manufacturer approved replacement trimmer head assembly. It is specially designed for use with Toro string trimmers. This trimmer head is used to quickly and efficiently cut through the grass. This item includes the bump head knob, spring, cover and metal eyelets. Please note, this cutting head assembly is sold individually.
Trimmer Head Assembly 308923014
OEM part for: Toro
Part Number: 308923014
$58.83
In Stock
Jump To:
Frequently Purchased Together ?

Compatibility
This part will fit the following 12 machines
Toro
51974 18in Straight Shaft Gas Trimmer View Diagrams & Manuals
51955 17in Curved-Shaft Gas Trimmer View Diagrams & Manuals
51977 (313000001-313999999) 18in Straight-Shaft Gas Trimmer View Diagrams & Manuals
51978 (317000001-999999999) 18in Straight-shaft Gas Trimmer View Diagrams & Manuals
51978 (314000001-314999999) 18in Straight-shaft Gas Trimmer, 2014 View Diagrams & Manuals
51998 (315000001-315999999) 18in Straight-shaft Gas Trimmer, 2015 View Diagrams & Manuals
51978A (317000001-999999999)(2017) 18in Straight-Shaft Gas Trimmer View Diagrams & Manuals
51978A (318000001-318999999) 18in Straight-Shaft Gas Trimmer View Diagrams & Manuals
51958 (321000001-321999999) 51958, 17in Curved-Shaft Gas Trimmer, (Sn 321000001-321999999) View Diagrams & Manuals
51978 (316000001-316999999)(2016) 51978, 18in Straight-Shaft Gas Trimmer, 2016 (Sn 316000001-316999999) View Diagrams & Manuals
51978A (319000001-319999999) 51978a, 18in Straight-Shaft Gas Trimmer, (Sn 319000001-319999999) View Diagrams & Manuals
51998 (319000001-319999999) 51998, 18in Straight-Shaft Gas Trimmer, (Sn 319000001-319999999) View Diagrams & Manuals
Show More Compatible Models
This item works with the following types of products:
- Trimmer Parts
This part replaces obsolete part #: 309034005, 518800005, 308923015
Customer Part Reviews ?
Average Rating (out of 5):
Click to filter by ratings:
5 stars
26
4 stars
1
3 stars
0
2 stars
0
1 stars
0
< PREV
- 1
- 2
- 3
Easy to install
Part arrived, was easy to install, and matched factory design. Weed Whacker is working the way it should now.
Jonathan -
October 18, 2023
Verified Purchase
Perfect replacement parts easy swap out repair.
Perfect fit for my Toro trimmer head. Once again eReplacementParts to the rescue. Easy to find the part, fast shipping and perfect parts replacement.
Guest -
May 18, 2023
Verified Purchase
Identical part
Easy website to navigate. Fair pricing. Quick delivery. The parts are always identical to the original. My one stop shopping for tools site!
Guest -
November 21, 2022
Verified Purchase
Perfect fit
After searching high and low for the perfect and affordable part finally found it here. This replacement is even better than the original part.
Guest -
October 25, 2022
Verified Purchase
Trimmer head
Exactly what I ordered. Works great.
Guest -
September 5, 2022
Verified Purchase
Easy fix
The part arrived fast part was perfect no problems
Anonymous -
July 22, 2022
Verified Purchase
5min Replacement
The part was a cinch to replace and it does wonders to my grass trimming. But still not sure how to make or rather extend out the nylon line without a lot of effort as needed.
Guest -
May 18, 2022
Verified Purchase
worked as expected and fit perfectly
working with my trimmer
Guest -
September 9, 2021
Verified Purchase
Exact part, fit perfect,easy repair.
Arrived quickly, easy install
Guest -
August 6, 2021
Verified Purchase
one bolt and done!
best weed whip ever. kicking grass ass !
Guest -
May 11, 2021
Verified Purchase
t
t
t -
t days ago
Verified Purchase
eReplacementParts Team
t
Questions & Answers ?
Our customer Service team is at the ready daily to answer your part and product questions.

Ask our Team
We have a dedicated staff with decades of collective experience in helping customers just like you purchase parts to repair their products.
Does this fit my product?Questions & Answers for Trimmer Head Assembly
Could not find model number. Serial #, mfg #, and item# which I have entered above
Carlos
for model number 51975
asked on 2023-10-25
Hello Carlos, Thank you for your inquiry. 51975 is listed as the model number of a Toro gas trimmer, and part# 308923014 would be the compatible trimmer head for that model. We hope this helps.
eReplacementParts Team October 25, 2023
Customer Repair Instructions ?
All our customer repair instructions are solicited directly from other customers just like you who have purchased and replaced this exact part.
Worn out head on trimmer
Angel - April 24, 2016
👍 9 of 10 people found this instruction helpful
Tool Type
Trimmer
Difficulty
Easy
Time
15-30 minutes
Tools Used
Socket set, Adjustable Wrench
Parts Used
Just used the adjustable wrench to hold the bar end and then remove the nut at the end the of the bar with the socket set. Then installed the new trimmer head , that's it!
Did you find this story helpful?
Thanks for voting and helping fellow customers!
Trimmer bump head broke
Robert - July 13, 2016
👍 4 of 4 people found this instruction helpful
Tool Type
Trimmer
Difficulty
Easy
Time
Less than 15 minutes
Tools Used
Parts Used
I used a center punch placed in a hole provided by the manufacture to stop the shaft from turning. A little counter-clockwise turn and the bump head head came off. Replacing was as easy as reversing the procedure.
Did you find this story helpful?
Thanks for voting and helping fellow customers!
String rewind needed replacement
Joe - March 12, 2019
👍 2 of 2 people found this instruction helpful
Tool Type
Trimmer
Difficulty
Easy
Time
Less than 15 minutes
Tools Used
Socket set
Parts Used
Disassembled stringer head
removed bolt holding head to shaft and removed old head assembly
installed new head and replaced bolt
reassembled new head
removed bolt holding head to shaft and removed old head assembly
installed new head and replaced bolt
reassembled new head
Did you find this story helpful?
Thanks for voting and helping fellow customers!
The trimming head was inoperative due to wear, became non usable because the plastic spindle was too worn to adjust the cutting line
Richard - June 20, 2017
👍 2 of 2 people found this instruction helpful
Tool Type
Trimmer
Difficulty
Easy
Time
15-30 minutes
Tools Used
Screwdriver, Socket set, Side cutters
Parts Used
Took the old head off the tool, re wrapped the trimmer head, re-assembled and tightened, tested, works fine.
Did you find this story helpful?
Thanks for voting and helping fellow customers!
Lawn trimmer head replacement
William - September 17, 2016
👍 3 of 4 people found this instruction helpful
Tool Type
Trimmer
Difficulty
Easy
Time
15-30 minutes
Tools Used
Wrench Set
Parts Used
1. Remove internal sections of existing trimmer head.
2. Applied WD-40 on bolt. Wait 5 minutes. Remove bolt holding existing trimmer head.
3. Remove existing trimmer head.
4. Remove internal section of new trimmer head.
5. Place new trimmer head on shaft and tighten bolt on trimmer head.
6. Restring and attach internal section to new trimmer head.
7. Place existing lawn trimmer back in service.
Did you find this story helpful?
Thanks for voting and helping fellow customers!
The spring essentially just disappeared. The ‘bumper’ loosened and when I investigated as to why it would not feed line, I found the spring GONE. I truly cannot figure out how I lost the spring.
STEPHEN - July 30, 2020
Tool Type
Trimmer
Difficulty
Easy
Time
15-30 minutes
Tools Used
Screwdriver
Parts Used
Opened the head assembly and looked it over then closed it and loaded it.
I did all of that after I attached it to the trimmer.
Very easy to do.
I did all of that after I attached it to the trimmer.
Very easy to do.
Did you find this story helpful?
Thanks for voting and helping fellow customers!
Worn out head.
Elbert - December 5, 2019
Tool Type
Trimmer
Difficulty
Easy
Time
Less than 15 minutes
Tools Used
Socket set
Parts Used
1- Remove head assembly to expose screw
2- Remove screw to remove head
base
3- Install New head assembly
2- Remove screw to remove head
base
3- Install New head assembly
Did you find this story helpful?
Thanks for voting and helping fellow customers!
Needed a new head assembly
Stephen - November 1, 2019
Tool Type
Trimmer
Difficulty
Easy
Time
Less than 15 minutes
Tools Used
Screwdriver, Pliers
Parts Used
Did you find this story helpful?
Thanks for voting and helping fellow customers!
original trimmer head spool and bump head were worn out. Gas cap leaked.
Dumont - October 12, 2019
Tool Type
Trimmer
Difficulty
Easy
Time
Less than 15 minutes
Tools Used
, none
Just removed the spool and bumper head and replaced. Left the original shell intact. No tools needed. Used the weed eater for about an hour in pretty heavy growth. Worked as it should; line fed correctly.
Did you find this story helpful?
Thanks for voting and helping fellow customers!
Bump cap was worn out
DONALD - September 4, 2018
Tool Type
Trimmer
Difficulty
Easy
Time
Less than 15 minutes
Tools Used
Wrench Set
Parts Used
Replaced the whole end cap
Did you find this story helpful?
Thanks for voting and helping fellow customers!
Load More Install Stories
OEM stands for Original Equipment Manufacturer and means the part you’re buying is sourced directly from the manufacturer who made your product. At eReplacementParts, we sell only genuine OEM parts, guaranteeing the part you’re purchasing is of better design and of higher quality than aftermarket parts.
Our product descriptions are a combination of data sourced directly from the manufacturers who made your product as well as content researched and curated by our content & customer service teams. This content is edited and reviewed internally before being made public to customers.
Our customer service team are at the ready daily to answer your part and product questions. We have a dedicated staff with decades of collective experience in helping customers just like you purchase parts to repair their products.
All our part reviews are solicited directly from other customers who have purchased this exact part. While we moderate these reviews for profanity, offensive language or personally identifiable information, these reviews are posted exactly as submitted and no alterations are made by our team.
All our customer repair instructions are solicited directly from other customers just like you who have purchased and replaced this exact part. While we moderate these reviews for profanity, offensive language or personally identifiable information, these reviews are posted exactly as submitted and no alterations are made by our team.
Based on data from past customer purchasing behaviors, these parts are most commonly purchased together along with the part you are viewing. These parts may be necessary or helpful to replace to complete your current repair.
All our installation videos are created and produced in collaboration with our in-house repair technician, Mark Sodja, who has helped millions of eReplacementParts customers over the last 13 years repair their products. Mark has years of experience in selling and repairing both commercial and residential products with a specialty in gas-powered equipment.
This data is collected from customers who submitted a repair instruction after replacing this exact part. Customers can rate how easy the repair was to complete and how long it took. We aggregate this data to provide a repair rating that allows customers to quickly determine the difficulty and time needed to perform their own repair.