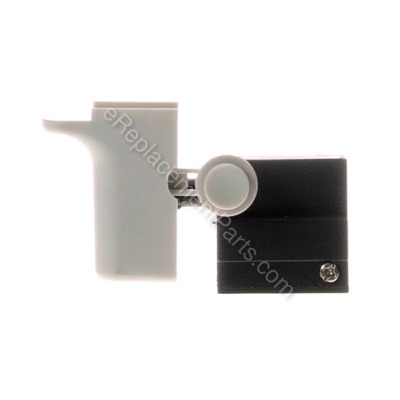
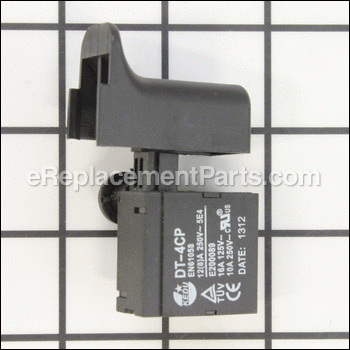
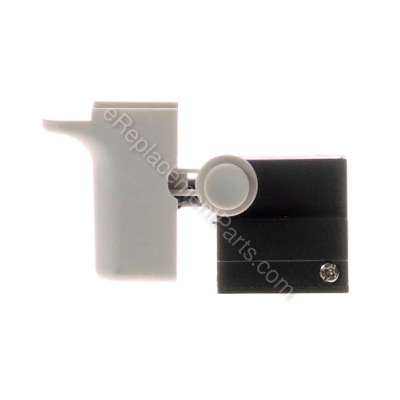
This switch is a genuine replacement part. This plastic part includes the trigger and internal switch used for Ryobi angle grinders. Because it is a mechanical switch, internal parts wear down with time and require replacement. This is a quick repair requiring only a screwdriver.
• Disassemble handle casing
• Remove old switch and disconnect wires
• Attach new switch to wires
• Attach switch to handle
• Reassemble handle casing
Switch 039028001045
OEM part for: Ryobi, Ryobi -TTI
Part Number: 039028001045
Jump To:
Product Description ?
- Classification: Part
- Weight: 0.01 lbs.
- Shipping: Ships Worldwide
Frequently Purchased Together ?
Compatibility
This part will fit the following 6 machines
Ryobi
Ryobi -TTI
This item works with the following types of products:
- Grinder Parts
This part replaces obsolete part #: 039028007044 (4-25-17 (Rev:02))
Customer Part Reviews ?
- 1
Questions & Answers ?
Our customer Service team is at the ready daily to answer your part and product questions.

Ask our Team
We have a dedicated staff with decades of collective experience in helping customers just like you purchase parts to repair their products.
Does this fit my product?Questions & Answers for Switch
Customer Repair Instructions ?
All our customer repair instructions are solicited directly from other customers just like you who have purchased and replaced this exact part.
Broken switch.
Tool Type
Grinder
Difficulty
Easy
Time
15-30 minutes
Tools Used
Screwdriver
Parts Used
2. Easily replaced with the new switch.
Angle grinder: brushes worn out and switch over-heated / burned out.
Tool Type
Grinder
Difficulty
Easy
Time
30-60 minutes
Tools Used
Screwdriver, emery cloth, chip brush, soldering iron.
Parts Used
Replacing the switch is straightforward but disassembly of the handle is fiddley. Once all the screws are out you still have to gently pry the sides apart. Note how the wires are run as there's not much room and they have to go back the same way. And mine has a rotating handle so it has to fit into a channel properly too.
In a pinch, if you have the skills and a dremel, you can take the switch apart and swap the parts over to the other side and make it work. The switch is designed like two matching halves and only one side is used.
All in all it took about 30-60 minutes and it works like new. I hate to just toss out tools or things that still have lots of life left in them.
Switch went bad.
Tool Type
Grinder
Difficulty
Easy
Time
Less than 15 minutes
Tools Used
Screwdriver
Parts Used
No power to tool
Tool Type
Grinder
Difficulty
Medium
Time
30-60 minutes
Tools Used
Screwdriver
Parts Used
Switch broken
Tool Type
Grinder
Difficulty
Easy
Time
15-30 minutes
Tools Used
Power Drill, Phillips screwdriver
Parts Used
Rear bearing failure, wrorn brushes broken handles
Tool Type
Grinder
Difficulty
Easy
Time
15-30 minutes
Tools Used
Screwdriver
Switch went out on my 18V 4" Ryobi Grinder
Tool Type
Grinder
Difficulty
Medium
Time
Less than 15 minutes
Tools Used
Screwdriver
Parts Used
Switch burned.
Tool Type
Grinder
Difficulty
Easy
Time
Less than 15 minutes
Tools Used
Screwdriver
Parts Used
Switch would not function.
Tool Type
Grinder
Difficulty
Easy
Time
15-30 minutes
Tools Used
, Star driver
Parts Used
2. Separated the handle.
3. Removed the switch from the handle.
4. Removed the wires from the switch.
5. Placed the wires in the connectors on the new switch.
6. Placed the switch in the handle casing.
7. Reinstalled the screws to the handle.
8. Plugged it in and tested.
Faulty switch.
Tool Type
Grinder
Difficulty
Easy
Time
Less than 15 minutes
Tools Used
Screwdriver
Parts Used
OEM stands for Original Equipment Manufacturer and means the part you’re buying is sourced directly from the manufacturer who made your product. At eReplacementParts, we sell only genuine OEM parts, guaranteeing the part you’re purchasing is of better design and of higher quality than aftermarket parts.
Our product descriptions are a combination of data sourced directly from the manufacturers who made your product as well as content researched and curated by our content & customer service teams. This content is edited and reviewed internally before being made public to customers.
Our customer service team are at the ready daily to answer your part and product questions. We have a dedicated staff with decades of collective experience in helping customers just like you purchase parts to repair their products.
All our part reviews are solicited directly from other customers who have purchased this exact part. While we moderate these reviews for profanity, offensive language or personally identifiable information, these reviews are posted exactly as submitted and no alterations are made by our team.
All our customer repair instructions are solicited directly from other customers just like you who have purchased and replaced this exact part. While we moderate these reviews for profanity, offensive language or personally identifiable information, these reviews are posted exactly as submitted and no alterations are made by our team.
Based on data from past customer purchasing behaviors, these parts are most commonly purchased together along with the part you are viewing. These parts may be necessary or helpful to replace to complete your current repair.
All our installation videos are created and produced in collaboration with our in-house repair technician, Mark Sodja, who has helped millions of eReplacementParts customers over the last 13 years repair their products. Mark has years of experience in selling and repairing both commercial and residential products with a specialty in gas-powered equipment.
This data is collected from customers who submitted a repair instruction after replacing this exact part. Customers can rate how easy the repair was to complete and how long it took. We aggregate this data to provide a repair rating that allows customers to quickly determine the difficulty and time needed to perform their own repair.


