
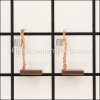
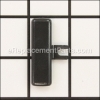
This item is a genuine Makita part that is OEM sourced to ensure a high level of quality. The switch is intended to be used with cordless drill/drivers. This item fits into the housing just below the motor. The switch is used to relay electricity from the battery to the motor. This item is sold as an individual replacement part.
Switch C3jw-4b, Xph06 650710-5
OEM part for: Makita
Part Number: 650710-5
$21.57
In Stock
Jump To:
Frequently Purchased Together ?
Compatibility
This part will fit the following 34 machines
Makita
XFD07M 18V LXT Lithium-Ion Brushless Cordless 1/2" Driver-Drill Kit View Diagrams & Manuals
XFD07Z 18V LXT Lithium-Ion Brushless Cordless 1/2" Driver-Drill View Diagrams & Manuals
XPH06 18V LXT Lithium-Ion Cordless 1/2" Hammer Driver-Drill Kit View Diagrams & Manuals
XPH07M 18V LXT Lithium-Ion Cordless 1/2" Hammer Driver-Drill Kit View Diagrams & Manuals
XPH07Z 18V LXT Lithium-Ion Cordless 1/2" Hammer Driver-Drill Kit View Diagrams & Manuals
XPH12 18V LXT - 1/2" Hammer Driver-Drill View Diagrams & Manuals
DDF480RFE Drill View Diagrams & Manuals
DDF480RME Drill View Diagrams & Manuals
DDF480Z Drill View Diagrams & Manuals
DHP480RFE Drill View Diagrams & Manuals
DHP480RME Drill View Diagrams & Manuals
DHP480SYE Drill View Diagrams & Manuals
DHP480Z Drill View Diagrams & Manuals
FD07 Drill View Diagrams & Manuals
XAD03PT Drill View Diagrams & Manuals
XAD03Z Drill View Diagrams & Manuals
XFD061 Drill View Diagrams & Manuals
XFD07 Drill View Diagrams & Manuals
XFD07MB Drill View Diagrams & Manuals
XFD07T Drill View Diagrams & Manuals
XFD12R Drill View Diagrams & Manuals
XFD12T Drill View Diagrams & Manuals
XFD12Z Drill View Diagrams & Manuals
XFD131 Drill View Diagrams & Manuals
XPH06Z Drill View Diagrams & Manuals
XPH07MB Drill View Diagrams & Manuals
XPH07TB Drill View Diagrams & Manuals
XPH12M Drill View Diagrams & Manuals
XPH12R Drill View Diagrams & Manuals
XPH12T Drill View Diagrams & Manuals
XPH12Z Drill View Diagrams & Manuals
XPH131 Drill View Diagrams & Manuals
XRJ07R1B Saw View Diagrams & Manuals
XRJ07ZB Saw View Diagrams & Manuals
Show More Compatible Models
This item works with the following types of products:
- Cordless Drill Parts
- Drill Parts
- Hammer Drill Parts
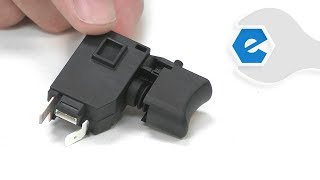
Repair Videos ?
Watch the Repair Video for
Switch C3jw-4b, Xph06
Customer Part Reviews ?
Average Rating (out of 5):
Click to filter by ratings:
5 stars
2
4 stars
0
3 stars
0
2 stars
0
1 stars
0
< PREV
- 1
Perfect fit, cordless brushless recipe saw switch replacementnt
Did not fix my intermittent working on my saw. Maybe better. Probably try to replace another part? Maybe control module?
Joseph -
June 5, 2023
Verified Purchase
It worked
came on time and solved the problem
Guest -
September 5, 2019
Verified Purchase
t
t
t -
t days ago
Verified Purchase
eReplacementParts Team
t
Questions & Answers ?
Our customer Service team is at the ready daily to answer your part and product questions.

Ask our Team
We have a dedicated staff with decades of collective experience in helping customers just like you purchase parts to repair their products.
Does this fit my product?Questions & Answers for Switch C3jw-4b, Xph06
No questions have been asked yet
Customer Repair Instructions ?
All our customer repair instructions are solicited directly from other customers just like you who have purchased and replaced this exact part.
Drill would not start.
Jesse - June 3, 2017
👍 1 of 1 people found this instruction helpful
Tool Type
Cordless Drill
Difficulty
Easy
Time
15-30 minutes
Tools Used
Screwdriver, Pliers
Went step by step using the parts diagram as a guide.
Did you find this story helpful?
Thanks for voting and helping fellow customers!
Motor will not turn
Antony - September 9, 2016
👍 1 of 1 people found this instruction helpful
Tool Type
Cordless Drill
Difficulty
Easy
Time
15-30 minutes
Tools Used
Screwdriver, Pliers
Parts Used
Removed old switch and installed new switch.
Did you find this story helpful?
Thanks for voting and helping fellow customers!
TRIGGER SKECTHY
KELLY - March 20, 2023
Tool Type
Cordless Drill
Difficulty
Easy
Time
Less than 15 minutes
Tools Used
Screwdriver, Pliers
Parts Used
Remove battery pack, all screws from side and back, 2 screws from head assy.
Remove casing side. use needle nose to remove wire connectors .
Install connectors to new trigger and replace screws .
Less than 10 min repair. Good as new.
Remove casing side. use needle nose to remove wire connectors .
Install connectors to new trigger and replace screws .
Less than 10 min repair. Good as new.
Did you find this story helpful?
Thanks for voting and helping fellow customers!
There was a broken piece that was jamming the switch.
Jeffrey - May 20, 2022
Tool Type
Cordless Drill
Difficulty
Easy
Time
Less than 15 minutes
Tools Used
Screwdriver, Power Drill
Parts Used
Opened the drill to expose the switch.
Removed the old switch
Installed the new switch.
Closed the drill.
Removed the old switch
Installed the new switch.
Closed the drill.
Did you find this story helpful?
Thanks for voting and helping fellow customers!
Could not pull the trigger on my Makita Cordless Drill
Peter - January 10, 2022
Tool Type
Cordless Drill
Difficulty
Easy
Time
Less than 15 minutes
Tools Used
Screwdriver
Parts Used
Removed all the necessary screws to open casing, pulled off two connectors from the switch and then reinstalled with new switch.
Couldn't have been easier.
Couldn't have been easier.
Did you find this story helpful?
Thanks for voting and helping fellow customers!
the trigger stopped working
Dave - October 18, 2019
Tool Type
Cordless Drill
Difficulty
Easy
Time
Less than 15 minutes
Tools Used
Screwdriver, Pliers
Parts Used
I took the drill apart. removed the trigger assembly and replaced it with the new one.
Did you find this story helpful?
Thanks for voting and helping fellow customers!
Switch not working
Peter - April 8, 2017
Tool Type
Cordless Drill
Difficulty
Easy
Time
Less than 15 minutes
Tools Used
Screwdriver
Parts Used
Removed the screws from the rear cover
Removed the screws from the housing
Disconnected the old switch
Connected the new switch
Screwed the housing back together
Installed the rear cover
Removed the screws from the housing
Disconnected the old switch
Connected the new switch
Screwed the housing back together
Installed the rear cover
Did you find this story helpful?
Thanks for voting and helping fellow customers!
Trigger was very hard to pull then the Foward and reverse switch wouldn't work
Erik - June 15, 2016
Tool Type
Cordless Drill
Difficulty
Medium
Time
Less than 15 minutes
Tools Used
Screwdriver, Pliers
Parts Used
Took screws out of back of drill x2
Took 4 screws out of front of drill
Took 6 or so screws out of handle
Split case
Pulled switch and disconnect
Connected new switch and reassembled
Took 4 screws out of front of drill
Took 6 or so screws out of handle
Split case
Pulled switch and disconnect
Connected new switch and reassembled
Did you find this story helpful?
Thanks for voting and helping fellow customers!
OEM stands for Original Equipment Manufacturer and means the part you’re buying is sourced directly from the manufacturer who made your product. At eReplacementParts, we sell only genuine OEM parts, guaranteeing the part you’re purchasing is of better design and of higher quality than aftermarket parts.
Our product descriptions are a combination of data sourced directly from the manufacturers who made your product as well as content researched and curated by our content & customer service teams. This content is edited and reviewed internally before being made public to customers.
Our customer service team are at the ready daily to answer your part and product questions. We have a dedicated staff with decades of collective experience in helping customers just like you purchase parts to repair their products.
All our part reviews are solicited directly from other customers who have purchased this exact part. While we moderate these reviews for profanity, offensive language or personally identifiable information, these reviews are posted exactly as submitted and no alterations are made by our team.
All our customer repair instructions are solicited directly from other customers just like you who have purchased and replaced this exact part. While we moderate these reviews for profanity, offensive language or personally identifiable information, these reviews are posted exactly as submitted and no alterations are made by our team.
Based on data from past customer purchasing behaviors, these parts are most commonly purchased together along with the part you are viewing. These parts may be necessary or helpful to replace to complete your current repair.
All our installation videos are created and produced in collaboration with our in-house repair technician, Mark Sodja, who has helped millions of eReplacementParts customers over the last 13 years repair their products. Mark has years of experience in selling and repairing both commercial and residential products with a specialty in gas-powered equipment.
This data is collected from customers who submitted a repair instruction after replacing this exact part. Customers can rate how easy the repair was to complete and how long it took. We aggregate this data to provide a repair rating that allows customers to quickly determine the difficulty and time needed to perform their own repair.