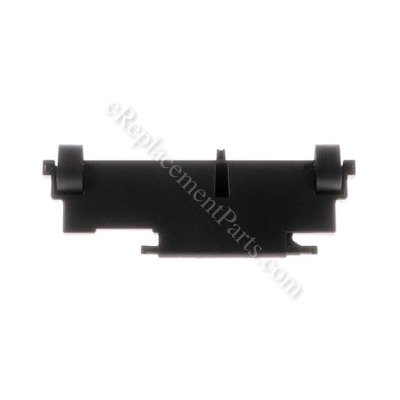


This is a Genuine OEM replacement part designed for use with Bissell Vacuums. This part is made out of Plastic. It consists of a Bracket/Roller and Plastic Wheels. Please note, Brushroll Assembly is Sold Separately.
When replacing this part you will need to remove an Access Plate using a Screwdriver. Snap the roller into place, attach Brushroll Assembly and connect the belt to the spindle that turns the belt.
Roller Assembly B-203-1015
OEM part for: Bissell
Part Number: B-203-1015
$12.99
In Stock
Jump To:
Product Description ?
- Classification: Part
- Weight: 0.25 lbs.
- Shipping: Ships Worldwide
Frequently Purchased Together ?
Compatibility
This part will fit the following 67 machines
Bissell
6585 Powerforce Turbo Bagless Upright Vacuum View Diagrams & Manuals
3576 Cleanview II Bagless Vacuum View Diagrams & Manuals
3576-1 Cleanview II Bagless Vacuum View Diagrams & Manuals
3576-2 Cleanview II Bagless Vacuum View Diagrams & Manuals
3576-6 Cleanview II Bagless Vacuum View Diagrams & Manuals
3576-C Cleanview II Bagless Vacuum View Diagrams & Manuals
3576-H Cleanview II Bagless Vacuum View Diagrams & Manuals
3576-U Cleanview II Bagless Vacuum View Diagrams & Manuals
20Q9 Cleanview II Plus Upright Vacuum View Diagrams & Manuals
3522 Powerforce Upright Vacuum View Diagrams & Manuals
3522-1 Powerforce Upright Vacuum View Diagrams & Manuals
3522-4 Powerforce Upright Vacuum View Diagrams & Manuals
3522-5 Powerforce Upright Vacuum View Diagrams & Manuals
3522-6 Powerforce Upright Vacuum View Diagrams & Manuals
3545 Powerglide Upright Vacuum View Diagrams & Manuals
3545-1 Powerglide Upright Vacuum View Diagrams & Manuals
3545-2 Powerglide Upright Vacuum View Diagrams & Manuals
3545-3 Powerglide Upright Vacuum View Diagrams & Manuals
3545-5 Powerglide Upright Vacuum View Diagrams & Manuals
3545-Q Powerglide Upright Vacuum View Diagrams & Manuals
3530 Powerforce Upright Vacuum View Diagrams & Manuals
3537 Powerforce Upright Vacuum View Diagrams & Manuals
46E5 Powerforce Upright Vacuum View Diagrams & Manuals
3574 Cleanview II Upright Vacuum View Diagrams & Manuals
3575 Cleanview Bagless Upright Vacuum View Diagrams & Manuals
3575-5 Cleanview Bagless Upright Vacuum View Diagrams & Manuals
3575-8 Cleanview Bagless Upright Vacuum View Diagrams & Manuals
3575-M Cleanview Bagless Upright Vacuum View Diagrams & Manuals
3575-Z Cleanview Bagless Upright Vacuum View Diagrams & Manuals
3590 Cleanview Bagless Upright Vacuum View Diagrams & Manuals
3590-1 Cleanview Bagless Upright Vacuum View Diagrams & Manuals
3591 Cleanview Bagless Upright Vacuum View Diagrams & Manuals
3593-1 Cleanview Bagless Upright Vacuum View Diagrams & Manuals
3593-Z Cleanview Bagless Upright Vacuum View Diagrams & Manuals
6590 Cleanview Bagless Upright Vacuum View Diagrams & Manuals
8975 Cleanview Bagless Upright Vacuum View Diagrams & Manuals
8990 Cleanview Bagless Upright Vacuum View Diagrams & Manuals
3595 Cleanview Bagless Upright Vacuum View Diagrams & Manuals
35952 Cleanview Bagless Upright Vacuum View Diagrams & Manuals
35962 Cleanview Bagless Upright Vacuum View Diagrams & Manuals
35961 Cleanview Bagless Upright Vacuum View Diagrams & Manuals
6591X Cleanview Bagless Upright Vacuum View Diagrams & Manuals
4104 Powergroom Pet Upright Vacuum View Diagrams & Manuals
6579 Powerforce Cleaners Bagless Upright Vacuum View Diagrams & Manuals
6594 Powerforce Cleaners Bagless Upright Vacuum View Diagrams & Manuals
6579-2 Powerforce Cleaners Bagless Upright Vacuum View Diagrams & Manuals
6582 Powerforce Bagless Upright Vacuum View Diagrams & Manuals
6583 Powerforce Bagless Upright Vacuum View Diagrams & Manuals
35951 Cleanview Revolution Bagless Vacuum View Diagrams & Manuals
3595H Cleanview Revolution Bagless Vacuum View Diagrams & Manuals
3596 Cleanview Revolution Bagless Vacuum View Diagrams & Manuals
6591 Cleanview Revolution Bagless Vacuum View Diagrams & Manuals
35452 PowerGlide Platinum Bagged Vacuum View Diagrams & Manuals
6592 PowerGlide Platinum Bagged Vacuum View Diagrams & Manuals
6596 PowerForce Bagless Turbo Upright Vacuum View Diagrams & Manuals
71Y7 Powerforce Upright Vacuum View Diagrams & Manuals
92L3P PowerClean Upright Carpet Cleaner View Diagrams & Manuals
9V00 Maxi-Glide Upright Vacuum View Diagrams & Manuals
6584 Powerforce Bagless Upright Vacuum View Diagrams & Manuals
3525 PowerForce Upright View Diagrams & Manuals
98N4 Powergroom Helix Rewind View Diagrams & Manuals
6579-3 Powerforce Bagless Vacuum View Diagrams & Manuals
92L3W Powerclean Bagless Upright Vacuum View Diagrams & Manuals
20Q92 Upright - Cleanview Ii View Diagrams & Manuals
1044 Powerglide Pet View Diagrams & Manuals
3576-M Cleanview 2 Bagless Upright View Diagrams & Manuals
73G8 Cleanview II Bagless View Diagrams & Manuals
Show More Compatible Models
This item works with the following types of products:
- Vacuum Parts
This part replaces obsolete part #: B-203-2556, B-203-1330
Customer Part Reviews ?
Average Rating (out of 5):
Click to filter by ratings:
5 stars
18
4 stars
1
3 stars
0
2 stars
0
1 stars
0
< PREV
- 1
- 2
It was in stock!
It was the correct part and you had it in stock, that’s all that mattered to me! BISSELL was of no help in finding that part!
Guest -
August 21, 2023
Verified Purchase
When my sister moved in with someone she didn't need her old vacuum...
When my sister moved in with someone she didn't need her old vacuum. I took it in because the model is much more powerful than my new one. Also, I don't like to throw things away that can go to good use. I found this part was broken and a few other parts just needed to be deep cleaned. Part fit perfect and was easy to install without instructions. Glad this website offers parts most don't.
Guest -
June 15, 2023
Verified Purchase
Part review
Great condition ! Fit perfect.
Guest -
March 20, 2023
Verified Purchase
Excellent
Easy to replace. Received within a few days of ordering. Was very easy to find on web site. Saved me the cost of having to replace with new sweeper.
Thank you!
Carol Redmond -
January 19, 2023
Verified Purchase
Perfect part easy installation
Part was an exact replacement. I’m going to keep ereplacement parts as my go to source
Guest -
December 19, 2022
Verified Purchase
Got the parts quickly,, Install help was helpful
Got the parts quickly,, Install help section was helpful.
Thanks
Guest -
December 15, 2022
Verified Purchase
Fast, excellent service.
Part arrived within 2 days. Good job !
Guest -
June 24, 2022
Verified Purchase
This was a simple fix, and I Appreciate you having the part
It was fantastic you had the part I needed for an older vacuum. I'm a repair it, not a throw it out person. It was an easy repair, once I found the part on your site.
Thanks Again
Guest -
May 25, 2022
Verified Purchase
great condition fit perfectly
very satisfied i'll keep your card
Guest -
March 25, 2022
Verified Purchase
Perfect purchase!
Brand new part, perfect, working sweeper again! Fast shipping! Definitely would buy from again!
Guest -
September 12, 2021
Verified Purchase
t
t
t -
t days ago
Verified Purchase
eReplacementParts Team
t
Questions & Answers ?
Our customer Service team is at the ready daily to answer your part and product questions.

Ask our Team
We have a dedicated staff with decades of collective experience in helping customers just like you purchase parts to repair their products.
Does this fit my product?Questions & Answers for Roller Assembly
No questions have been asked yet
Customer Repair Instructions ?
All our customer repair instructions are solicited directly from other customers just like you who have purchased and replaced this exact part.
The original plate with two rollers broke its retaining pins. You guys shipped immediately and I installed it when I received it. Thank you
MARK - July 3, 2017
👍 2 of 2 people found this instruction helpful
Tool Type
Vacuum
Difficulty
Easy
Time
Less than 15 minutes
Tools Used
, None reuired
Parts Used
All I had to do was install the new plate. No tools were needed.
Did you find this story helpful?
Thanks for voting and helping fellow customers!
Roller Assembly broken
Christine - June 21, 2023
Tool Type
Vacuum
Difficulty
Easy
Time
Less than 15 minutes
Tools Used
Screwdriver
Parts Used
Super easy repair! The replacement part fit perfectly. I just unscrewed the part that hold the roller assembly in, took out the old and put in the new part. Four screws and less than 5 minutes.
Did you find this story helpful?
Thanks for voting and helping fellow customers!
Two ends that fitted into slots holding roller in place were both broken off
Katherine - December 11, 2021
Tool Type
Vacuum
Difficulty
Easy
Time
Less than 15 minutes
Tools Used
Screwdriver
Parts Used
Removed plate holding roller in place with two screws, fitted roller in place and put plate back on. Quick and easy.
Did you find this story helpful?
Thanks for voting and helping fellow customers!
roller on one side of assembly broken
Frank - May 20, 2021
Tool Type
Vacuum
Difficulty
Easy
Time
Less than 15 minutes
Tools Used
Screwdriver
Parts Used
Simple removal and reinstallation.
Did you find this story helpful?
Thanks for voting and helping fellow customers!
Roller Assy for adjusting the brush height broke off under the Vacuum cleaner
Eugene - October 12, 2019
Tool Type
Vacuum
Difficulty
Easy
Time
15-30 minutes
Tools Used
Screwdriver
Parts Used
1. Removed the 5 screws from the brush guard to remove the brush assy and belt.
2. Rotated the adjustment knob to where slot allows removal of knob to under the vacuum.
3. Cleaned and lubricated brush assy and adjustment knob.
4. Reinstall the adjustment knob and set to LOWEST setting.
5. Removed the screw holding the brush enclosure in place.
6. Aligned roller assy axle narrow ends with slots for the assy.
7. Lowered the roller assy while moving the brush enclosure to allow the roller assy protrusion
to fit UNDER the lip sticking out of the brush enclosure.
8. Reinstall the brush enclosure screw.
9. Reinstall the brush assy with the belt ON the motor spindle.
10. Reinstall the brush guard with the 5 screws.
11. Convince wife it is now safe to use the vacuum! Demonstrate if you must!
Did you find this story helpful?
Thanks for voting and helping fellow customers!
Vacuum bottom plate broken
Linda - January 27, 2019
Tool Type
Vacuum
Difficulty
Easy
Time
15-30 minutes
Tools Used
Screwdriver
Parts Used
Took off old plate put new in.
Did you find this story helpful?
Thanks for voting and helping fellow customers!
Roller assembly worn out.
anthony - April 6, 2018
Tool Type
Vacuum
Difficulty
Easy
Time
Less than 15 minutes
Tools Used
Screwdriver
Parts Used
Removed and replaced.
Did you find this story helpful?
Thanks for voting and helping fellow customers!
Worn parts on vacuum
Jon - March 6, 2018
Tool Type
Vacuum
Difficulty
Easy
Time
Less than 15 minutes
Tools Used
Screwdriver
Simple repair, was so pleased to fix my vacuum for 15 dollars as opposed to 100 for a new one. Thank you so much
Did you find this story helpful?
Thanks for voting and helping fellow customers!
Parts of vacuum broke.
Ann - December 14, 2017
Tool Type
Vacuum
Difficulty
Easy
Time
Less than 15 minutes
Tools Used
Screwdriver
Removed plate and placed rollers into slots.
Inserted the part that holds vacuum top upright
Inserted the part that holds vacuum top upright
Did you find this story helpful?
Thanks for voting and helping fellow customers!
The front wheels broke off.
Jessica - June 9, 2017
Tool Type
Vacuum
Difficulty
Easy
Time
Less than 15 minutes
Tools Used
, Hands
Parts Used
I snapped the replacement part in place. That was pretty much it!
Did you find this story helpful?
Thanks for voting and helping fellow customers!
Load More Install Stories
OEM stands for Original Equipment Manufacturer and means the part you’re buying is sourced directly from the manufacturer who made your product. At eReplacementParts, we sell only genuine OEM parts, guaranteeing the part you’re purchasing is of better design and of higher quality than aftermarket parts.
Our product descriptions are a combination of data sourced directly from the manufacturers who made your product as well as content researched and curated by our content & customer service teams. This content is edited and reviewed internally before being made public to customers.
Our customer service team are at the ready daily to answer your part and product questions. We have a dedicated staff with decades of collective experience in helping customers just like you purchase parts to repair their products.
All our part reviews are solicited directly from other customers who have purchased this exact part. While we moderate these reviews for profanity, offensive language or personally identifiable information, these reviews are posted exactly as submitted and no alterations are made by our team.
All our customer repair instructions are solicited directly from other customers just like you who have purchased and replaced this exact part. While we moderate these reviews for profanity, offensive language or personally identifiable information, these reviews are posted exactly as submitted and no alterations are made by our team.
Based on data from past customer purchasing behaviors, these parts are most commonly purchased together along with the part you are viewing. These parts may be necessary or helpful to replace to complete your current repair.
All our installation videos are created and produced in collaboration with our in-house repair technician, Mark Sodja, who has helped millions of eReplacementParts customers over the last 13 years repair their products. Mark has years of experience in selling and repairing both commercial and residential products with a specialty in gas-powered equipment.
This data is collected from customers who submitted a repair instruction after replacing this exact part. Customers can rate how easy the repair was to complete and how long it took. We aggregate this data to provide a repair rating that allows customers to quickly determine the difficulty and time needed to perform their own repair.