
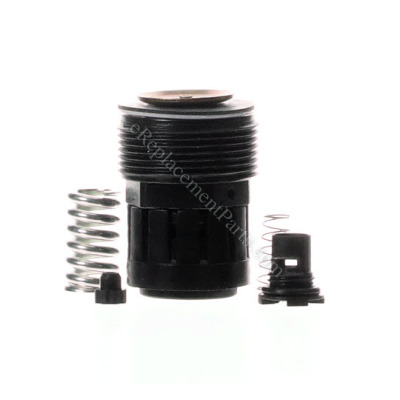


This is a genuine OEM regulator repair kit designed for Dewalt air compressors. It contains all the necessary parts to repair a regulator on your air compressor. Over time internal parts of the regulator will wear out and would need to be replaced.
Replacing these items you would need a screwdriver and pliers.
Regulator Repair Kit 5130027-00
OEM part for: DeWALT
Part Number: 5130027-00
$49.71
In Stock
Jump To:
Product Description ?
- Classification: Part
- Weight: 0.06 lbs.
- Shipping: Ships Worldwide
Frequently Purchased Together ?


Compatibility
This part will fit the following 3 machines
DeWALT
D55155 Type 1 Compressor View Diagrams & Manuals
D55250 Type 1 Compressor View Diagrams & Manuals
This item works with the following types of products:
- Compressor Parts
This part replaces obsolete part #: 5135064-00
Customer Part Reviews ?
Average Rating (out of 5):
Click to filter by ratings:
5 stars
2
4 stars
1
3 stars
0
2 stars
0
1 stars
1
< PREV
- 1
Exact replacement!
Easy install, 20
Guest -
September 28, 2021
Verified Purchase
Repair
Repair not performed need new compressor
Guest -
May 11, 2019
Verified Purchase
Easy enough
The directions for assembly weren't with the parts. But I was able to get the info I needed. My compressor works like new.
Steve -
June 16, 2021
Verified Purchase
Still not working
I received all the parts in great condition. Unfortunately, after replacing the Regulartor Kit I have lots of air flowing out of the regulator weep hole(s).
Guest -
September 29, 2023
Verified Purchase
t
t
t -
t days ago
Verified Purchase
eReplacementParts Team
t
Questions & Answers ?
Our customer Service team is at the ready daily to answer your part and product questions.

Ask our Team
We have a dedicated staff with decades of collective experience in helping customers just like you purchase parts to repair their products.
Does this fit my product?Questions & Answers for Regulator Repair Kit
I am missing the regulator on the manifold. Does this kit need any of the existing regulator parts?
David
for model number D55155 type 1
asked on 2022-07-15
Hello David, Thank you for the question. This is just the repair kit, it does not include the regulator. If you need help placing an order, customer service is open 7 days a week. Please feel free to give us a call. We look forward to hearing from you!
eReplacementParts Team July 15, 2022
Customer Repair Instructions ?
All our customer repair instructions are solicited directly from other customers just like you who have purchased and replaced this exact part.
Regulator was leaking air
Steve - December 29, 2016
👍 21 of 32 people found this instruction helpful
Tool Type
Compressor
Difficulty
Medium
Time
30-60 minutes
Tools Used
Pliers, Adjustable Wrench
Parts Used
This was an easy repair after I had the parts in and out four times. An adjustable wrench to remove the black regulator knob and a needle nose pliers to remove the parts. Place the old parts in the order they were removed. Put new parts in and before you screw the black regulator knob on, hold it in your hand and turn it so the brass stem on the inside can be seen. Then screw it in and gently tighten it. This is the reason I did it four times. If you don't it will leak air like it's broken and you will be mad.
Now my 15 year old Dewalt compressor is running like it's brand new
Now my 15 year old Dewalt compressor is running like it's brand new
Did you find this story helpful?
Thanks for voting and helping fellow customers!
No air could be regulated
Jesus - January 4, 2016
👍 4 of 6 people found this instruction helpful
Tool Type
Compressor
Difficulty
Easy
Time
30-60 minutes
Tools Used
Screwdriver, Pliers
Parts Used
Disassembled regulator ensuring small parts were kept in order, then reassembled accordingly. Worked great on the second attempt. Thanks for having the kit available. I will continue using your website on future repairs. No need to replace when repair kits are easily obtainable. Thanks
Did you find this story helpful?
Thanks for voting and helping fellow customers!
Air was leaking out of vent holes
randy - September 17, 2018
👍 1 of 1 people found this instruction helpful
Tool Type
Compressor
Difficulty
Easy
Time
Less than 15 minutes
Tools Used
Screwdriver, Adjustable Wrench
Parts Used
Replaced all parts and it leaked more than when I started. Removed all parts and used epoxy to seal pressure adjuster and vent holes. Purchased a regulator and a male and female connectors. Works like new.
Did you find this story helpful?
Thanks for voting and helping fellow customers!
Allan wrench
Michael - June 1, 2021
Tool Type
Compressor
Difficulty
Easy
Time
15-30 minutes
Tools Used
Adjustable Wrench
Parts Used
Replace the regulator
Did you find this story helpful?
Thanks for voting and helping fellow customers!
compressor was leaking air at the regulator.
Louis - April 29, 2021
Tool Type
Compressor
Difficulty
Easy
Time
Less than 15 minutes
Tools Used
Screwdriver, Wrench Set, impact wrench
Parts Used
This was a first for me i usually would send it out to get it repaired.
removed the cover to access the regulator.
removed the valve paying close attention of how the old springs and parts came out.
there was one part that was threaded and i figured it out by looking at the new parts.
over all it was a easy fix.
removed the cover to access the regulator.
removed the valve paying close attention of how the old springs and parts came out.
there was one part that was threaded and i figured it out by looking at the new parts.
over all it was a easy fix.
Did you find this story helpful?
Thanks for voting and helping fellow customers!
Regulator Repair Kit Did Not Hold Seal
Lawrence - February 9, 2021
Tool Type
Compressor
Difficulty
Easy
Time
15-30 minutes
Tools Used
Screwdriver, Socket set, Adjustable Wrench
Parts Used
The repair is incomplete due to the regulator repair kit not being able to hold the vacuum seal.
1. Unplugged the unit and drained the air from the tank
2. Removed the cover that houses the adjustment regulator
3. Removed the faulty adjustment regulator using an adjustable wrench
4. Cleaned the interior of the rack and applied teflon tape to the hose connected to the rack
5. Installed the new adjustment regulator in the reverse order of the removal
6. Tested the unit and on build up the air was seeping from the front of the adjustment regulator
7. Dismantled the unit again to ensure all parts were in the exact order of installation
8. Before completing the installation I reviewed the DeWalt manual for my compressor unit, Model D55155, proceeded with installation and tested the adjustment regulator for the second time and it failed to hold a seal
Did you find this story helpful?
Thanks for voting and helping fellow customers!
Pressure regulator was leaking
Alan - December 8, 2020
Tool Type
Compressor
Difficulty
Easy
Time
15-30 minutes
Tools Used
Screwdriver, Adjustable Wrench, Toothbrush and Q-Tips
Parts Used
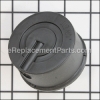
1. Remove regulator knob with crescent wrench.
2. Remove washer and diaphragm.
3. Use wide flat blade screwdriver to unscrew valve from compressor body. Be careful to not damage the aluminum body machined surfaces.
4. Clean all debris from body surfaces. Make sure surface where valve O-ring seats, is clean.
5. Using flat blade screwdriver, screw new valve and spring assembly into compressor body.
6. Install rubber diaphragm and O-Ring onto opening
7. Screw new regulator valve knob into compressor body. Do not overnighten.
Did you find this story helpful?
Thanks for voting and helping fellow customers!
Wouldn't build pressure on regulated side
Dc - April 22, 2020
Tool Type
Compressor
Difficulty
Medium
Time
15-30 minutes
Tools Used
Screwdriver, Pliers
Parts Used
Installed regulator repair kit
Did you find this story helpful?
Thanks for voting and helping fellow customers!
Bad seal
bill - December 24, 2019
Tool Type
Compressor
Difficulty
Medium
Time
30-60 minutes
Tools Used
Screwdriver, Socket set, Wrench Set
Parts Used
Replaced seal
Did you find this story helpful?
Thanks for voting and helping fellow customers!
regulator was leaking
Mark - January 14, 2019
👍 0 of 1 people found this instruction helpful
Tool Type
Compressor
Difficulty
Easy
Time
15-30 minutes
Tools Used
Adjustable Wrench
Parts Used
removed old one piece by piece and reversed the process
Did you find this story helpful?
Thanks for voting and helping fellow customers!
Load More Install Stories
OEM stands for Original Equipment Manufacturer and means the part you’re buying is sourced directly from the manufacturer who made your product. At eReplacementParts, we sell only genuine OEM parts, guaranteeing the part you’re purchasing is of better design and of higher quality than aftermarket parts.
Our product descriptions are a combination of data sourced directly from the manufacturers who made your product as well as content researched and curated by our content & customer service teams. This content is edited and reviewed internally before being made public to customers.
Our customer service team are at the ready daily to answer your part and product questions. We have a dedicated staff with decades of collective experience in helping customers just like you purchase parts to repair their products.
All our part reviews are solicited directly from other customers who have purchased this exact part. While we moderate these reviews for profanity, offensive language or personally identifiable information, these reviews are posted exactly as submitted and no alterations are made by our team.
All our customer repair instructions are solicited directly from other customers just like you who have purchased and replaced this exact part. While we moderate these reviews for profanity, offensive language or personally identifiable information, these reviews are posted exactly as submitted and no alterations are made by our team.
Based on data from past customer purchasing behaviors, these parts are most commonly purchased together along with the part you are viewing. These parts may be necessary or helpful to replace to complete your current repair.
All our installation videos are created and produced in collaboration with our in-house repair technician, Mark Sodja, who has helped millions of eReplacementParts customers over the last 13 years repair their products. Mark has years of experience in selling and repairing both commercial and residential products with a specialty in gas-powered equipment.
This data is collected from customers who submitted a repair instruction after replacing this exact part. Customers can rate how easy the repair was to complete and how long it took. We aggregate this data to provide a repair rating that allows customers to quickly determine the difficulty and time needed to perform their own repair.