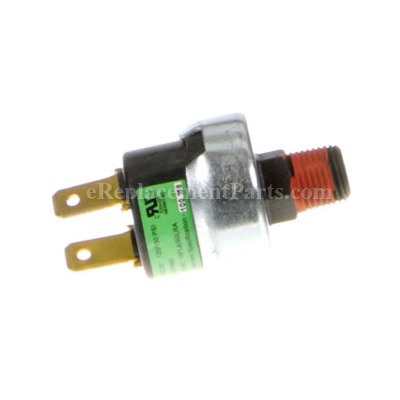
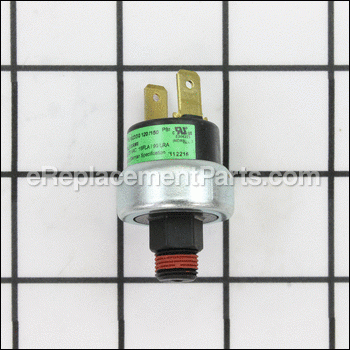


Pressure Switch N192330
OEM part for: Bostitch
Part Number: N192330
$21.33
In Stock
Jump To:
Frequently Purchased Together ?

Compatibility
This part will fit the following 3 machines
Bostitch
BTFP02011 (Type 1) 6G 150Psi Compressor View Diagrams & Manuals
BTFP02011 (Type 2) 6g 150psi Compressor Power Tool View Diagrams & Manuals
BTFP02011 (Type 3) 6g 150psi Compressor Power Tool View Diagrams & Manuals
This item works with the following types of products:
- Compressor Parts
This part replaces obsolete part #: N140697
Customer Part Reviews ?
Average Rating (out of 5):
Click to filter by ratings:
5 stars
9
4 stars
0
3 stars
0
2 stars
0
1 stars
0
< PREV
- 1
The customer service representative that I spoke to was very helpful and knowledgeable. I received the pressure switch for my Bostitch compressor in 4 days. I couldnt find a good instruction to chang it on YouTube but I figured it out and had it changed out in about an hour. Now my compressor is working fine.
The compressor switch was exactly what I needed.
Guest -
August 2, 2023
Verified Purchase
Worked great
Air compressor would not restart so I replaced pressure switch I ordered from you guys and now air compressor works efficiently
Guest -
June 7, 2023
Verified Purchase
Fit perfect and was easy to replace
Easy replacement and works fine
Guest -
May 25, 2023
Verified Purchase
Easy repair
E.g. the part works great!!! My compressor works like new again.
Guest -
March 6, 2023
Verified Purchase
Free air compressor fixed fast!
The pressure switch got to me within a week fit perfectly functioned properly and saved me a bundle on a new air compressor!!
Guest -
June 9, 2022
Verified Purchase
Perfect transaction
Quick shipping and exact part
Guest -
April 5, 2022
Verified Purchase
easy repair
Part arrived before scheduled date and worked like a charm. I was able to use my air compressor in 30 minutes after arrival
Guest -
February 16, 2021
Verified Purchase
Easy, quick and spot on.
I looked up part number on website and ordered part. The new pressure switch came in quickly, was exactly the right part, and my compressor is up and running again. Thanks for the help!
Guest -
January 24, 2021
Verified Purchase
Great fit
Bought a air compressor from a local pawn shop and the pressure switch was leaking bought this one and put it on and the compressor works good as new thanks
Guest -
July 20, 2019
Verified Purchase
t
t
t -
t days ago
Verified Purchase
eReplacementParts Team
t
Questions & Answers ?
Our customer Service team is at the ready daily to answer your part and product questions.

Ask our Team
We have a dedicated staff with decades of collective experience in helping customers just like you purchase parts to repair their products.
Does this fit my product?Questions & Answers for Pressure Switch
No questions have been asked yet
Customer Repair Instructions ?
All our customer repair instructions are solicited directly from other customers just like you who have purchased and replaced this exact part.
Compressor would not shut off and kept filling until the relief valve opened.
Travis - April 30, 2017
👍 20 of 20 people found this instruction helpful
Tool Type
Compressor
Difficulty
Medium
Time
15-30 minutes
Tools Used
Screwdriver
Parts Used
Only remove the screws for the front panel. You do not need to remove the entire top shell. The part is accessible from the front. The replacement is not identical but will still fit. Just disconnect the 2 electrical connectors, unscrew the old one, screw the new one in and reconnect the electrical connectors. They are not polarized so it doesn't matter how you reconnect them. Put the front cover back on and you are done.
Did you find this story helpful?
Thanks for voting and helping fellow customers!
Bad pressure switch
Charles - March 15, 2017
👍 8 of 9 people found this instruction helpful
Tool Type
Compressor
Difficulty
Easy
Time
Less than 15 minutes
Tools Used
Screwdriver, Pliers, Adjustable Wrench
Parts Used
1. Removed the screws on the cover to access pressure switch on the manifold.
2. Removed defective switch with adjustable wrench replaced the pressure switch.
3. Reassembled compressor housing and tested operation.
2. Removed defective switch with adjustable wrench replaced the pressure switch.
3. Reassembled compressor housing and tested operation.
Did you find this story helpful?
Thanks for voting and helping fellow customers!
Compressor would run, shut off then not restart for a while, then restart sparaticaly
Rick - June 20, 2017
👍 3 of 4 people found this instruction helpful
Tool Type
Compressor
Difficulty
Easy
Time
Less than 15 minutes
Tools Used
Screwdriver, Adjustable Wrench
Parts Used
Remove the 4 screws from the front faceplate where the gauges are.
Remove the 2 screws from the main gauge housing where it is held to the frame.
Pull out the assembly exposing the pressure switch.
Unhook the 2 wires from the pressure switch.
Unscrew the pressure switch from the housing/assembly.
Install the new sensor and tighten snugly (do not overtighten) it comes with adequate thread seal on the threads already.
Reassemble in reverse order.
Did you find this story helpful?
Thanks for voting and helping fellow customers!
Pressure switch not shutting off.
David - April 27, 2020
Tool Type
Compressor
Difficulty
Easy
Time
15-30 minutes
Tools Used
Screwdriver, Pliers, Wrench Set
Parts Used
Removed cover screws, have to remove two rubber feet and disconnect air tube at push to connect fitting, squeeze lock ring into fitting then pull hose out, to get cover off. Disconnect switch wires with needle nose pliers, unscrewed switch, had to get a 1/4 by 1/8 reducer pipe bushing. Apply thread sealant, install new switch, reattach switch wires, reassemble tube, cover and rubber feet. My rubber feet had the original screws break off. Drilled out and replaced.
Did you find this story helpful?
Thanks for voting and helping fellow customers!
pressure switch corroded, unit would not shut off at pressure
David - October 2, 2019
Tool Type
Compressor
Difficulty
Medium
Time
30-60 minutes
Tools Used
Screwdriver, Power Drill, Wrench Set
Parts Used
1. Remove plastic case/cover. Disconnect air tube from tank.
2. disconnect pressure switch wires, difficult beacuse of the locking feature of the female wire connector.
3. Find something that will grab the switch body and turn it out, cemented in with Lock Tite, used pipe wrench.
4. Order part.
5. Wait a week for part.
6. Receive part, find a 1/4" by 1/8" reducer bushing. Install bushing on the new switch. Careful not to over tighten the plastic switch into the bushing. install the switch into the tapped hole with thread sealant on the bushing.
7. Repair wire terminals, connect wires. Connect air tube to tank.
8. Test compressor. Shut off at correct pressure. Re-assemble cover in to position, fasten in place.
9. Repair the broken screws that hold two of the rubber feeet to the legs, drill out the borken screws, re-tap holes, find more screws, assemble feet to legs.
Did you find this story helpful?
Thanks for voting and helping fellow customers!
safety valve continued releasing air
Michael - August 28, 2019
Tool Type
Compressor
Difficulty
Easy
Time
15-30 minutes
Tools Used
Screwdriver, Wrench Set, none
Parts Used
most likely just need pressure switch. replaced both. now fixed and works perfect.
Did you find this story helpful?
Thanks for voting and helping fellow customers!
would not shut off when max pressure was reached
Alex - July 1, 2019
Tool Type
Compressor
Difficulty
Easy
Time
15-30 minutes
Tools Used
Screwdriver, Pliers, Adjustable Wrench
Parts Used
followed directions found in videos
Did you find this story helpful?
Thanks for voting and helping fellow customers!
Would not stop running
Michael - August 12, 2018
Tool Type
Compressor
Difficulty
Easy
Time
15-30 minutes
Tools Used
Pliers, Wrench Set, T-20 torx driver
Parts Used
Removed the cover, unplugged the wires on the pressure switch, unscrewed the pressure switch and replaced the switch.
Did you find this story helpful?
Thanks for voting and helping fellow customers!
William - April 5, 2018
Tool Type
Compressor
Difficulty
Easy
Time
15-30 minutes
Tools Used
Screwdriver, Adjustable Wrench
Parts Used
Pulled front cover , 4screws, 1 holding manifold. Disconnected wires on old pressure switch, unscrewed old switch, screwed in new switch. Replaced screws, turned compressor on, it cut off correctly. Put faceplate back on. Finished.
Did you find this story helpful?
Thanks for voting and helping fellow customers!
OEM stands for Original Equipment Manufacturer and means the part you’re buying is sourced directly from the manufacturer who made your product. At eReplacementParts, we sell only genuine OEM parts, guaranteeing the part you’re purchasing is of better design and of higher quality than aftermarket parts.
Our product descriptions are a combination of data sourced directly from the manufacturers who made your product as well as content researched and curated by our content & customer service teams. This content is edited and reviewed internally before being made public to customers.
Our customer service team are at the ready daily to answer your part and product questions. We have a dedicated staff with decades of collective experience in helping customers just like you purchase parts to repair their products.
All our part reviews are solicited directly from other customers who have purchased this exact part. While we moderate these reviews for profanity, offensive language or personally identifiable information, these reviews are posted exactly as submitted and no alterations are made by our team.
All our customer repair instructions are solicited directly from other customers just like you who have purchased and replaced this exact part. While we moderate these reviews for profanity, offensive language or personally identifiable information, these reviews are posted exactly as submitted and no alterations are made by our team.
Based on data from past customer purchasing behaviors, these parts are most commonly purchased together along with the part you are viewing. These parts may be necessary or helpful to replace to complete your current repair.
All our installation videos are created and produced in collaboration with our in-house repair technician, Mark Sodja, who has helped millions of eReplacementParts customers over the last 13 years repair their products. Mark has years of experience in selling and repairing both commercial and residential products with a specialty in gas-powered equipment.
This data is collected from customers who submitted a repair instruction after replacing this exact part. Customers can rate how easy the repair was to complete and how long it took. We aggregate this data to provide a repair rating that allows customers to quickly determine the difficulty and time needed to perform their own repair.