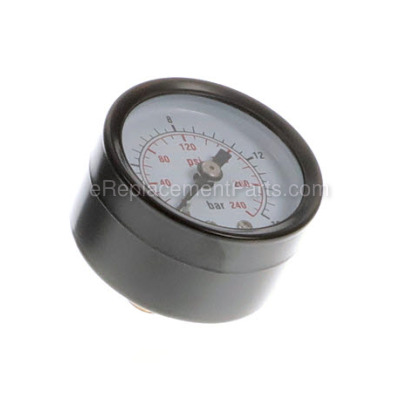


This gauge is an authentic Hitachi replacement part. It is commonly used in machines such as compressors and oil pumps. This part gauges pressure readings in order to maintain the desired pressure. It should be replaced if it is cracked or begins to leak. This is a simple repair that requires a wrench. It is made of metal and sold individually.
Pressure Gauge 881508
OEM part for: Metabo HPT (Hitachi)
Part Number: 881508
$13.31
Usually ships in 7 - 12 business days
7 - 12 business days
Jump To:
Frequently Purchased Together ?
Compatibility
This part will fit the following 11 machines
Metabo HPT (Hitachi)
EC12 Portable Electric 2HP Oil Lubricated Air Compressor View Diagrams & Manuals
EC79 Oil Free 6 Gallon Pancake Air Compressor View Diagrams & Manuals
EC16 Compressor Oil 2 1/2 HP WB View Diagrams & Manuals
EC6B Compressor 1HP Oil Pump View Diagrams & Manuals
EC6C Compressor 1HP Oil less Pump View Diagrams & Manuals
EC89 4-Gallon Portable Twin Stack Air Compressor View Diagrams & Manuals
EC510 6 Ga. Pancake Compressor View Diagrams & Manuals
EC12E4 Compressor View Diagrams & Manuals
EC510E2 Compressor View Diagrams & Manuals
EC510KIT Compressor View Diagrams & Manuals
EC79E3 Compressor View Diagrams & Manuals
Show More Compatible Models
This item works with the following types of products:
- Compressor Parts
Customer Part Reviews ?
Average Rating (out of 5):
Click to filter by ratings:
5 stars
5
4 stars
0
3 stars
0
2 stars
0
1 stars
1
< PREV
- 1
Only place that I could find this item at a reasonable price!
Quick n easy.
Guest -
January 26, 2023
Verified Purchase
Exact parts
My air compressor had a broken regulator. Got all the right parts that I needed to fix my compressor. Delivery was quick and easy
Guest -
September 21, 2021
Verified Purchase
Perfect match for replacement
Just what I needed, and got it in fast delivery
Guest -
April 20, 2021
Verified Purchase
Perfect replacement parts
Better than the original plastic gauges!
Guest -
November 30, 2020
Verified Purchase
Wow fast service!
My husband needed a new gauge for his air compressor. So, of course, I go online and google as I normally do. Lo, and behold, here is the part he needed. (And, of course, he didn't think I found the right one so easy!! lol) He made sure this one was correct, I ordered it, and we received it very fast. It's so great to have this company that has all these small-but essential-parts.
Guest -
November 2, 2019
Verified Purchase
Not fits
I buy a part for my air compressor METABO HPT they recommend (hitachi) part but not fitting
Guest -
December 3, 2021
Verified Purchase
t
t
t -
t days ago
Verified Purchase
eReplacementParts Team
t
Questions & Answers ?
Our customer Service team is at the ready daily to answer your part and product questions.

Ask our Team
We have a dedicated staff with decades of collective experience in helping customers just like you purchase parts to repair their products.
Does this fit my product?Questions & Answers for Pressure Gauge
No questions have been asked yet
Customer Repair Instructions ?
All our customer repair instructions are solicited directly from other customers just like you who have purchased and replaced this exact part.
something hit the gauge
Dennis - June 10, 2022
Tool Type
Compressor
Difficulty
Easy
Time
Less than 15 minutes
Tools Used
Wrench Set
Parts Used
just replaced the gauge. very easy
Did you find this story helpful?
Thanks for voting and helping fellow customers!
Gauge was broken
Stephen - April 22, 2022
Tool Type
Compressor
Difficulty
Easy
Time
Less than 15 minutes
Tools Used
, Open end wrench
Parts Used
Removed and replaced the gauge. Used a wrench to remove the old gauge, wrapped the threads of the new one with teflon tape and put it on the compressor.
Did you find this story helpful?
Thanks for voting and helping fellow customers!
Broken pressure reducer
Terry - September 27, 2021
Tool Type
Compressor
Difficulty
Easy
Time
15-30 minutes
Tools Used
Screwdriver, Adjustable Wrench
Parts Used
Removed and replaced
Did you find this story helpful?
Thanks for voting and helping fellow customers!
Removed pressure reducer and gauge do to normal wear. As a Carpenter the compressor is used daily
Stanley - March 7, 2021
Tool Type
Compressor
Difficulty
Easy
Time
15-30 minutes
Tools Used
Wrench Set, Adjustable Wrench, Plumbers tape for gauge and air fitting
Parts Used
Removed air fitting
Removed pressure reducer gauge
Removed pressure reducer by turning pressure reducer slightly clockwise as not to interfere with tank then removed reducer
Apply plumbers tape to all threaded fittings
Install new pressure reducer then turn reducer back slightly counterclockwise to it’s original position
Install new pressure gauge to pressure reducer
Re install air fitting
Start compressor and set desired pressure
Did you find this story helpful?
Thanks for voting and helping fellow customers!
Broke the intake filter housing and guages
Ralph's - February 11, 2021
Tool Type
Compressor
Difficulty
Easy
Time
15-30 minutes
Tools Used
Screwdriver, Wrench Set
Simple repair. Just one screw for the filter housing.
Unscrewed, Teflon taped new gauges and screwed back on.
Unscrewed, Teflon taped new gauges and screwed back on.
Did you find this story helpful?
Thanks for voting and helping fellow customers!
Pressure gauge was broken
r - May 9, 2017
Tool Type
Compressor
Difficulty
Easy
Time
Less than 15 minutes
Tools Used
Adjustable Wrench
Parts Used
I removed the old broken gauge with a wrench
Wrapped some teflon tape on the threads of the new one and installed it
Wrapped some teflon tape on the threads of the new one and installed it
Did you find this story helpful?
Thanks for voting and helping fellow customers!
I broke the gauge.
Ken - July 3, 2016
Tool Type
Compressor
Difficulty
Easy
Time
Less than 15 minutes
Tools Used
Wrench Set
Parts Used
Removed the old one and put the new one in its place.
Did you find this story helpful?
Thanks for voting and helping fellow customers!
Pressure gauge started leaking badly
John - March 26, 2016
Tool Type
Compressor
Difficulty
Easy
Time
Less than 15 minutes
Tools Used
Wrench Set
Parts Used
I determined it was the pressure gauge by feel, could tell where the air was rushing out. Found the replacement gauge here easily, and it was delivered fast too.
All I had to do was unscrew the old gauge, wrap a little Teflon tape around the threads of the new gauge, and screw it in. Only needs a little bit of tightening, no need to crank on it.
Easy fix. Compressor working perfectly again.
All I had to do was unscrew the old gauge, wrap a little Teflon tape around the threads of the new gauge, and screw it in. Only needs a little bit of tightening, no need to crank on it.
Easy fix. Compressor working perfectly again.
Did you find this story helpful?
Thanks for voting and helping fellow customers!
Pressure gauge was broke
Chas - July 15, 2020
👍 0 of 1 people found this instruction helpful
Tool Type
Compressor
Difficulty
Easy
Time
15-30 minutes
Tools Used
Screwdriver, Pliers, Wrench Set
Parts Used
removed gauge and air reducer put on new ones everything worked well' Easy fix. Price moderate arrival time good.
Did you find this story helpful?
Thanks for voting and helping fellow customers!
OEM stands for Original Equipment Manufacturer and means the part you’re buying is sourced directly from the manufacturer who made your product. At eReplacementParts, we sell only genuine OEM parts, guaranteeing the part you’re purchasing is of better design and of higher quality than aftermarket parts.
Our product descriptions are a combination of data sourced directly from the manufacturers who made your product as well as content researched and curated by our content & customer service teams. This content is edited and reviewed internally before being made public to customers.
Our customer service team are at the ready daily to answer your part and product questions. We have a dedicated staff with decades of collective experience in helping customers just like you purchase parts to repair their products.
All our part reviews are solicited directly from other customers who have purchased this exact part. While we moderate these reviews for profanity, offensive language or personally identifiable information, these reviews are posted exactly as submitted and no alterations are made by our team.
All our customer repair instructions are solicited directly from other customers just like you who have purchased and replaced this exact part. While we moderate these reviews for profanity, offensive language or personally identifiable information, these reviews are posted exactly as submitted and no alterations are made by our team.
Based on data from past customer purchasing behaviors, these parts are most commonly purchased together along with the part you are viewing. These parts may be necessary or helpful to replace to complete your current repair.
All our installation videos are created and produced in collaboration with our in-house repair technician, Mark Sodja, who has helped millions of eReplacementParts customers over the last 13 years repair their products. Mark has years of experience in selling and repairing both commercial and residential products with a specialty in gas-powered equipment.
This data is collected from customers who submitted a repair instruction after replacing this exact part. Customers can rate how easy the repair was to complete and how long it took. We aggregate this data to provide a repair rating that allows customers to quickly determine the difficulty and time needed to perform their own repair.