
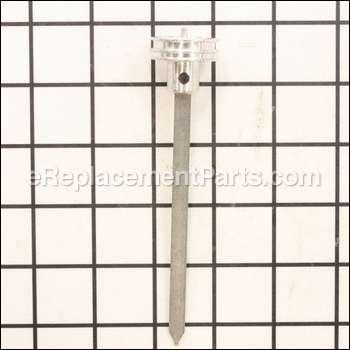
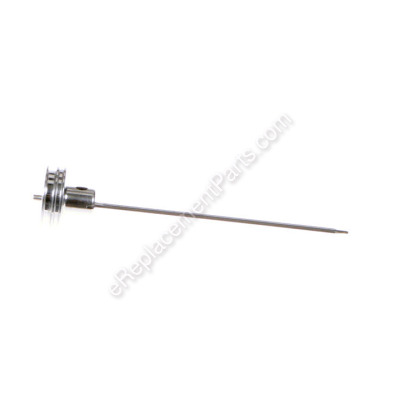


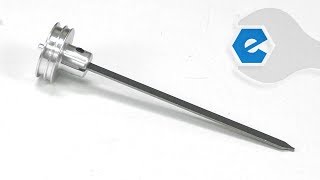
This is an authentic OEM sourced replacement part designed for use with brad nailers. The piston/driver assembly is the part of the nail gun that drives the nail into the material that is being used. Drivers do have a tendency to bend or break if not used correctly or if you are driving nails into extra hard material. This assembly is made out of metal and it is sold individually.
To help extend the life of a pneumatic tool use the specified oil in it daily 4-5 Drops will do every time you use it.
To replace this part you would need a screwdriver
• First you want to remove 4 screws from cap
• Remove the cap
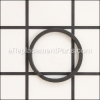
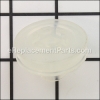
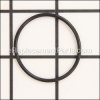
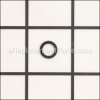
• Remove driver, and take out piston ring and o-ring
• Secure the o-ring and piston ring on new driver
• Install new driver
• Reattach the cap with the 4 screws
Piston Driver Assembly 9R195283-K
OEM part for: Porter Cable, DeWALT
Part Number: 9R195283-K
Jump To:
Product Description ?
- Classification: Part
- Weight: 0.04 lbs.
- Shipping: Ships Worldwide
Frequently Purchased Together ?


Compatibility
This part will fit the following 2 machines
Porter Cable
DeWALT
This item works with the following types of products:
- Nailer Parts
This part replaces obsolete part #: 9R195283
Repair Videos ?
|
Step-by-step instructions for removing and installing the piston driver on your DeWALT brad nailer....
July 30, 2018
|

Customer Part Reviews ?
- 1
Questions & Answers ?
Our customer Service team is at the ready daily to answer your part and product questions.

Ask our Team
We have a dedicated staff with decades of collective experience in helping customers just like you purchase parts to repair their products.
Does this fit my product?Questions & Answers for Piston Driver Assembly
Customer Repair Instructions ?
All our customer repair instructions are solicited directly from other customers just like you who have purchased and replaced this exact part.
The piston blew through the cylinder and all of that had to be replaced and lubricated.
Tool Type
Nailer
Difficulty
Easy
Time
15-30 minutes
Tools Used
, Allen key pack
2. Once open, you wanna get the cylinder loose, I use rag and grab ahold of the cylinder and gently move it in all directions, while trying to pull, mine came out easy because it was cracked, but some can be tight. Take your time and it will pop out.
3. Inspection of broken parts first, then all o-rings that are on the cylinder and the driver were changed.
I use a little grease on each so the o-ring doesn’t twist or not seal properly.
4. Make sure you took note of which way the cylinder goes and the plastic ring that holds it in place, I usually take pictures, and ziplock/label parts that are easy to lose.
5. After all o-rings are changed, install the cylinder, you need to be gentle but push as even as possible so there is a good seal, install the driver after a bit of grease, making sure you are right side up, the driver rod has a groove, make sure you look to see which way yours goes in.
6. Finally done with the hard part, to reinstall the back valve body, first replace the gasket, then line up the bolt holes, the spring will push up, so you need to hold it and install the two adjacent screws first, holding it down prevents stripping the bolts, and once they are all in I will tighten in a sequence,
(R top, L bottom) and same on the other two bolts.
7. Finished, first attach air hose, to check for leaks, if non insert nails and test on a scrap board. Adjust sink depth because that can change with new seals.
My gun works, I love it, rigid is my favorite nailer, and ereplacementparts.com is my go to for buying parts for all my tools!
OEM stands for Original Equipment Manufacturer and means the part you’re buying is sourced directly from the manufacturer who made your product. At eReplacementParts, we sell only genuine OEM parts, guaranteeing the part you’re purchasing is of better design and of higher quality than aftermarket parts.
Our product descriptions are a combination of data sourced directly from the manufacturers who made your product as well as content researched and curated by our content & customer service teams. This content is edited and reviewed internally before being made public to customers.
Our customer service team are at the ready daily to answer your part and product questions. We have a dedicated staff with decades of collective experience in helping customers just like you purchase parts to repair their products.
All our part reviews are solicited directly from other customers who have purchased this exact part. While we moderate these reviews for profanity, offensive language or personally identifiable information, these reviews are posted exactly as submitted and no alterations are made by our team.
All our customer repair instructions are solicited directly from other customers just like you who have purchased and replaced this exact part. While we moderate these reviews for profanity, offensive language or personally identifiable information, these reviews are posted exactly as submitted and no alterations are made by our team.
Based on data from past customer purchasing behaviors, these parts are most commonly purchased together along with the part you are viewing. These parts may be necessary or helpful to replace to complete your current repair.
All our installation videos are created and produced in collaboration with our in-house repair technician, Mark Sodja, who has helped millions of eReplacementParts customers over the last 13 years repair their products. Mark has years of experience in selling and repairing both commercial and residential products with a specialty in gas-powered equipment.
This data is collected from customers who submitted a repair instruction after replacing this exact part. Customers can rate how easy the repair was to complete and how long it took. We aggregate this data to provide a repair rating that allows customers to quickly determine the difficulty and time needed to perform their own repair.