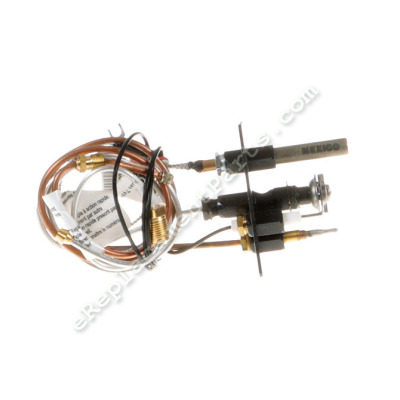
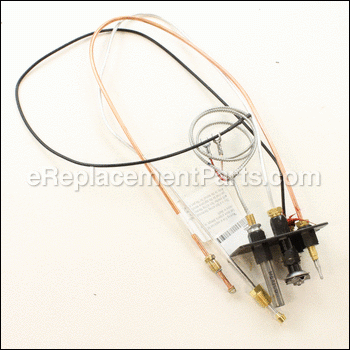
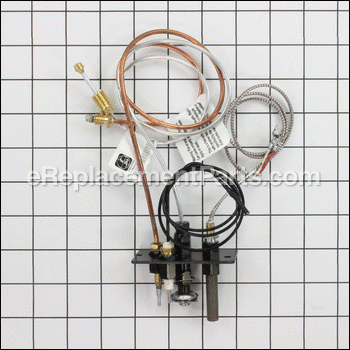
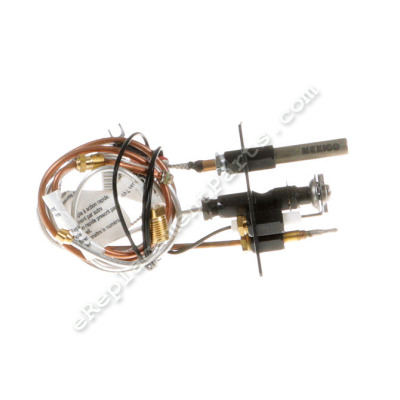
It is an authentic OEM sourced item which is specially produced for use with Majestic and Monessen gas fireplaces. The natural gas pilot assembly may become broken and will need to be replaced. During the installation process, a screwdriver, a set of pliers, a wrench set, and wire cutters might all be needed to replace this part. This is available as an individual replacement part.
Pilot Assy. - Natural Gas 37D0018K
OEM part for: Majestic, Monessen
Part Number: 37D0018K
Compatibility
This Pilot Assy. - Natural Gas will fit the following 46 machines. Confirm this part works with your model, and view the detailed model diagrams and repair help we have to offer.
Majestic
Monessen
Show More Compatible ModelsThis item works with the following types of products:
- Fireplace Parts
- Range Parts
Repair Videos ?
|
Having trouble getting your grill to light up? A common cause of this issue is a defective ignition switch. We'll sho...
November 08, 2012
|
Customer Part Reviews ?
- 1
Questions & Answers ?
Our customer Service team is at the ready daily to answer your part and product questions.

Ask our Team
We have a dedicated staff with decades of collective experience in helping customers just like you purchase parts to repair their products.
Does this fit my product?Questions & Answers for Pilot Assy. - Natural Gas
Customer Repair Instructions ?
All our customer repair instructions are solicited directly from other customers just like you who have purchased and replaced this exact part.
Pilot assembly was bad
Tool Type
Fireplace
Difficulty
Medium
Time
15-30 minutes
Tools Used
Screwdriver, Nutdriver, Adjustable Wrench
Parts Used
Removed lava rocks
Removed logs
Removed and replaced pilot assembly
Replaced pilot assembly
Tool Type
Fireplace
Difficulty
Medium
Time
1-2 hours
Tools Used
Screwdriver, Wrench Set, wire cutters
Parts Used
2. Remove old pilot.
3. Insert new pilot assembly.
4. Remove ignitor, unplug old wire, plug in new wire.
5. Remove old gas line, install new gas line.
6. Remove old thermocouple connection, install new connection.
7. Remove old thermopile wires, install new wires paying attention to wire colors.
8. Seal holes in firebox floor with high temperature sealant. Allow 24 hours for sealant to cure.
9. Ignite pilot and adjust flame size.
10. Light fireplace to test system.
Thermistor was bad
Tool Type
Fireplace
Difficulty
Easy
Time
30-60 minutes
Tools Used
Screwdriver, Pliers, Wrench Set
Parts Used
Turn off the gas, remove the front control panel...like the louvers....lifts off tangs. NOTE: notice the wire colors n locations...take pic with phone. Disconnect the 2-tubes, 3 wires, 2 screws holding the assy in in the firebox. NOTE: the holes which items feed through into the firebox (pic). Since you are replacing them, just use wire cutters n cut the ends off...easier to pullout. Then you can remove the old RTV sealant. NOTE: Careful bending the tubes...they are fragile....if you crimp them, they are no good. Install the new assy feeding the tubes and wire through the same holes. Screw the assy in place. Now you see why you have the burner removed.....so you can reapply RTV sealant. NOTE: If you have some nitrile disposable gloves they are nice for this....so you do not have sealant all over your hands....hard to get off. Connect everything back together as your pics show. Test the unit before replacing the logs or grate. Then finish reassembly.
Pilot was definitely bad , replaced gas valve because it seemed slow in lighting and did not want to get into again if old did not work properly
Tool Type
Fireplace
Difficulty
Medium
Time
1-2 hours
Tools Used
Socket set, Wrench Set, Adjustable Wrench, Tin snips, had to cut some of old pilot assembly
The pilot assembly was too old
Tool Type
Fireplace
Difficulty
Easy
Time
15-30 minutes
Tools Used
Screwdriver, Pliers, Adjustable Wrench
Parts Used
Pilot would go out and unit was old and rusty
Tool Type
Fireplace
Difficulty
Medium
Time
1-2 hours
Tools Used
Screwdriver, Pliers, Wrench Set, Flashlight
Parts Used
2 Took picture of the wires and orientation of the pilot assembly
3. Remove the front panel, glass, logs, rock wool and lava rock (I put in new rock wool and lava rock).
4. Cut the lines and wires made it easier to remove assembly
5. I wore mechanic gloves and long sleeve shirt when removing and installing the assembly.
6. Also I used high temp caulk to replace the caulk the I removed, available at the Auto Parts store
(wear nitrite gloves when reapplying) let dry for 24hrs
7. Reinstalled, made all connections, tested gas line with soapy water for leaks.
8. Fired unit up and is working fine.
Note: On my unit their are numerous sheet metal screws with sharp points that will cut you, that is why the gloves and shirt.
OEM stands for Original Equipment Manufacturer and means the part you’re buying is sourced directly from the manufacturer who made your product. At eReplacementParts, we sell only genuine OEM parts, guaranteeing the part you’re purchasing is of better design and of higher quality than aftermarket parts.
Our product descriptions are a combination of data sourced directly from the manufacturers who made your product as well as content researched and curated by our content & customer service teams. This content is edited and reviewed internally before being made public to customers.
Our customer service team are at the ready daily to answer your part and product questions. We have a dedicated staff with decades of collective experience in helping customers just like you purchase parts to repair their products.
All our part reviews are solicited directly from other customers who have purchased this exact part. While we moderate these reviews for profanity, offensive language or personally identifiable information, these reviews are posted exactly as submitted and no alterations are made by our team.
All our customer repair instructions are solicited directly from other customers just like you who have purchased and replaced this exact part. While we moderate these reviews for profanity, offensive language or personally identifiable information, these reviews are posted exactly as submitted and no alterations are made by our team.
Based on data from past customer purchasing behaviors, these parts are most commonly purchased together along with the part you are viewing. These parts may be necessary or helpful to replace to complete your current repair.
All our installation videos are created and produced in collaboration with our in-house repair technician, Mark Sodja, who has helped millions of eReplacementParts customers over the last 13 years repair their products. Mark has years of experience in selling and repairing both commercial and residential products with a specialty in gas-powered equipment.
This data is collected from customers who submitted a repair instruction after replacing this exact part. Customers can rate how easy the repair was to complete and how long it took. We aggregate this data to provide a repair rating that allows customers to quickly determine the difficulty and time needed to perform their own repair.


