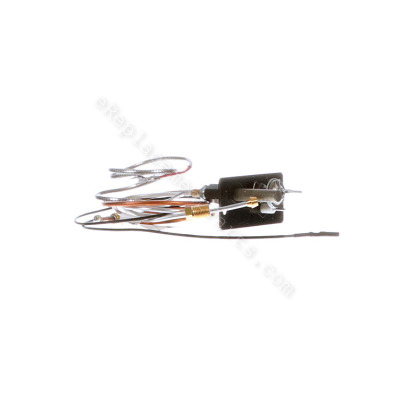


Pilot Assembly 10002264
OEM part for: Majestic, Monessen, Vermont
Part Number: 10002264
$122.06
In Stock
Jump To:
Frequently Purchased Together ?
Compatibility
This part will fit the following 40 machines
Majestic
OXDV30NV Direct Vent Natural Vent Gas Heater View Diagrams & Manuals
RFSDV24 Freestanding Direct Vent Gas Stove View Diagrams & Manuals
RFSDV34 Freestanding Direct Vent Gas Stove View Diagrams & Manuals
ODGSR36A Outdoor Gas Fireplace View Diagrams & Manuals
ODGSR42A Outdoor Gas Fireplace View Diagrams & Manuals
DVBR36 Builder Direct Vent View Diagrams & Manuals
33BDVR BDVR Series Direct Vent Gas Fireplace View Diagrams & Manuals
36BDVR BDVR Series Direct Vent Gas Fireplace View Diagrams & Manuals
39BDVR BDVR Series Direct Vent Gas Fireplace View Diagrams & Manuals
43BDVR BDVR Series Direct Vent Gas Fireplace View Diagrams & Manuals
33LDVR LDVR Series Direct Vent Gas Fireplace View Diagrams & Manuals
36LDVR LDVR Series Direct Vent Gas Fireplace View Diagrams & Manuals
39LDVR LDVR Series Direct Vent Gas Fireplace View Diagrams & Manuals
43LDVR LDVR Series Direct Vent Gas Fireplace View Diagrams & Manuals
NVBC36 NVB Series B-Vent Gas Fireplace View Diagrams & Manuals
NVBR36 NVB Series B-Vent Gas Fireplace View Diagrams & Manuals
NVBR42 NVB Series B-Vent Gas Fireplace View Diagrams & Manuals
NVBC42 NVB Series B-Vent Gas Fireplace View Diagrams & Manuals
DV580 Direct Vent Gas Fireplace View Diagrams & Manuals
DV360 Direct Vent Gas Fireplace View Diagrams & Manuals
DVRT36 Direct Vent Fireplace View Diagrams & Manuals
DVRT39 Direct Vent Fireplace View Diagrams & Manuals
DVRT43 Direct Vent Fireplace View Diagrams & Manuals
33LDVT Builder Top Vent Direct Vent Fireplace View Diagrams & Manuals
36LDVT Builder Top Vent Direct Vent Fireplace View Diagrams & Manuals
39LDVT Builder Top Vent Direct Vent Fireplace View Diagrams & Manuals
43LDVT Builder Top Vent Direct Vent Fireplace View Diagrams & Manuals
360DVS3 Multisided Top/Rear Vent Convertible Fireplace View Diagrams & Manuals
Monessen
ODGR400 (ODGR Series) Outdoor Gas Fireplace View Diagrams & Manuals
ODGR500 (ODGR Series) Outdoor Gas Fireplace View Diagrams & Manuals
OXDV30NV Direct Vent Natural Vent Gas Heater View Diagrams & Manuals
RFSDV24 Freestanding Direct Vent Gas Stove View Diagrams & Manuals
RFSDV34 Freestanding Direct Vent Gas Stove View Diagrams & Manuals
Vermont
Intrepid Direct Vent/Rear Vent Gas Heater View Diagrams & Manuals
RADVT Direct Vent Gas Heater View Diagrams & Manuals
RADVTCS Direct Vent Gas Heater View Diagrams & Manuals
SDDVT Direct Vent/Natural Vent Gas Heater View Diagrams & Manuals
SDDVTCS Direct Vent/Natural Vent Gas Heater View Diagrams & Manuals
SNV30 (3980-3996) Stardance Natural Vent Gas Heater View Diagrams & Manuals
SDV30 (3070-3073) Stardance Direct Vent/Natural Vent Gas Heater View Diagrams & Manuals
Show More Compatible Models
This item works with the following types of products:
- Heater Parts
- Range Parts
- Outdoor Grill Parts
- Fireplace Parts
Repair Videos ?

Articles:
|
Having trouble getting your grill to light up? A common cause of this issue is a defective ignition switch. We'll sho...
November 08, 2012
|

Customer Part Reviews ?
Questions & Answers ?
Our customer Service team is at the ready daily to answer your part and product questions.

Ask our Team
We have a dedicated staff with decades of collective experience in helping customers just like you purchase parts to repair their products.
Does this fit my product?Questions & Answers for Pilot Assembly
No questions have been asked yet
Customer Repair Instructions ?
All our customer repair instructions are solicited directly from other customers just like you who have purchased and replaced this exact part.
The pilot light on my fireplace would go out. I could relight the pilot and start the fireplace, but once it was shut off, the pilot would go out again
James - January 22, 2016
👍 9 of 9 people found this instruction helpful
Tool Type
Fireplace
Difficulty
Medium
Time
30-60 minutes
Tools Used
Screwdriver, Wrench Set, penetrating oil
Parts Used
I decided that after 15 years of use, it would be better to replace the major components that take the most abuse so I opted to purchase the pilot assembly. Take a picture of the log set up before you remove them. Shut the gas off before you do anything. The hardest part of the job was breaking the one mounting screw loose. I used a little penetrating oil and it came right out. I could fish everything through the hole except the thermophile. I had to disconnect that from the assembly and fish it up into the hole separately. I used a phillips screwdriver to terminate the two wires. I took a picture of the wire lugs to make sure I got the correct wires on the terminal. I also used open end wrenches to terminate the thermophile and the thermocouple. An adjustable wrench was too large to fit into the tight space on the controller so make sure you get the correct size open end wrenches first before you proceed. While I was in there, I used a shop vac to clean the dust out around the base of the fireplace.
Did you find this story helpful?
Thanks for voting and helping fellow customers!
Fireplace pilot was on but the flame would not ignite
Dave - January 24, 2017
👍 6 of 6 people found this instruction helpful
Tool Type
Fireplace
Difficulty
Medium
Time
30-60 minutes
Tools Used
Wrench Set, putty knife
Parts Used
Turned the gas off and let the ceramic logs cool off.
put a protective towel or mat on the floor to prevent scratching the floor or burning carpet fibers.
Removed the top grill and door.
Opened the bottom access door.
Take a digital picture of the connections or write them down.
Using a can of compressed air, blow away any dust from around the connections you will disconnect so you do not get any dust in the lines when reconnecting them.
Disconnect the electrical connection first, then gas lines using the correct size small open end box wrenches.
Use a putty knife to scrape away the putty where the ignitor comes through from the bottom.
Loosen the screw securing the ignitor assembly and then carefully pull the assembly up through the hole. Practice not kinking the lines as you will need to install the new part without kinking them.
Install the new assembly, reconnect the gas lines and electrical connections.
Reinstall the door and top grille.
Turn the gas on and start the pilot flame.
Using a small amount of liquid dish washing soap or hand soap and put in just a couple drops of water. Using a Q tip or other small applicator, put the solution around the nuts for the gas lines you reconnected.
Turn the fireplace on and observe for any expanding air bubbles at the gas connections you just tightened. If none, then you do not have a gas leak. If you see small bubbles forming, turn it off and tighten the needed connections slightly more and recheck.
When no leaks, flip up the bottom access door and sit back and enjoy your fireplace
Did you find this story helpful?
Thanks for voting and helping fellow customers!
Pilot low flame: no main fire
Glenn - November 24, 2015
👍 6 of 6 people found this instruction helpful
Tool Type
Fireplace
Difficulty
Easy
Time
15-30 minutes
Tools Used
Screwdriver, Wrench Set
Parts Used
Repairman wants $180 PLUS PARTS just to light the pilot. I purchased a new pilot assembly from ereplacementparts.com for less than half of that (including shipping) and it works like a charm. Extremely easy install (2 threaded nuts and 2 wires). The tubing only goes one way. Put the wires on the same places as the old part. Very easy. Not only did we save well over $100 in labor alone, but we have NEW pilot assembly! Very happy.
Did you find this story helpful?
Thanks for voting and helping fellow customers!
Pilot light can't stay on
Shun - December 7, 2015
👍 6 of 7 people found this instruction helpful
Tool Type
Fireplace
Difficulty
Medium
Time
30-60 minutes
Tools Used
Screwdriver, Socket set
Parts Used
Removing the old pilot assembly was a little challenging, hard to reach or screw stuck etc, but somehow got it done. Always take photos before you start anywhere you work on, so you know where the wires go and other layout etc
Thanks
Thanks
Did you find this story helpful?
Thanks for voting and helping fellow customers!
Repair part fit correctly
Charles - January 13, 2017
👍 3 of 3 people found this instruction helpful
Tool Type
Fireplace
Difficulty
Medium
Time
1-2 hours
Tools Used
Screwdriver, Socket set, Wrench Set, Adjustable Wrench, Flash lights and puddy knife
Parts Used
1. Turn off Gas
2. Remove front glass - logs - lava rocks - back piece metal that log sets on
3. Vacuum fireplace and sides - check to make sure fitting are tight on new pilot assembly
4. Take photo's of pilot - top - bottom - and gas valve so you will know where all new wires go.
5. Make sure your new part looks like you old part - same number wires - lines ect.
6. Remove some small metal parts around pilot
7. Unhook wires - pilot line - ect. that is on the old assembly - the remove old part
8. Install new part - install pilot line - wires - ect.
9. Reinstall metal parts - logs - glass - ect. - turn on gas - light pilot - test
10. Good luck!
Did you find this story helpful?
Thanks for voting and helping fellow customers!
No pilot light, corroded parts
BRIAN - June 3, 2017
👍 2 of 2 people found this instruction helpful
Tool Type
Fireplace
Difficulty
Easy
Time
30-60 minutes
Tools Used
Screwdriver, Wrench Set
Disassembled log set,(be careful not to drop them) removed shields and mounting screws. Removed two nuts holding thermocouple and pilot tube. Attached wires. Reversed procedure and viola! Only trouble was rusted screws.
Did you find this story helpful?
Thanks for voting and helping fellow customers!
Main burner on fireplace would not stay lit. I think the problem was actually a bad switch.
Andrew - November 26, 2016
👍 2 of 2 people found this instruction helpful
Tool Type
Fireplace
Difficulty
Medium
Time
30-60 minutes
Tools Used
Screwdriver, Power Drill, Wrench Set
Parts Used
There is a plate under the fireplace that needs to be removed first. Mine was sealed up with heat compatible silicone, so the first thing to do is cut the plate free with a razor blade or safety knife. There is very little room to get the plate screw off, so you need a short screw driver. For me, the screw was too tight to remove with the screwdriver, so I used a small set of channel locks. Then, you need to remove the screw holding down the pilot assembly. I used an impact driver because the screw was too tight. Finally, I removed the gas lines off the main control unit. Be very careful not to damage the threads though. Re installation is easy, just put it all back as it was.
Did you find this story helpful?
Thanks for voting and helping fellow customers!
pilot would light but the burner would not light- eventually the pilot would go out
Daniel - January 5, 2023
Tool Type
Fireplace
Difficulty
Medium
Time
30-60 minutes
Tools Used
Screwdriver, Pliers, Power Drill, Socket set, Wrench Set, mini rachet screwdriver set
Parts Used
Take photos of the log setup and wiring placement prior to any removal.
You will probably need to spray some WD-40 on the screws to be removed and let them sit a few minutes to loosen the screws.
1. Shut the gas off.
2. Remove logs and ember stones.
3. Remove the front log bracket with 2 Phillips screws.
4. Remove the rear heat shield screwed to the back wall of the firebox. (2 Phillips screws)
5. Disconnect the 2 gas lines of the pilot assembly using open-end box wrenches.
6. Disconnect wires from the controller.
7. Carefully disconnect the igniter wire from the back of the igniter button.
NOTE:
Before trying to remove the old pilot assembly, it's necessary to remove the small heat shield that's fastened with one Phillips screw underneath the hole for the pilot assembly. There is almost no room to work and I needed a mini ratchet Phillips screwdriver to loosen the screw so the pilot assembly could be fished out of the hole in the metal plate.
8. Once the heat shield is removed carefully pull out the pilot wires and the gas lines.
9. Fish the wires and gas lines of the new pilot assembly carefully through the hole taking care not to kink the gas lines.
10. Reinstall the heat shield under the pilot assembly. (Very tight space to work.)
11. Reconnect the wires and gas lines and tighten them. After reconnecting the igniter wire, check the igniter to see if you have a spark. If you do, continue to the next step.
12. Spray a little soapy water on the gas fittings, turn the gas valve back on and check for the smell of gas and leaks where the soapy water was sprayed.
13. Reinstall the rear heat shield and the front bracket for the log assembly.
14. Reinstall the ceramic logs and the stone embers.
15. Reinstall the glass door and fasten it as necessary.
16. Light the pilot and turn the fireplace on and enjoy having heat again.
Did you find this story helpful?
Thanks for voting and helping fellow customers!
fireplace pilot valve replacment
Richard - November 11, 2021
Tool Type
Fireplace
Difficulty
Medium
Time
30-60 minutes
Tools Used
Pliers, Socket set, Wrench Set
Parts Used
removed old unit installed new unit checked for leaks fired up new system and adjusted pilot height works great.
Did you find this story helpful?
Thanks for voting and helping fellow customers!
Fireplace wouldn't light.
Charles - September 28, 2018
Tool Type
Fireplace
Difficulty
Hard
Time
1-2 hours
Tools Used
Screwdriver, Wrench Set, Sharp putty knife
Parts Used
Removed old pilot assy. Installed new. Difficulty is in cramped working area. Gas tubes and electrical connections pass through a one-inch hole in the floor of fireplace. This hole is partially covered by a small plate which is sealed with ample silicone sealant. Care must be taken not to crimp the gas supply tube while threading through the hole. Access hole cover plate is re=installed and new silicone applied. Take care in installing gas tubes to gas valve as threads are fine and made of soft brass. Good Luck
Did you find this story helpful?
Thanks for voting and helping fellow customers!
Load More Install Stories
OEM stands for Original Equipment Manufacturer and means the part you’re buying is sourced directly from the manufacturer who made your product. At eReplacementParts, we sell only genuine OEM parts, guaranteeing the part you’re purchasing is of better design and of higher quality than aftermarket parts.
Our product descriptions are a combination of data sourced directly from the manufacturers who made your product as well as content researched and curated by our content & customer service teams. This content is edited and reviewed internally before being made public to customers.
Our customer service team are at the ready daily to answer your part and product questions. We have a dedicated staff with decades of collective experience in helping customers just like you purchase parts to repair their products.
All our part reviews are solicited directly from other customers who have purchased this exact part. While we moderate these reviews for profanity, offensive language or personally identifiable information, these reviews are posted exactly as submitted and no alterations are made by our team.
All our customer repair instructions are solicited directly from other customers just like you who have purchased and replaced this exact part. While we moderate these reviews for profanity, offensive language or personally identifiable information, these reviews are posted exactly as submitted and no alterations are made by our team.
Based on data from past customer purchasing behaviors, these parts are most commonly purchased together along with the part you are viewing. These parts may be necessary or helpful to replace to complete your current repair.
All our installation videos are created and produced in collaboration with our in-house repair technician, Mark Sodja, who has helped millions of eReplacementParts customers over the last 13 years repair their products. Mark has years of experience in selling and repairing both commercial and residential products with a specialty in gas-powered equipment.
This data is collected from customers who submitted a repair instruction after replacing this exact part. Customers can rate how easy the repair was to complete and how long it took. We aggregate this data to provide a repair rating that allows customers to quickly determine the difficulty and time needed to perform their own repair.