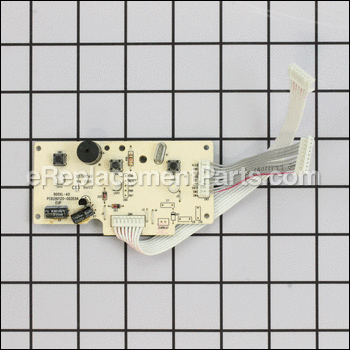
Pcb1 Control Pcb SP0010353
OEM part for: Breville
Part Number: SP0010353
Compatibility
This part will fit the following 4 machines
Breville
This item works with the following types of products:
- Food Processor Parts
This part replaces obsolete part #: BFP800XL/117, BFP800XL117
Questions & Answers ?
Our customer Service team is at the ready daily to answer your part and product questions.

Ask our Team
We have a dedicated staff with decades of collective experience in helping customers just like you purchase parts to repair their products.
Does this fit my product?Questions & Answers for Pcb1 Control Pcb
Customer Repair Instructions ?
All our customer repair instructions are solicited directly from other customers just like you who have purchased and replaced this exact part.
Breville Food Processor BFP800XL dead. wont power up. no signs of life
Tool Type
Food Processor
Difficulty
Medium
Time
30-60 minutes
Tools Used
Screwdriver, Pliers, xacto or other small sharp tool
Parts Used
I assume this is a common problem. The button seals are not designed well so eventually they will leak and damage the circuitry.
1- Remove the bottom. The screws are under the 4 rubber feet.
2- Lift out the vertically mounted PC board to expose the control board
3- Remove the screws that secure the control board
4- Disconnect the 2 ribbon connectors from the control board carefully using a blade to separate the two halves where they join
5- Pull out the control board
6- Remove the buttons and rubber membrane and clean them off and dry thoroughly.
7- Optional: I sealed them with clear silicone caulk
8- Plug in the new board and put it all back together
You can carefully test it before reassembling but be careful of high voltages and big capacitors that can store charge even when the unit is unplugged. To test you will need to push in the safety interlock or the motor wont run.
OEM stands for Original Equipment Manufacturer and means the part you’re buying is sourced directly from the manufacturer who made your product. At eReplacementParts, we sell only genuine OEM parts, guaranteeing the part you’re purchasing is of better design and of higher quality than aftermarket parts.
Our product descriptions are a combination of data sourced directly from the manufacturers who made your product as well as content researched and curated by our content & customer service teams. This content is edited and reviewed internally before being made public to customers.
Our customer service team are at the ready daily to answer your part and product questions. We have a dedicated staff with decades of collective experience in helping customers just like you purchase parts to repair their products.
All our part reviews are solicited directly from other customers who have purchased this exact part. While we moderate these reviews for profanity, offensive language or personally identifiable information, these reviews are posted exactly as submitted and no alterations are made by our team.
All our customer repair instructions are solicited directly from other customers just like you who have purchased and replaced this exact part. While we moderate these reviews for profanity, offensive language or personally identifiable information, these reviews are posted exactly as submitted and no alterations are made by our team.
Based on data from past customer purchasing behaviors, these parts are most commonly purchased together along with the part you are viewing. These parts may be necessary or helpful to replace to complete your current repair.
All our installation videos are created and produced in collaboration with our in-house repair technician, Mark Sodja, who has helped millions of eReplacementParts customers over the last 13 years repair their products. Mark has years of experience in selling and repairing both commercial and residential products with a specialty in gas-powered equipment.
This data is collected from customers who submitted a repair instruction after replacing this exact part. Customers can rate how easy the repair was to complete and how long it took. We aggregate this data to provide a repair rating that allows customers to quickly determine the difficulty and time needed to perform their own repair.


