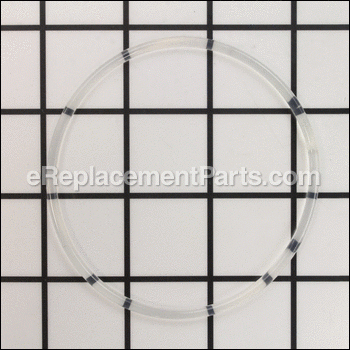
It is a genuine manufacturer sourced replacement part designed for Dewalt belt sanders. This o-ring provides an air-tight seal for the shroud, for correct application make sure to check appropriate diagrams of your equipment. Over time seals and o-rings may shrink, become brittle and crack eventually requiring replacement to maintain peak performance. It is made from durable polymer material and it is sold individually.
O-ring 393749-01
OEM part for: DeWALT
Part Number: 393749-01
Jump To:
Frequently Purchased Together ?
Compatibility
This part will fit the following 11 machines
DeWALT
This item works with the following types of products:
- Sander Parts
Customer Part Reviews ?
- 1
Questions & Answers ?
Our customer Service team is at the ready daily to answer your part and product questions.

Ask our Team
We have a dedicated staff with decades of collective experience in helping customers just like you purchase parts to repair their products.
Does this fit my product?Questions & Answers for O-ring
Customer Repair Instructions ?
All our customer repair instructions are solicited directly from other customers just like you who have purchased and replaced this exact part.
No saw dust extraction
Tool Type
Sander
Difficulty
Medium
Time
15-30 minutes
Tools Used
Screwdriver
Belt drive for dust catcher. The Dewalt manual calls it an o-ring, but really is a small belt that looks like an o ring!
Tool Type
Sander
Difficulty
Easy
Time
Less than 15 minutes
Tools Used
Screwdriver
Parts Used
The blower stop working
Tool Type
Screwdriver
Difficulty
Easy
Time
15-30 minutes
Tools Used
Screwdriver, No
Parts Used
BROKE ORING
Tool Type
Sander
Difficulty
Easy
Time
Less than 15 minutes
Tools Used
Screwdriver, NONE
Parts Used
Belt sander would not exhaust sanding dust
Tool Type
Sander
Difficulty
Easy
Time
Less than 15 minutes
Tools Used
Screwdriver, Torx 20 bit or flat blade screw driver
Parts Used
2. Removed the cover.
3. Removed the motor drive belt. It has splines. Rotate the pulleys as you pull up on the belt and it will come off easily. Take care; it will pinch your fingers if caught between the belt and pulleys.
4. Remove the old dust exhaust port o-ring. It may already be broken, as mine was.
5. Install the o-ring. It will be obvious where it attaches to the dust exhaust port squirrel fan and on the smaller motor drive belt pulley.
6. Reinstall the motor drive belt. If you put it around the larger pulley first, and then the smaller pulley, turning the pulleys as you slip the belt on, it's pretty easy.
7. Reinstall the cover. The screws should be snug, but don't over tighten and strip the plastic threads in the body.
Drive wheel was mangled, drive shaft was broken, o-ring for blower stretched waaaaay out.
Tool Type
Sander
Difficulty
Medium
Time
30-60 minutes
Tools Used
Screwdriver, Adjustable Wrench, T-20 Screwdriver
Remove the 5 T-20's holding the cover plate over the dust-port side.
Remove the o-ring and the drive belt.
Remove the T-20 screws holding the handle on.
Remove the handle. Take a picture so you know where the wires go. You do _not_ need to unplug the switch or muddle with wires.
Remove the T-20 screws holding the cast body together. There are two long ones with nuts on the front of the tool. The rest screw into posts. Make sure you get them all. There's a couple that like to hide where the handle was, and where the tension adjustment are.
I seem to recall needing to remove the tensioning lever, and removing the front roller assembly. There were a couple of screws on the roller assembly, and a nut that I used a monkey wrench on.
Remove the drive wheel. The nut that holds it on is reverse threaded. If you can jamb the drive shaft from moving you can turn the wheel clockwise and the nut will free. The wheel should come off pretty easily too.
Separate everything very carefully. Don't pry hard. You can crack a casting if you forgot or missed a screw. There are some pry-points in the castings to make separation easy.
Remove the drive shaft (you don't have to remove a bearing!), set the new one in, grease things (if you need to) re-seal and put things back together. :-)
I accidentally pried too hard, before getting all the screws out, and broke the casting. Luckily it took a nice clean hole right around the screw head, and I was able to use a washer around the screw head and some J-B weld to make a reasonably solid repair that set quickly and I was able to file things down to the same level they used to be. The tool operates just as well (if not better) than it did before.
I'd also recommend blowing everything out with compressed air as you go. Wear a mask for that. It's a mess in a sander.
OEM stands for Original Equipment Manufacturer and means the part you’re buying is sourced directly from the manufacturer who made your product. At eReplacementParts, we sell only genuine OEM parts, guaranteeing the part you’re purchasing is of better design and of higher quality than aftermarket parts.
Our product descriptions are a combination of data sourced directly from the manufacturers who made your product as well as content researched and curated by our content & customer service teams. This content is edited and reviewed internally before being made public to customers.
Our customer service team are at the ready daily to answer your part and product questions. We have a dedicated staff with decades of collective experience in helping customers just like you purchase parts to repair their products.
All our part reviews are solicited directly from other customers who have purchased this exact part. While we moderate these reviews for profanity, offensive language or personally identifiable information, these reviews are posted exactly as submitted and no alterations are made by our team.
All our customer repair instructions are solicited directly from other customers just like you who have purchased and replaced this exact part. While we moderate these reviews for profanity, offensive language or personally identifiable information, these reviews are posted exactly as submitted and no alterations are made by our team.
Based on data from past customer purchasing behaviors, these parts are most commonly purchased together along with the part you are viewing. These parts may be necessary or helpful to replace to complete your current repair.
All our installation videos are created and produced in collaboration with our in-house repair technician, Mark Sodja, who has helped millions of eReplacementParts customers over the last 13 years repair their products. Mark has years of experience in selling and repairing both commercial and residential products with a specialty in gas-powered equipment.
This data is collected from customers who submitted a repair instruction after replacing this exact part. Customers can rate how easy the repair was to complete and how long it took. We aggregate this data to provide a repair rating that allows customers to quickly determine the difficulty and time needed to perform their own repair.


