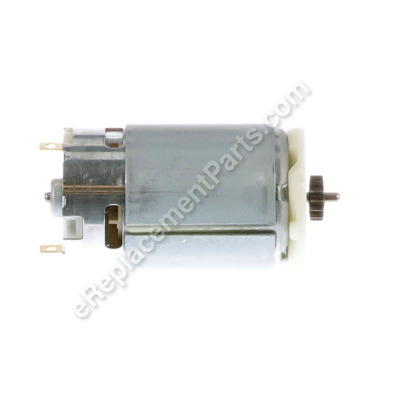
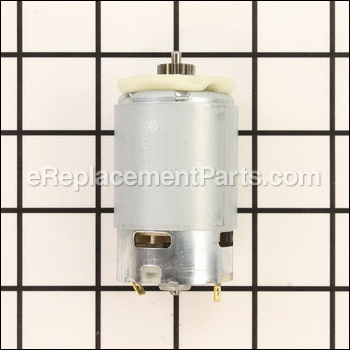
This replacement motor assembly is a high quality item that is supplied directly from original tool manufacturer for use in Milwaukee impact drivers. It is a complete assembly which includes the motor, bearing and the bevel gear. Please note this replacement service motor assembly is sold individually. When replacing the motor make sure to now how the old one is wired, if it helps you may want to take a picture of the old assembly.
Motor Service Assembly 23-30-0090
OEM part for: Milwaukee
Part Number: 23-30-0090
Compatibility
This Motor Service Assembly will fit the following 14 machines. Confirm this part works with your model, and view the detailed model diagrams and repair help we have to offer.
Milwaukee
Show More Compatible ModelsThis item works with the following types of products:
- Impact Driver Parts
- Impact Wrench Parts
Customer Part Reviews ?
- 1
Questions & Answers ?
Our customer Service team is at the ready daily to answer your part and product questions.

Ask our Team
We have a dedicated staff with decades of collective experience in helping customers just like you purchase parts to repair their products.
Does this fit my product?Questions & Answers for Motor Service Assembly
Customer Repair Instructions ?
All our customer repair instructions are solicited directly from other customers just like you who have purchased and replaced this exact part.
Would not run intermittently.
Tool Type
Impact Driver
Difficulty
Medium
Time
15-30 minutes
Tools Used
Nutdriver, Soldering iron
Parts Used
2. Removed screws holding nosepiece on.
3. Removed 2 pins that hold motor to drive.
4. Desoldered 2 wires on motor.
5. Reversed to assemble.
Mine also had a wire loose at the board that needed resoldering.
Bad brushes
Tool Type
Impact Driver
Difficulty
Easy
Time
15-30 minutes
Tools Used
, Solder gun and screw gun
Parts Used
Burnt. 7 year of hard working
Tool Type
Impact Driver
Difficulty
Easy
Time
15-30 minutes
Tools Used
Screwdriver, Soldering gun for wires.
Parts Used
Remove all the body screws (T9) n (T20)
Use small punch to remove guide locking pins. Separate front impact housing.
Use soldering gun to melt lead on wires(on the motor) by heating them. Re install in reverse order. Function check before installing body screws.
Not working one Way, lost power
Tool Type
Impact Driver
Difficulty
Medium
Time
30-60 minutes
Tools Used
, Impact driver
Parts Used
Unsolder 2 wires from bad motor
Solder wires back to new motor
Position motor in the case
Screw cases back
Motor controls shorted out, motor was damaged
Tool Type
Impact Driver
Difficulty
Medium
Time
30-60 minutes
Tools Used
Screwdriver, Soldering gun, torx screw driver sizes 9 and 15
2. Unpacked new parts and laid them out on workbench
3. Disassembled gear train, cleaned, regreased and reassembled.
4. Soldered motor leads from controls to motor ( they are marked )
5.Using old parts as a guide assembled new parts to gearcase then into new handle.
6 Installed screws and special clip in battery well.
7. Finally removed old hog ring and rubber ring and replaced with new ones.
Worn brushes.
Tool Type
Impact Driver
Difficulty
Easy
Time
30-60 minutes
Tools Used
Screwdriver, Socket set, Soldering iron
Parts Used
2. Removed the old brushes.
3. Attached the new.
4. Reassembled and tested.
Motor stopped running
Tool Type
Impact Driver
Difficulty
Easy
Time
1-2 hours
Tools Used
Screwdriver, soldering iron
Parts Used
OEM stands for Original Equipment Manufacturer and means the part you’re buying is sourced directly from the manufacturer who made your product. At eReplacementParts, we sell only genuine OEM parts, guaranteeing the part you’re purchasing is of better design and of higher quality than aftermarket parts.
Our product descriptions are a combination of data sourced directly from the manufacturers who made your product as well as content researched and curated by our content & customer service teams. This content is edited and reviewed internally before being made public to customers.
Our customer service team are at the ready daily to answer your part and product questions. We have a dedicated staff with decades of collective experience in helping customers just like you purchase parts to repair their products.
All our part reviews are solicited directly from other customers who have purchased this exact part. While we moderate these reviews for profanity, offensive language or personally identifiable information, these reviews are posted exactly as submitted and no alterations are made by our team.
All our customer repair instructions are solicited directly from other customers just like you who have purchased and replaced this exact part. While we moderate these reviews for profanity, offensive language or personally identifiable information, these reviews are posted exactly as submitted and no alterations are made by our team.
Based on data from past customer purchasing behaviors, these parts are most commonly purchased together along with the part you are viewing. These parts may be necessary or helpful to replace to complete your current repair.
All our installation videos are created and produced in collaboration with our in-house repair technician, Mark Sodja, who has helped millions of eReplacementParts customers over the last 13 years repair their products. Mark has years of experience in selling and repairing both commercial and residential products with a specialty in gas-powered equipment.
This data is collected from customers who submitted a repair instruction after replacing this exact part. Customers can rate how easy the repair was to complete and how long it took. We aggregate this data to provide a repair rating that allows customers to quickly determine the difficulty and time needed to perform their own repair.


