
This authentic item that is supplied by the original equipment manufacturer for use with NordicTrack and ProForm treadmills. It provides an identical replacement for a worn or a damaged motor belt that drives the walking belt. Make sure to refer to the appropriate diagrams for your model for the correct repair procedure. Note, this high-quality motor belt is made of durable rubber and is sold individually. A screwdriver and a wrench set will be needed to perform this repair.
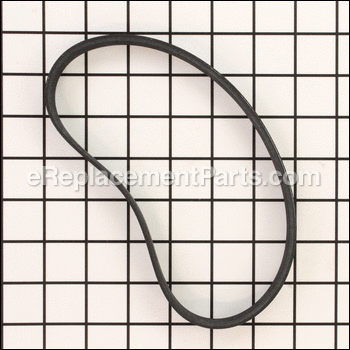
Motor Belt 216749
OEM part for: NordicTrack, ProForm, Weslo
Part Number: 216749
$22.47
In Stock
Jump To:
Frequently Purchased Together ?

Compatibility
This part will fit the following 72 machines
NordicTrack
NTL10750 (C2100) Treadmill View Diagrams & Manuals
NTL10751 (C2100) Treadmill View Diagrams & Manuals
NTL108050 (C2150) Treadmill View Diagrams & Manuals
NTL108051 (C2150) Treadmill View Diagrams & Manuals
NTL108052 (C2150) Treadmill View Diagrams & Manuals
NTL10850 (A2050) Treadmill View Diagrams & Manuals
NTL10851 (A2050) Treadmill View Diagrams & Manuals
NTL109050 (C2200) Treadmill View Diagrams & Manuals
NTL109051 (C2200) Treadmill View Diagrams & Manuals
NTL109052 (C2200) Treadmill View Diagrams & Manuals
NTL109053 (C2200) Treadmill View Diagrams & Manuals
NTL10950 (C2050) Treadmill View Diagrams & Manuals
NTL10951 (C2050) Treadmill View Diagrams & Manuals
NTL10952 (C2050) Treadmill View Diagrams & Manuals
NTL10953 (C2050) Treadmill View Diagrams & Manuals
NTL129050 (C2300) Treadmill View Diagrams & Manuals
NTL129051 (C2300) Treadmill View Diagrams & Manuals
NTL129052 (C2300) Treadmill View Diagrams & Manuals
NTL129053 (C2300) Treadmill View Diagrams & Manuals
NTL12950 (C2270) Treadmill View Diagrams & Manuals
NTL12951 (C2270) Treadmill View Diagrams & Manuals
NTL12952 (C2270) Treadmill View Diagrams & Manuals
NTL12953 (C2270) Treadmill View Diagrams & Manuals
NTL149050 (2800) Viewpoint Treadmill View Diagrams & Manuals
NTL149052 (2800) Viewpoint Treadmill View Diagrams & Manuals
NTL149053 (2800) Viewpoint Treadmill View Diagrams & Manuals
295070 (N2050) View Diagrams & Manuals
295071 (A2050) View Diagrams & Manuals
295090 (C2270) View Diagrams & Manuals
295091 (C2270) View Diagrams & Manuals
295092 (C2270) View Diagrams & Manuals
295093 (C2270) View Diagrams & Manuals
295270 Treadmill View Diagrams & Manuals
295271 (C2050) View Diagrams & Manuals
295272 (C2050) View Diagrams & Manuals
295273 (C2050) View Diagrams & Manuals
295770 (C2100) View Diagrams & Manuals
295771 (C2100) View Diagrams & Manuals
296070 (C2150) View Diagrams & Manuals
296071 (C2150) View Diagrams & Manuals
296072 (C2150) View Diagrams & Manuals
296090 (C2300) View Diagrams & Manuals
296091 (C2300) View Diagrams & Manuals
296092 (C2300) View Diagrams & Manuals
296093 (C2300) View Diagrams & Manuals
296110 (2800) Viewpoint View Diagrams & Manuals
296112 (2800) Viewpoint View Diagrams & Manuals
296113 (2800) Viewpoint View Diagrams & Manuals
296270 (C2200) View Diagrams & Manuals
296271 (C2200) View Diagrams & Manuals
296272 (C2200) View Diagrams & Manuals
296273 (C2200) View Diagrams & Manuals
NETL819060 Treadmill View Diagrams & Manuals
NETL824060 Treadmill View Diagrams & Manuals
30601.0 C2300 Treadmill View Diagrams & Manuals
NTL1075.0 C2100 Treadmill View Diagrams & Manuals
NTL1075.1 C2100 Treadmill View Diagrams & Manuals
NTL10805.1 C2150 Treadmill View Diagrams & Manuals
NTL10805.2 C2150 Treadmill View Diagrams & Manuals
ProForm
PFEX33110 VR980 EKG Bike View Diagrams & Manuals
PFTL58580 585EX Wide Deck Treadmill View Diagrams & Manuals
PFTL58581 585EX Wide Deck Treadmill View Diagrams & Manuals
PFTL58582 585EX Wide Deck Treadmill View Diagrams & Manuals
PFTL58590 525C Target Pulse Analysis Treadmill View Diagrams & Manuals
PFTL912050 Sport 1000 Treadmill View Diagrams & Manuals
PETL30130 360 P Treadmill View Diagrams & Manuals
PETL30131 360 P Treadmill View Diagrams & Manuals
PETL30134 360 P Treadmill View Diagrams & Manuals
Weslo
WLTL4208.1 Cadence Sl30 Treadmill View Diagrams & Manuals
WLTL4208.0 Cadence Sl30 Treadmill View Diagrams & Manuals
WLTL4859.1 Cadence Sl25 Treadmill View Diagrams & Manuals
WLTL4859.0 Cadence Sl25 Treadmill View Diagrams & Manuals
Show More Compatible Models
This item works with the following types of products:
- Treadmill Parts
- Exercise Bike Parts
Customer Part Reviews ?
Average Rating (out of 5):
Click to filter by ratings:
5 stars
3
4 stars
0
3 stars
0
2 stars
0
1 stars
0
< PREV
- 1
Was exactly what I needed to replace the belt in my 17 year old treadmill!
The belt came quicker than I had anticipated! It was exactly what I needed. I was quite surprised that I could still find the part after 17 years of owning my treadmill that is used 2-3x a day. Thank you e-replacement parts for serving well.🤗
Laural -
11 days ago
Verified Purchase
Works fine, great to be back on my treadmill.
Motor Belt fits good.
Guest -
April 2, 2020
Verified Purchase
Treadmill motor belt
Great condition..came fast...will use you people again..thanks
Guest -
November 30, 2019
Verified Purchase
t
t
t -
t days ago
Verified Purchase
eReplacementParts Team
t
Questions & Answers ?
Our customer Service team is at the ready daily to answer your part and product questions.

Ask our Team
We have a dedicated staff with decades of collective experience in helping customers just like you purchase parts to repair their products.
Does this fit my product?Questions & Answers for Motor Belt
No questions have been asked yet
Customer Repair Instructions ?
All our customer repair instructions are solicited directly from other customers just like you who have purchased and replaced this exact part.
Bad vibration and loud noise while treadmill was running.
John - August 9, 2018
👍 1 of 1 people found this instruction helpful
Tool Type
Treadmill
Difficulty
Medium
Time
30-60 minutes
Tools Used
Screwdriver, Socket set
Parts Used
1. Turn off power.
2. Remove cover over motor assembly.
3. Loosen mounting bolt on motor.
4. Loosen both adjusting screws on treadmill belt.
5. Remove adjusting bolt on left side of front roller.
6. Lift left end of front roller and slide it to the left and out of the right side bushing.
7. Remove and replace motor belt and front bushing.
8. Reverse above steps.
My treadmill now runs quieter than it ever has.
Point of interest; my owners manual parts diagram and the diagram on your web site does not show the or list the front roller bushing.
Did you find this story helpful?
Thanks for voting and helping fellow customers!
old belt Stretched out.
Jay - April 3, 2023
Tool Type
Treadmill
Difficulty
Easy
Time
15-30 minutes
Tools Used
Screwdriver, allen wrench
Parts Used
Remove two back Covers loosen tread Remove motor belt replace with new. tighten tred replace covers. done!
Did you find this story helpful?
Thanks for voting and helping fellow customers!
Drive belt was slipping
David - January 25, 2020
Tool Type
Treadmill
Difficulty
Easy
Time
30-60 minutes
Tools Used
Screwdriver, Pliers, Socket set, Tape measure
Parts Used
Loosened walking belt ,removed the motor ,removed the front roller ,took old belt off and replaced it with the new belt,then just replaced everything in the order in which I took them off.
Did you find this story helpful?
Thanks for voting and helping fellow customers!
Worn out drive belt
Scott - January 22, 2016
👍 1 of 2 people found this instruction helpful
Tool Type
Treadmill
Difficulty
Easy
Time
15-30 minutes
Tools Used
Screwdriver, Socket set, Allen wrench
Parts Used
1. Remove the motor compartment cover
2. Remove spring from tensioner
3 Loosen belt tensioners, remember the number of turns
4 Remove screw in opposite side of front drive belt roller
5. Loosen motor mounting bolts
6 Remove the front drive belt side roller, be careful of bushing. Inspect bushing for damage.
7 remove belt.
8. Install new belt on motor pully first, then roller
9. Reinstall all
Did you find this story helpful?
Thanks for voting and helping fellow customers!
OEM stands for Original Equipment Manufacturer and means the part you’re buying is sourced directly from the manufacturer who made your product. At eReplacementParts, we sell only genuine OEM parts, guaranteeing the part you’re purchasing is of better design and of higher quality than aftermarket parts.
Our product descriptions are a combination of data sourced directly from the manufacturers who made your product as well as content researched and curated by our content & customer service teams. This content is edited and reviewed internally before being made public to customers.
Our customer service team are at the ready daily to answer your part and product questions. We have a dedicated staff with decades of collective experience in helping customers just like you purchase parts to repair their products.
All our part reviews are solicited directly from other customers who have purchased this exact part. While we moderate these reviews for profanity, offensive language or personally identifiable information, these reviews are posted exactly as submitted and no alterations are made by our team.
All our customer repair instructions are solicited directly from other customers just like you who have purchased and replaced this exact part. While we moderate these reviews for profanity, offensive language or personally identifiable information, these reviews are posted exactly as submitted and no alterations are made by our team.
Based on data from past customer purchasing behaviors, these parts are most commonly purchased together along with the part you are viewing. These parts may be necessary or helpful to replace to complete your current repair.
All our installation videos are created and produced in collaboration with our in-house repair technician, Mark Sodja, who has helped millions of eReplacementParts customers over the last 13 years repair their products. Mark has years of experience in selling and repairing both commercial and residential products with a specialty in gas-powered equipment.
This data is collected from customers who submitted a repair instruction after replacing this exact part. Customers can rate how easy the repair was to complete and how long it took. We aggregate this data to provide a repair rating that allows customers to quickly determine the difficulty and time needed to perform their own repair.