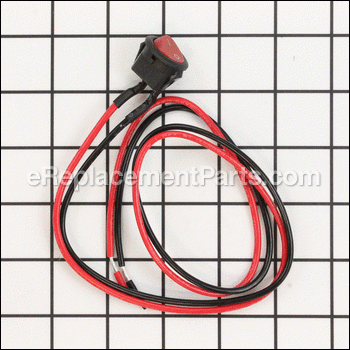
This is a genuine Hoover replacement part that has been sourced from the original manufacturer to be used with upright vacuums. The switch fits into the port on the back of the lower handle/motor housing. The switch is used to relay electricity from the power cord to the motor assembly. This item is sold as an individual replacement part.
Main Switch Assembly H-270046001
OEM part for: Hoover
Part Number: H-270046001
Compatibility
This part will fit the following 5 machines
Hoover
This item works with the following types of products:
- Vacuum Parts
This part replaces obsolete part #: 270046001
Customer Part Reviews ?
- 1
Questions & Answers ?
Our customer Service team is at the ready daily to answer your part and product questions.

Ask our Team
We have a dedicated staff with decades of collective experience in helping customers just like you purchase parts to repair their products.
Does this fit my product?Questions & Answers for Main Switch Assembly
Customer Repair Instructions ?
All our customer repair instructions are solicited directly from other customers just like you who have purchased and replaced this exact part.
Hoover vacuum power switch jammed ON or OFF
Tool Type
Vacuum
Difficulty
Easy
Time
15-30 minutes
Tools Used
Screwdriver, Heatshrink tubing, solder, wire cutters
Parts Used
switch wouldn't power on.
Tool Type
Vacuum
Difficulty
Easy
Time
Less than 15 minutes
Tools Used
Screwdriver, Pliers, needle nose pliers.
Parts Used
Vacuum wolud not turn on. Replaced Broken switch. Problem solved. Thanks for your Help!!
Tool Type
Vacuum
Difficulty
Medium
Time
30-60 minutes
Tools Used
Screwdriver
Parts Used
Bad switch
Tool Type
Vacuum
Difficulty
Medium
Time
30-60 minutes
Tools Used
Screwdriver
Parts Used
2. Removed switch assemble. (Easier said than done. The neck section is a little tricky.)
3. Reassemble.
Works better than ever.
If you think you might not remember how to put it back together correctly, stop and take pictures as you go.
Off/on switch on vacuum appeared to have malfunctioned
Tool Type
Vacuum
Difficulty
Medium
Time
30-60 minutes
Tools Used
Screwdriver, Wire stripper/crimping tool, insulated splicer connectors
Parts Used
2. Carefully popped out assembly with screwdriver and cut wires
3. Spliced remaining wires with new ones on replacement assembly, and crimped together with insulated butt splicer connections using crimping/wire stripper tool.
4.Placed new switch assembly in proper slot, and replaced all screws.
5.Crossed fingers and plugged vacuum in, turned on the switch, and VIOLA!
6.Patted myself on the back for correctly diagnosing the problem and fixing it myself for less than $10, saving me a trip to the repair shop and/or the cost of replacing the entire vacuum like my husband wanted me to do!
OEM stands for Original Equipment Manufacturer and means the part you’re buying is sourced directly from the manufacturer who made your product. At eReplacementParts, we sell only genuine OEM parts, guaranteeing the part you’re purchasing is of better design and of higher quality than aftermarket parts.
Our product descriptions are a combination of data sourced directly from the manufacturers who made your product as well as content researched and curated by our content & customer service teams. This content is edited and reviewed internally before being made public to customers.
Our customer service team are at the ready daily to answer your part and product questions. We have a dedicated staff with decades of collective experience in helping customers just like you purchase parts to repair their products.
All our part reviews are solicited directly from other customers who have purchased this exact part. While we moderate these reviews for profanity, offensive language or personally identifiable information, these reviews are posted exactly as submitted and no alterations are made by our team.
All our customer repair instructions are solicited directly from other customers just like you who have purchased and replaced this exact part. While we moderate these reviews for profanity, offensive language or personally identifiable information, these reviews are posted exactly as submitted and no alterations are made by our team.
Based on data from past customer purchasing behaviors, these parts are most commonly purchased together along with the part you are viewing. These parts may be necessary or helpful to replace to complete your current repair.
All our installation videos are created and produced in collaboration with our in-house repair technician, Mark Sodja, who has helped millions of eReplacementParts customers over the last 13 years repair their products. Mark has years of experience in selling and repairing both commercial and residential products with a specialty in gas-powered equipment.
This data is collected from customers who submitted a repair instruction after replacing this exact part. Customers can rate how easy the repair was to complete and how long it took. We aggregate this data to provide a repair rating that allows customers to quickly determine the difficulty and time needed to perform their own repair.


