eReplacementParts.com
877-346-4814
Ryobi Parts
Repair Parts Home
  
Power Tool Parts
  
Ryobi Parts
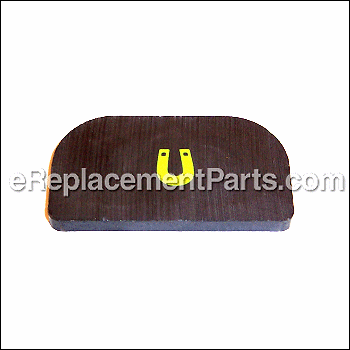
  303001015 Assembly Magnet

Assembly Magnet 303001015

OEM part for: Ryobi

Part Number: 303001015


Install
Videos!
Grid squares measure 1x1 inch
In Stock
Ships within 1 business day
Easy 15-30 minutes (3 rated repairs)?
OEM: Original Equipment Manufacturer ?
Ryobi
Does this d-block d-md-none fit my product?

Product Description ?

This special OEM approved component is made for use with Ryobi drills. It provides an identical replacement for a missing or a faulty magnet that was installed on a new equipment. The magnetic tray conveniently stores screws or other small parts. Check the owners manual and the diagrams of your specific model for the correct installation of this part. It is made of durable material and is sold individually. The #560444002 Foam Rubber that cushions the magnet is sold separately.

  • Classification: Part
  • Weight: 0.10 lbs.
  • Shipping: Ships Worldwide

Compatibility

This part will fit the following 18 machines

Ryobi

P203 1/2" 2-Speed 18V Cordless Drill-Driver View Diagrams & Manuals
P202 Cordless Drill View Diagrams & Manuals
P232 18V Impact Driver View Diagrams & Manuals
P250 18V Autoshift Drill View Diagrams & Manuals
P212G 18 Volt Hammer Drill View Diagrams & Manuals
P236 18V Impact Driver View Diagrams & Manuals
P241 18 Volt Right Angle Drill View Diagrams & Manuals
P271 18V, 1/2" 2-Speed Drill-Driver View Diagrams & Manuals
P234G 18 Volt Impact Driver View Diagrams & Manuals
P213 P213 Compact 18 Volt Hammer Drill View Diagrams & Manuals
P236A 18 Volt Impact Driver View Diagrams & Manuals
P270G 1/2-In. 2-SPEED 18 Volt Drill-Driver View Diagrams & Manuals
P238 18 Volt Impact Driver View Diagrams & Manuals
P290 18 Volt Impact Driver View Diagrams & Manuals
P235 18 Volt Impact Driver View Diagrams & Manuals
P214 18 Volt Drill-Driver View Diagrams & Manuals
P277 1/2-Inch 2-Speed 18 Volt Drill-Driver View Diagrams & Manuals
P251 18 Volt Brushless Hammer Drill View Diagrams & Manuals
Show More Compatible Models
Don't see yours? Try searching our site for :

This item works with the following types of products:

  • Cordless Drill Parts
  • Drill Parts
  • Impact Driver Parts
  • Hammer Drill Parts

This part replaces obsolete part #: 300823003

Customer Part Reviews ?

5
Average Rating (out of 5):
1 Review
Click to filter by ratings:
5 stars
1
4 stars
0
3 stars
0
2 stars
0
1 stars
0
  • Highest Rating
  • Most Recent
< PREV
  • 1
NEXT >
  • Great customer support and service
    I was looking for replacement parts of my Ryobi drill and could not get any other company to respond to my questions they just wanted to sell me things without asking what my issues were. So I remembered my previous experience with ereplacements and gave them another try. Best decision I made! From my first call to my follow up call with there customer support they were extremely knowledgeable and friendly. One of my parts was on back order and the agent reached out via email to inform me of the change. I was surprised but not really because I knew that they would do there best for me the customer. Many thanks to the ereplacements support and customer service team. God bless.
    John - June 11, 2023 Verified Purchase
    t
    t
    t - t days ago Verified Purchase
    eReplacementParts Team
    t

    Questions & Answers ?

    Our customer Service team is at the ready daily to answer your part and product questions.

    photo of team member
    Ask our Team

    We have a dedicated staff with decades of collective experience in helping customers just like you purchase parts to repair their products.

    Does this fit my product?

    Questions & Answers for Assembly Magnet


    No questions have been asked yet

    Customer Repair Instructions ?

    All our customer repair instructions are solicited directly from other customers just like you who have purchased and replaced this exact part.

    Easy 15-30 minutes (3 rated repairs)?

    Motor burned out

    Ernest - December 28, 2020
    Tool Type

    Cordless Drill

    Difficulty

    Easy

    Time

    30-60 minutes

    Tools Used

    Screwdriver, Solder gun

    Open up drill, unsolder old motor, solder in new motor, put back together with screws.
    Did you find this story helpful?
    Thanks for voting and helping fellow customers!

    Impact drill fall on a ladder from a second floor unfinished deck. As I was putting in a aluminum soffit ceiling.

    Pete - March 1, 2017
    Tool Type

    Impact Driver

    Difficulty

    Easy

    Time

    15-30 minutes

    Tools Used

    Screwdriver, Power Drill

    Remove the screws from the old impact. To remove the motor and trigger. Then installed them in the new housing. Replace the magnet that broke. Cleaned a little dirt from the motor. Saw dust etc. Cause the old impact was about 6 years old. Replace all the screws. And tested it out. It's almost like new.
    Did you find this story helpful?
    Thanks for voting and helping fellow customers!

    The housing for my impact driver was beat up from abuse from dropping it and just just every day use.

    Craig - February 1, 2016
    Tool Type

    Impact Driver

    Difficulty

    Easy

    Time

    15-30 minutes

    Tools Used

    , Star driver

    I unscrewed the eight screws holding the case together and the four screws holding the front metal gear case and assembly . Then I needed to split the case apart an the remove the gear case and the motor and switch will all come out together as one piece and just set it in the new housing and need to remove the forward reverse push bar and slide it in the new housing, you may have to pull up on the switch to have it sit right in the bar. Then slid the battery terminal, the metal clip for the belt holder and magnet from the old housing and put them in the new housing, or replace them with the new parts if you bought them. Now put the housing together and put all the screws back in, the four screws for the gear case cover are the smaller screws. The screws are a star with the little tit in the center so the bits you use must have a hole in the center of the star. If you find two little pieces of rubber with the new housing they go inside the housing on a plastic strip so it will hold the motor steady just look at the old case and you will see them one on each side of the housing. Hope this helps.

    Craig
    Did you find this story helpful?
    Thanks for voting and helping fellow customers!

    OEM stands for Original Equipment Manufacturer and means the part you’re buying is sourced directly from the manufacturer who made your product. At eReplacementParts, we sell only genuine OEM parts, guaranteeing the part you’re purchasing is of better design and of higher quality than aftermarket parts.

    Our product descriptions are a combination of data sourced directly from the manufacturers who made your product as well as content researched and curated by our content & customer service teams. This content is edited and reviewed internally before being made public to customers.

    Our customer service team are at the ready daily to answer your part and product questions. We have a dedicated staff with decades of collective experience in helping customers just like you purchase parts to repair their products.

    All our part reviews are solicited directly from other customers who have purchased this exact part. While we moderate these reviews for profanity, offensive language or personally identifiable information, these reviews are posted exactly as submitted and no alterations are made by our team.

    All our customer repair instructions are solicited directly from other customers just like you who have purchased and replaced this exact part. While we moderate these reviews for profanity, offensive language or personally identifiable information, these reviews are posted exactly as submitted and no alterations are made by our team.

    Based on data from past customer purchasing behaviors, these parts are most commonly purchased together along with the part you are viewing. These parts may be necessary or helpful to replace to complete your current repair.

    All our installation videos are created and produced in collaboration with our in-house repair technician, Mark Sodja, who has helped millions of eReplacementParts customers over the last 13 years repair their products. Mark has years of experience in selling and repairing both commercial and residential products with a specialty in gas-powered equipment.

    This data is collected from customers who submitted a repair instruction after replacing this exact part. Customers can rate how easy the repair was to complete and how long it took. We aggregate this data to provide a repair rating that allows customers to quickly determine the difficulty and time needed to perform their own repair.

    eReplacementParts.com
    7174 South 400 West
    Suite 5
    Midvale, UT 84047
    visa mastercard discover american express PayPal