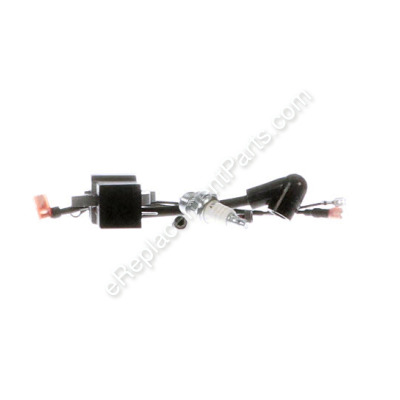


This is a genuine OEM sourced replacement part designed for use with Homelite and Ryobi chainsaws. The ignition module also known as armature-magneto provides current for the ignition system by producing pulses of high voltage for the spark plugs. While there are various reasons for ignition module failure, the primary symptoms usually manifest in the form of extreme difficulty starting your equipment, and eventually, a no-start condition. It is a complete kit which includes a metal ignition module, rubberized lead wire, spark plug and two screws to secure it.
Ignition Kit 984883001
OEM part for: Homelite, Ryobi
Part Number: 984883001
$72.61
Usually ships in 7 - 12 business days
7 - 12 business days
Compatibility
This part will fit the following 63 machines
Ryobi
RY74005D 38cc - 16 in. Chain Saw View Diagrams & Manuals
RY74007D 45cc - 18 in. Chain Saw View Diagrams & Manuals
Homelite
UT10947A Chainsaw View Diagrams & Manuals
D3300 (UT10855) Chainsaw View Diagrams & Manuals
UT-10803 Chainsaw View Diagrams & Manuals
UT10946D 45cc 20 In. Chainsaw View Diagrams & Manuals
UT10927D 38cc 16 In. Chainsaw View Diagrams & Manuals
UT10942D 45cc 18 In. Chainsaw View Diagrams & Manuals
UT10781 Z3800 Chain Saw View Diagrams & Manuals
UT10782 Z3300 Chain Saw View Diagrams & Manuals
UT10785 Z3800c Chain Saw View Diagrams & Manuals
UT10786 Z3300c Chain Saw View Diagrams & Manuals
UT10868 (I3350B) 33cc Chainsaw View Diagrams & Manuals
UT10878 (BCS35) 33cc Chainsaw View Diagrams & Manuals
UT10861 (D3850B) 38cc Chainsaw View Diagrams & Manuals
UT10886 (D3850B) 38cc Chainsaw View Diagrams & Manuals
UT10865 (D3850BC) 38cc Chainsaw View Diagrams & Manuals
UT10866 (D3850BC) 38cc Chainsaw View Diagrams & Manuals
UT10887 (D3850BC) 38cc Chainsaw View Diagrams & Manuals
UT10846 (23AV) 38cc Chainsaw View Diagrams & Manuals
UT10884 (23AV) 38cc Chainsaw View Diagrams & Manuals
UT10856 (23AVW/CC) 38cc Chainsaw View Diagrams & Manuals
UT10858 (23AVW/CC) 38cc Chainsaw View Diagrams & Manuals
UT10885 (23AVW/CC) 38cc Chainsaw View Diagrams & Manuals
UT10888 (23AVW/CC) 38cc Chainsaw View Diagrams & Manuals
UT10869 (I3850B) 38cc Chainsaw View Diagrams & Manuals
UT10867 (I4150B) 45cc Chainsaw View Diagrams & Manuals
UT10860 (D4550B) 45cc Chainsaw View Diagrams & Manuals
UT10864 (D4550BC) 45cc Chainsaw View Diagrams & Manuals
UT10862 (I4550B) 45cc Chainsaw View Diagrams & Manuals
UT10859 (27AV) 45cc Chainsaw View Diagrams & Manuals
UT10863 (27AVW/CC) 45cc Chainsaw View Diagrams & Manuals
UT10874 (27AVW/CC) 45cc Chainsaw View Diagrams & Manuals
UT10847 (20) 33cc Chainsaw View Diagrams & Manuals
UT10941 (B2216CC) 33cc Chainsaw View Diagrams & Manuals
UT10881 (20) 33cc Chainsaw View Diagrams & Manuals
UT10853 (20w/CC) 33cc Chainsaw View Diagrams & Manuals
UT10883 (20w/CC) 33cc Chainsaw View Diagrams & Manuals
UT10870 (23w/CC) 38cc Chainsaw View Diagrams & Manuals
UT10901 33cc Chainsaw View Diagrams & Manuals
UT10880 (D3300) 33cc Chainsaw View Diagrams & Manuals
UT10857 (D3300C) 33cc Chainsaw View Diagrams & Manuals
UT10882 (D3300C) 33cc Chainsaw View Diagrams & Manuals
UT10854 (PS33) 33cc Chainsaw View Diagrams & Manuals
UT10927 38cc 16" Chainsaw View Diagrams & Manuals
UT10927A 38cc 16" Chainsaw View Diagrams & Manuals
UT10946 45cc 18" Chainsaw View Diagrams & Manuals
UT10946A 45cc 18" Chainsaw View Diagrams & Manuals
UT10942A 45cc 20" Chainsaw View Diagrams & Manuals
UT10945 Chainsaw View Diagrams & Manuals
UT10947 33cc 16" Chainsaw View Diagrams & Manuals
UT74123B 38cc 16 Inch Chain Saw View Diagrams & Manuals
UT74125B 45cc 18 Inch Chain Saw View Diagrams & Manuals
UT74123D 38cc 16 Inch Chain Saw View Diagrams & Manuals
UT74125D 45cc 18 Inch Chain Saw View Diagrams & Manuals
UT74127D 45cc 20 Inch Chain Saw View Diagrams & Manuals
UT10901A 33cc-14" Chainsaw View Diagrams & Manuals
UT10926 (Ranger) 33cc-16" Chainsaw View Diagrams & Manuals
UT10910 (Timberman) 45cc-18" Chainsaw View Diagrams & Manuals
UT-10817 Chain Saw View Diagrams & Manuals
UT-10829 Chainsaw View Diagrams & Manuals
PS33 (UT-10788) Chainsaw View Diagrams & Manuals
UT-74125-D 45CC 18-In. Chain Saw View Diagrams & Manuals
Show More Compatible Models
This item works with the following types of products:
- Chain Saw Parts
- Saw Parts
This part replaces obsolete part #: UP07865, UP05851A, A08676A, UP05851, UP07865A
Customer Part Reviews ?
Average Rating (out of 5):
Click to filter by ratings:
5 stars
0
4 stars
0
3 stars
0
2 stars
1
1 stars
0
< PREV
- 1
Great part
The part worked fine, but it took too long to ship. Instead of 3 day ground shipping it took 6 days to receive my part . After i called to complain things started moving on my tracking
Guest -
May 30, 2019
Verified Purchase
t
t
t -
t days ago
Verified Purchase
eReplacementParts Team
t
Questions & Answers ?
Our customer Service team is at the ready daily to answer your part and product questions.

Ask our Team
We have a dedicated staff with decades of collective experience in helping customers just like you purchase parts to repair their products.
Does this fit my product?Questions & Answers for Ignition Kit
No questions have been asked yet
Customer Repair Instructions ?
All our customer repair instructions are solicited directly from other customers just like you who have purchased and replaced this exact part.
Absolutely no spark after chainsaw ran for 10 minutes and quit and randomly ignited, but wouldn't stay running
Richard - April 24, 2018
👍 6 of 6 people found this instruction helpful
Tool Type
Chain Saw
Difficulty
Easy
Time
15-30 minutes
Tools Used
Screwdriver
Parts Used
1, Set the ignition switch to "Stop".
2. Remove top cover by removing three screws.
3. Turn saw on its side to remove Pull Start cover by removing 4 screws.
4. Disconnect spark plug boot and kill switch wire.
5. Turn the wheel so that the magnets on the side of the wheel facing away from the coil.
6. Remove two screws and ground strap securing the coil near the pull wheel and remove.
7. Inspect the magnet surfaces. Mine were rusted over, which it turns out is why I had no spark.
8. Clean the magnet surfaces by sanding with coarse grit sandpaper.
9. Place the new coil in place with the kill switch post facing the top of the saw, not facing the pull wheel.
10. Secure the two screws with the ground strap in place, but don't tighten.
11. Push the coil away from the wheel until it stops on the screws.
12. Turn the wheel so that the magnets face the bottom of the coil.
13. Insert a business card (or similarly thin piece of stock paper or cardboard) between the coil and the magnets.
14. Push the coil to meet the business card and tighten the screws.
15. Replace the kill switch wire followed by the wheel cover and top cover.
16. With spark plug boot attached to spark plug, kill switch on, and end of spark plug touching metal, pull the wheel several times to ensure that spark is visible.
17. Insert spark plug, tighten appropriately. and replace spark plug boot.
Note: My old coil was not the problem, it was the rusted surface of the magnets. Check this and the cleanliness of the coil facing the magnets before spending the money for a part you don't need.
Did you find this story helpful?
Thanks for voting and helping fellow customers!
No Spark
John - June 22, 2018
👍 3 of 3 people found this instruction helpful
Tool Type
Chain Saw
Difficulty
Easy
Time
15-30 minutes
Tools Used
Screwdriver, Wrench Set
Parts Used
1. Remove top cover with Torx Bit or Screwdriver.
2, Remove side cover with Torx Bit or Screwdriver
3. Remove ignition coil (Magneto) screws, spark plug wires and shut off wire.
4, Replace Magneto and snug screws with magneto all the way up in slots.
5. Fold a strip of paper in half and put it in between magneto and flywheel, rotate magneto until the magnets are centered under magneto. Loosen up mounting screws and let magneto contact paper.
6. Tighten Magneto mounting screws, remove paper/
7. Replace shut of wires and side cover.
8. Replace Spark Plug and Spark Plug Wire.
9. Replace top cover and start up motor!
Did you find this story helpful?
Thanks for voting and helping fellow customers!
Nothing was wrong with this product.
Daniel - May 21, 2017
👍 2 of 3 people found this instruction helpful
Tool Type
Chain Saw
Difficulty
Easy
Time
Less than 15 minutes
Tools Used
Screwdriver
Parts Used
Used my screwdriver to install the new coil. Very easy to do.
Did you find this story helpful?
Thanks for voting and helping fellow customers!
OEM stands for Original Equipment Manufacturer and means the part you’re buying is sourced directly from the manufacturer who made your product. At eReplacementParts, we sell only genuine OEM parts, guaranteeing the part you’re purchasing is of better design and of higher quality than aftermarket parts.
Our product descriptions are a combination of data sourced directly from the manufacturers who made your product as well as content researched and curated by our content & customer service teams. This content is edited and reviewed internally before being made public to customers.
Our customer service team are at the ready daily to answer your part and product questions. We have a dedicated staff with decades of collective experience in helping customers just like you purchase parts to repair their products.
All our part reviews are solicited directly from other customers who have purchased this exact part. While we moderate these reviews for profanity, offensive language or personally identifiable information, these reviews are posted exactly as submitted and no alterations are made by our team.
All our customer repair instructions are solicited directly from other customers just like you who have purchased and replaced this exact part. While we moderate these reviews for profanity, offensive language or personally identifiable information, these reviews are posted exactly as submitted and no alterations are made by our team.
Based on data from past customer purchasing behaviors, these parts are most commonly purchased together along with the part you are viewing. These parts may be necessary or helpful to replace to complete your current repair.
All our installation videos are created and produced in collaboration with our in-house repair technician, Mark Sodja, who has helped millions of eReplacementParts customers over the last 13 years repair their products. Mark has years of experience in selling and repairing both commercial and residential products with a specialty in gas-powered equipment.
This data is collected from customers who submitted a repair instruction after replacing this exact part. Customers can rate how easy the repair was to complete and how long it took. We aggregate this data to provide a repair rating that allows customers to quickly determine the difficulty and time needed to perform their own repair.