
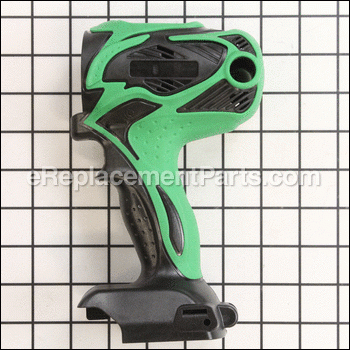
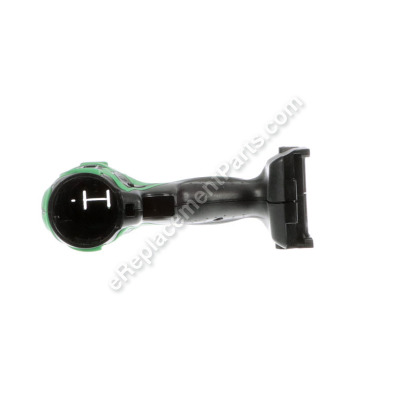


This replacement housing set is designed for Hitachi cordless drill drivers. It is an authentic high quality item that is sourced directly from original equipment manufacturer. This set contains both the left and the right sides of the housing. Please note, the screws that hold the pieces together are not included, they are sold separately. This clamshell set is made from durable plastic and it is sold individually. Replacing this housing set you will need a screwdriver.
Housing Set 330594
OEM part for: Metabo HPT (Hitachi)
Part Number: 330594
$30.49
In Stock
Compatibility
This Housing Set will fit the following 2 machines. Confirm this part works with your model, and view the detailed model diagrams and repair help we have to offer.
Metabo HPT (Hitachi)
This item works with the following types of products:
- Cordless Drill Parts
- Drill Parts
Customer Part Reviews ?
Questions & Answers ?
Our customer Service team is at the ready daily to answer your part and product questions.

Ask our Team
We have a dedicated staff with decades of collective experience in helping customers just like you purchase parts to repair their products.
Does this fit my product?Questions & Answers for Housing Set
No questions have been asked yet
Customer Repair Instructions ?
All our customer repair instructions are solicited directly from other customers just like you who have purchased and replaced this exact part.
I dropped drill and broke the housing in a way that prevented the battery from locking in.
Jonathan - December 7, 2016
👍 4 of 4 people found this instruction helpful
Tool Type
Cordless Drill
Difficulty
Medium
Time
15-30 minutes
Tools Used
Screwdriver
Parts Used
1. Remove all screws holding the two halves of the housing together.
2. Carefully remove battery connection assembly, trigger/LED assembly, and drill cylinder from the half-housing. Try not to dislodge the low/high setting or direction toggle, and take picture or remember how these were oriented.
3. Carefully reinsert entire drill assembly into new half-body. Take care not to dislodge the magnets on the rear of the drill cylinder (these replace the brushes in some drills).
4. Ensure everything is in correct position, gently put other body half onto drill and tighten screws.
Did you find this story helpful?
Thanks for voting and helping fellow customers!
I dropped my cordless drill and the housing broke just above the battery
Eugene - April 22, 2020
Tool Type
Cordless Drill
Difficulty
Easy
Time
Less than 15 minutes
Tools Used
Screwdriver
Parts Used
1. Removed all of the housing retaining screws.
2. Transferred all parted from old housing to new one.
3. Reinstalled the housing retaining screws.
2. Transferred all parted from old housing to new one.
3. Reinstalled the housing retaining screws.
Did you find this story helpful?
Thanks for voting and helping fellow customers!
broken housing
James - May 28, 2019
Tool Type
Cordless Drill
Difficulty
Easy
Time
15-30 minutes
Tools Used
Screwdriver
Parts Used
1. Opened the broken housing by removing the screws and removing one side of the housing from the components.
2. Matched the new housing with the one still containing the drill components.
3.Swapped the drill components from the old housing into the new housing to ensure proper placement.
4. Replaced the brush set while the housing was open
5. Put the opposite side housing onto the new housing containing the drill components and screwed the two housing sides together.
6. Tested the drill
Did you find this story helpful?
Thanks for voting and helping fellow customers!
Case broken battery wouldn't stay in
Marshall - July 20, 2018
Tool Type
Cordless Drill
Difficulty
Easy
Time
15-30 minutes
Tools Used
Screwdriver
Parts Used
Removed all the screw's and remove 1/2 of the case and install the new half of case then flipped over and put the other half on and put the screw's back in and it was done
Did you find this story helpful?
Thanks for voting and helping fellow customers!
One of my volunteers at Habitat for Humanity of Metro Louisville dropped my drill and the lower section broke into pieces.
Chuck - June 10, 2018
Tool Type
Cordless Drill
Difficulty
Easy
Time
30-60 minutes
Tools Used
Screwdriver, Socket set, Wrench Set
Parts Used
First, I was amazed that when I typed in my model number that the part was still available! I have had it for several years and like it because it is not as heavy as my DeWalt or Ryobi drills. Removed the old housing. I needed to clean several of the parts off before putting it back together because of the years of use and accumulated dirt and grime. Once I got the trigger, reversing switch and the speed control switch cleaned up it went right back together.
Did you find this story helpful?
Thanks for voting and helping fellow customers!
Ears that hold the battery in place broke when drill was knocked off work bench.
Sherman - March 10, 2018
Tool Type
Cordless Drill
Difficulty
Medium
Time
30-60 minutes
Tools Used
Screwdriver
Parts Used
Removed the case (phillips screws).
Installed drive assembly into new case.
This is an exact fit and requires you pay attention to how the assembly sat in the old case. Note: you do not have to take off the chuck or the head of the drill to replace the case.
Installed new case. Note: The case fit perfectly, but, the screw hole for the belt clip is to large. I had to use a larger screw..
Did you find this story helpful?
Thanks for voting and helping fellow customers!
Dropped drill and broke the plastic housing.
Henry - January 30, 2018
Tool Type
Cordless Drill
Difficulty
Easy
Time
15-30 minutes
Tools Used
Screwdriver
Parts Used
Removed all of the screws, took off one broken side, then replaced the removed broken part with the new replacement new part the repeated the process in the other side, reinstalled the screws and was done. Very easy repair.
Did you find this story helpful?
Thanks for voting and helping fellow customers!
Battery clip broke off after a hard fall
Gary - January 13, 2018
Tool Type
Cordless Drill
Difficulty
Easy
Time
Less than 15 minutes
Tools Used
Screwdriver
Parts Used
1.I removed all the screws (8 of them I believe
2.I separated the case and removed the one half.
3.I put new half of case on then flipped drill over and removed other half.
4.I then made sure everything was lined up properly like the wires,trigger, the light etc.
5.I then put the other new half back on and put screws in and tightened then, put battery in to check to see if everything work.
6. Put drill back in bag ready to be used for next time
Did you find this story helpful?
Thanks for voting and helping fellow customers!
OEM stands for Original Equipment Manufacturer and means the part you’re buying is sourced directly from the manufacturer who made your product. At eReplacementParts, we sell only genuine OEM parts, guaranteeing the part you’re purchasing is of better design and of higher quality than aftermarket parts.
Our product descriptions are a combination of data sourced directly from the manufacturers who made your product as well as content researched and curated by our content & customer service teams. This content is edited and reviewed internally before being made public to customers.
Our customer service team are at the ready daily to answer your part and product questions. We have a dedicated staff with decades of collective experience in helping customers just like you purchase parts to repair their products.
All our part reviews are solicited directly from other customers who have purchased this exact part. While we moderate these reviews for profanity, offensive language or personally identifiable information, these reviews are posted exactly as submitted and no alterations are made by our team.
All our customer repair instructions are solicited directly from other customers just like you who have purchased and replaced this exact part. While we moderate these reviews for profanity, offensive language or personally identifiable information, these reviews are posted exactly as submitted and no alterations are made by our team.
Based on data from past customer purchasing behaviors, these parts are most commonly purchased together along with the part you are viewing. These parts may be necessary or helpful to replace to complete your current repair.
All our installation videos are created and produced in collaboration with our in-house repair technician, Mark Sodja, who has helped millions of eReplacementParts customers over the last 13 years repair their products. Mark has years of experience in selling and repairing both commercial and residential products with a specialty in gas-powered equipment.
This data is collected from customers who submitted a repair instruction after replacing this exact part. Customers can rate how easy the repair was to complete and how long it took. We aggregate this data to provide a repair rating that allows customers to quickly determine the difficulty and time needed to perform their own repair.