eReplacementParts.com
877-346-4814
DeLonghi Parts
Repair Parts Home
  
Appliance Parts
  
DeLonghi Parts
  GL1003 Heating Element

Heating Element GL1003

OEM part for: DeLonghi

Part Number: GL1003


Install
Videos!
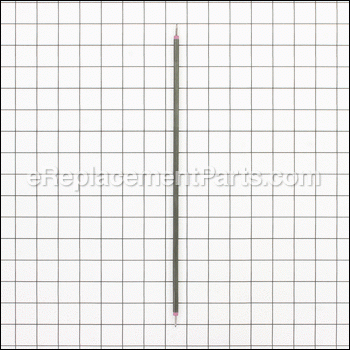
Grid squares measure 1x1 inch
Heating Element - GL1003:DeLonghiHeating Element - GL1003:DeLonghi
In Stock
Ships within 1 business day
Medium 1-2 hours (2 rated repairs)?
OEM: Original Equipment Manufacturer ?
DeLonghi
Does this d-block d-md-none fit my product?

Product Description ?

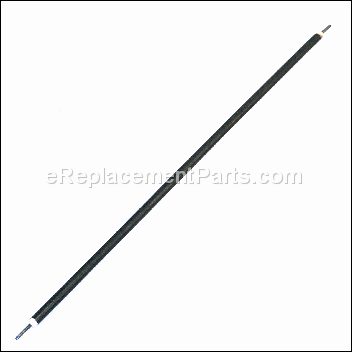
This is an authentic replacement part manufactured for use with DeLonghi toaster ovens. The heating element is used on the bottom side of the cabinet and used to radiate heat. This heating element is sold individually, please note two are required.

  • Classification: Part
  • Weight: 0.14 lbs.
  • Shipping: Ships Worldwide

Compatibility

This part will fit the following 10 machines

DeLonghi

EO2058 Toaster Oven View Diagrams & Manuals
EO2060 Toaster Oven W/Rotisserie View Diagrams & Manuals
RO2050 Toaster Oven View Diagrams & Manuals
RO2058 Toaster Oven View Diagrams & Manuals
EO2058 (118452300) Toaster Oven View Diagrams & Manuals
DO2058 (118852300) Toaster Oven View Diagrams & Manuals
RO2050 (0118451400) Toaster Oven View Diagrams & Manuals
RO2050B (0118451401) Toaster Oven View Diagrams & Manuals
RO2058 (118453500) Convection Toaster Oven View Diagrams & Manuals
EO2060 (118450200) Toaster Oven W/Rotisserie View Diagrams & Manuals
Show More Compatible Models
Don't see yours? Try searching our site for :

This item works with the following types of products:

  • Convection Oven Parts
  • Toaster Parts

Customer Part Reviews ?

5
Average Rating (out of 5):
4 Reviews
Click to filter by ratings:
5 stars
4
4 stars
0
3 stars
0
2 stars
0
1 stars
0
  • Highest Rating
  • Most Recent
< PREV
  • 1
NEXT >
  • Works good so far
    On time delivery, great customer service.
    Guest - April 28, 2021 Verified Purchase
    Repairing Delonghi Toaster Oven
    They say patience is virtue, and it is very true especially when it comes to repairing a toaster oven, but the benefits are with it. My two top heating elements over time became deformed, (not sure how that happened), and eventually stopped working on my Delonghi Toaster Oven. I was just replacing the top heating elements since the bottom ones were working. I started by removing all the screws on the bottom and sides, and there are quite a few of them. Two of them have a triangle head on the bottom, so I just used a small narrow screwdriver and that worked. From here I was able to wiggle off the black U-shaped frame. At that point I now had access to all the heating elements. Un-attached as follows: 1) carefully slip off the rubber silicon casing at each end of the heating element, 2) unscrew the first nut holding the connecting wire in place, 3) remove the wire that is attached to each element, 4) remove the second nut hold the heating element against the frame. The problem with removing the nuts, is that they are soldered in using a thread-locking adhesive. The only way I found to loosen the adhesive was to use a heating gun (that I had from years ago), and a couple of electronic pliers, both short and long nosed. If I had a socket set at the time, maybe that would have worked without the need to use the heat gun, hard to say. When the new heating elements arrived from eReplacement, they had this extra piece of metal for positioning, which the OEM did not have. Just leave it on since it is just there for positioning into the frame hole. Re-assemble as follows: 1) Re-attach the first nut to secure the heating element to the frame, 2) re-attach the wire end, 3) re-attach the second nut to hold the wire in place, 4) slip back on the rubber silicon casing. No need to add thread-locking adhesive, since I am not driving the appliance on Hwy #401. Patience is required again, slowly wiggle back on the black u-shape frame, re-attach all the screws and your are done! I turned it back on, and the toaster worked as if brand new again. For shipping, eReplacement uses iGlobal for all international orders. If ordering from Canada, make sure to use your Canadian credit card at check out. Initially I used my U.S. credit card, not realizing iGlobal converted the payment to Canadian funds which covered the conversion from US to CDN dollar. The shipping cost is also very high for such a light item, but because the original order had to be cancelled and reordered use my Canadian credit card, iGlobal gave me a break on the shipping because of the inconvenience and reduced the shipping cost by 50%, (iGlobal was fair that way). Also, if you order less than $20 CDN, it is exempt custom charges.
    iGlobal - December 18, 2020 Verified Purchase
    Parts worked as expected!
    Delivered Parts as shown on their Web page. I highly recommend them.
    Guest - April 7, 2020 Verified Purchase
    Great service and part
    Really great all in one piece works great
    Guest - August 8, 2019 Verified Purchase
    t
    t
    t - t days ago Verified Purchase
    eReplacementParts Team
    t

    Questions & Answers ?

    Our customer Service team is at the ready daily to answer your part and product questions.

    photo of team member
    Ask our Team

    We have a dedicated staff with decades of collective experience in helping customers just like you purchase parts to repair their products.

    Does this fit my product?

    Questions & Answers for Heating Element


    No questions have been asked yet

    Customer Repair Instructions ?

    All our customer repair instructions are solicited directly from other customers just like you who have purchased and replaced this exact part.

    Medium 1-2 hours (2 rated repairs)?

    Upper heating elements burned out

    John - July 27, 2017
    👍 5 of 6 people found this instruction helpful
    Tool Type

    Convection Oven

    Difficulty

    Hard

    Time

    1-2 hours

    Tools Used

    Screwdriver, Pliers, Nutdriver

    Removed the cover from the toaster oven. Caution DeLonghi uses several security screws to impede this process. My $4 security bit set from home center makes short work of this issue.
    The most vexing issue is the use of thread locker on the nuts holding the electrical connections to the heating elements. It's obvious that the OEM wanted to make replacing the heater element as difficult as possible. I was not deterred and succeeded in replacing the upper heating elements with the excellent ones provided by the vendor on this site

    John Z
    Did you find this story helpful?
    Thanks for voting and helping fellow customers!

    One of the four heating elements failed

    TED - September 28, 2016
    👍 2 of 2 people found this instruction helpful
    Tool Type

    Convection Oven

    Difficulty

    Easy

    Time

    1-2 hours

    Tools Used

    Screwdriver, Blind (pop) rivet gun, multi meter

    1 Isolated each element electrically
    2 Checked resistance of same
    3 Determined that one element had failed
    4 Ordered replacement
    5 Upon delivery, replaced same
    6 Reassembled appliance, using rivets instead of screws.
    7 Electrically tested entire device & confirmed continuity and safety
    8 Connected to outlet and confirmed function and amperage draw.
    9 Appliance performs as advertised
    Did you find this story helpful?
    Thanks for voting and helping fellow customers!

    OEM stands for Original Equipment Manufacturer and means the part you’re buying is sourced directly from the manufacturer who made your product. At eReplacementParts, we sell only genuine OEM parts, guaranteeing the part you’re purchasing is of better design and of higher quality than aftermarket parts.

    Our product descriptions are a combination of data sourced directly from the manufacturers who made your product as well as content researched and curated by our content & customer service teams. This content is edited and reviewed internally before being made public to customers.

    Our customer service team are at the ready daily to answer your part and product questions. We have a dedicated staff with decades of collective experience in helping customers just like you purchase parts to repair their products.

    All our part reviews are solicited directly from other customers who have purchased this exact part. While we moderate these reviews for profanity, offensive language or personally identifiable information, these reviews are posted exactly as submitted and no alterations are made by our team.

    All our customer repair instructions are solicited directly from other customers just like you who have purchased and replaced this exact part. While we moderate these reviews for profanity, offensive language or personally identifiable information, these reviews are posted exactly as submitted and no alterations are made by our team.

    Based on data from past customer purchasing behaviors, these parts are most commonly purchased together along with the part you are viewing. These parts may be necessary or helpful to replace to complete your current repair.

    All our installation videos are created and produced in collaboration with our in-house repair technician, Mark Sodja, who has helped millions of eReplacementParts customers over the last 13 years repair their products. Mark has years of experience in selling and repairing both commercial and residential products with a specialty in gas-powered equipment.

    This data is collected from customers who submitted a repair instruction after replacing this exact part. Customers can rate how easy the repair was to complete and how long it took. We aggregate this data to provide a repair rating that allows customers to quickly determine the difficulty and time needed to perform their own repair.

    eReplacementParts.com
    7174 South 400 West
    Suite 5
    Midvale, UT 84047
    visa mastercard discover american express PayPal