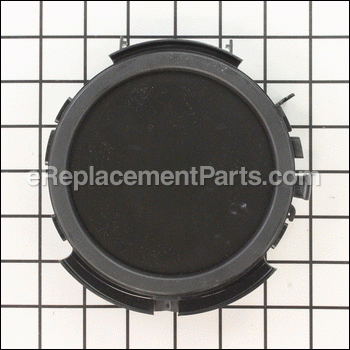

Heating Element Cpl. BR67050282
OEM part for: Braun
Part Number: BR67050282
$27.25
Usually ships in 7 - 12 business days
7 - 12 business days
Compatibility
This part will fit the following 7 machines
Braun
KF500 3104 Aroma Passion View Diagrams & Manuals
KF510 3104 Aroma Passion View Diagrams & Manuals
KF520 3104 Aroma Passion View Diagrams & Manuals
KF540 3104 Aroma Passion View Diagrams & Manuals
KF550 3104 Aroma Passion View Diagrams & Manuals
KF560 3104 Aroma Passion View Diagrams & Manuals
KF570 3104 Aroma Passion View Diagrams & Manuals
Show More Compatible Models
This item works with the following types of products:
- Coffee Maker Parts
This part replaces obsolete part #: 67050282
Questions & Answers ?
Our customer Service team is at the ready daily to answer your part and product questions.

Ask our Team
We have a dedicated staff with decades of collective experience in helping customers just like you purchase parts to repair their products.
Does this fit my product?Questions & Answers for Heating Element Cpl.
No questions have been asked yet
Customer Repair Instructions ?
All our customer repair instructions are solicited directly from other customers just like you who have purchased and replaced this exact part.
Heating element failed - coffeemaker would power on but not function
David - March 8, 2021
Tool Type
Coffee Maker
Difficulty
Medium
Time
15-30 minutes
Tools Used
Screwdriver
Parts Used
Overall an easy repair. Disassembly took a little time but just takes patience.
1. Removed single security torx screw. I had Torx but not security Torx screwdrivers. After watching a few you tube videos I used a small flathead screwdriver to remove the screw.
2. Using a small screwdriver and my fingers, I pryed the clips around the bottom and removed.
3. I took a picture of the assembly to be sure I remember how it went together.
4. Removed the two wires from the old heating element.
5. Removed the two water tubes from the old heating element.
6. Removed the old heating element.
7. Snap in the new heating element and re-assemble.
Did you find this story helpful?
Thanks for voting and helping fellow customers!
Coffee would not brew.
Rose - October 12, 2017
Tool Type
Coffee Maker
Difficulty
Medium
Time
30-60 minutes
Tools Used
Screwdriver, Power Drill
Parts Used
I had a huge problem finding the replacement part. It is discontinued and no longer made. After searching the web each night, for about two weeks; I found a message board that helped give me more info and steer me in the right direction.
My Braun coffee maker is a 3105 and that is specifically what I was only looking for. Turns out that other models numbers use the same replacement heating element. Once I actually found the part I needed, the repair was a challenge for me, because I did not have the proper star headed screw driver, but I managed. I removed the one screw that I could, using a Phillips screw driver, from the bottom of the coffee maker and the rest, which were the star headed ones, I simply drilled them out with the smallest drill bit I had.
Popping the bottom off was a little difficult for me but I finally was successful. There are plastic tabs that need to be pushed together to release the bottom and I couldn't hold them tight enough. I used a little brute force with a screw driver.
Removing the heating element and the two little rubber hoses was a snap; but the wires on my replacement heating element were too short. I knew this when I ordered the part because I could not get a replacement 3105 and ordered a different model number (KF580), which had shorter wires. I cut the 4 wires; peeled back the rubber wire cover; used electrical wing nuts to connect the old wires and the new wires together; put back the two little rubber hoses; snapped the bottom back on and the coffee maker works fine now.
I didn't even bother trying to put any screws back on the bottom because the fit is so tight, you really don't need them anyway.
Did you find this story helpful?
Thanks for voting and helping fellow customers!
Wouldn't heat and brew
John - September 21, 2016
Tool Type
Coffee Maker
Difficulty
Medium
Time
15-30 minutes
Tools Used
Screwdriver, Security \\
Parts Used
Remove single screw on bottom then gent!y pry sides of coffee maker housing from the base at each tab To pop it open
Did you find this story helpful?
Thanks for voting and helping fellow customers!
OEM stands for Original Equipment Manufacturer and means the part you’re buying is sourced directly from the manufacturer who made your product. At eReplacementParts, we sell only genuine OEM parts, guaranteeing the part you’re purchasing is of better design and of higher quality than aftermarket parts.
Our product descriptions are a combination of data sourced directly from the manufacturers who made your product as well as content researched and curated by our content & customer service teams. This content is edited and reviewed internally before being made public to customers.
Our customer service team are at the ready daily to answer your part and product questions. We have a dedicated staff with decades of collective experience in helping customers just like you purchase parts to repair their products.
All our part reviews are solicited directly from other customers who have purchased this exact part. While we moderate these reviews for profanity, offensive language or personally identifiable information, these reviews are posted exactly as submitted and no alterations are made by our team.
All our customer repair instructions are solicited directly from other customers just like you who have purchased and replaced this exact part. While we moderate these reviews for profanity, offensive language or personally identifiable information, these reviews are posted exactly as submitted and no alterations are made by our team.
Based on data from past customer purchasing behaviors, these parts are most commonly purchased together along with the part you are viewing. These parts may be necessary or helpful to replace to complete your current repair.
All our installation videos are created and produced in collaboration with our in-house repair technician, Mark Sodja, who has helped millions of eReplacementParts customers over the last 13 years repair their products. Mark has years of experience in selling and repairing both commercial and residential products with a specialty in gas-powered equipment.
This data is collected from customers who submitted a repair instruction after replacing this exact part. Customers can rate how easy the repair was to complete and how long it took. We aggregate this data to provide a repair rating that allows customers to quickly determine the difficulty and time needed to perform their own repair.