


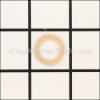
This is the rubber grommet for the thermostat that helps to create an air tight seal. It is a genuine OEM sourced replacement part that is specially designed for use with BUNN equipment. Please note this high quality item is sold individually.
Grommet, Thermostat 07073.1000
OEM part for: BUNN
Part Number: 07073.1000
$6.84
In Stock
Jump To:
Frequently Purchased Together ?

Compatibility
This part will fit the following 41 machines
BUNN
FMD-1 (S.N. FMD0013000 and After) Fresh Mix Dispenser View Diagrams & Manuals
FMD-2 (S.N. FMD0013000 and After) Fresh Mix Dispenser View Diagrams & Manuals
FMD-3 (S.N. FMD0013000 and After) Fresh Mix Dispenser View Diagrams & Manuals
FMD DBC-3 (S.N. FMD0013000 and After) Fresh Mix Dispenser View Diagrams & Manuals
FMD-4 Fresh Mix Dispenser View Diagrams & Manuals
FMD-5 Fresh Mix Dispenser View Diagrams & Manuals
IMIX-3S Fresh Mix Dispenser View Diagrams & Manuals
IMIX-5S Fresh Mix Dispenser View Diagrams & Manuals
H5 Element Hot Water Equipment View Diagrams & Manuals
H5M Hot Water Equipment View Diagrams & Manuals
HW2 Hot Water Equipment View Diagrams & Manuals
OHW Hot Water Equipment View Diagrams & Manuals
TB3 (S.N. TU00020000 and After) Iced Tea Brewer View Diagrams & Manuals
TB3-LP (S.N. TU00020000 and After) Iced Tea Brewer View Diagrams & Manuals
TB3Q (S.N. TU00020000 and After) Iced Tea Brewer View Diagrams & Manuals
A10 Coffee Brewer With Warmer View Diagrams & Manuals
A10A Coffee Brewer With Warmer View Diagrams & Manuals
CRT5 Coffee Brewer with Warmer View Diagrams & Manuals
CRTF5 Coffee Brewer with Warmer View Diagrams & Manuals
C (Series) Automatic Coffee Brewer With Warmers View Diagrams & Manuals
CT (Series) Automatic Coffee Brewer With Warmers View Diagrams & Manuals
CWTF (Series) Automatic Coffee Brewer With Warmers View Diagrams & Manuals
CW (Series) Automatic Coffee Brewer With Warmers View Diagrams & Manuals
FMDA DBC-3 (S.N. FMD0013000 and After) Fresh Mix Dispenser View Diagrams & Manuals
H5E Hot Water Equipment View Diagrams & Manuals
H5X Hot Water Equipment View Diagrams & Manuals
HW2A Hot Water Equipment View Diagrams & Manuals
OHWA Hot Water Equipment View Diagrams & Manuals
OL Coffee Brewer With Warmer View Diagrams & Manuals
RL Coffee Brewer With Warmer View Diagrams & Manuals
OT Coffee Brewer With Warmer View Diagrams & Manuals
RT Coffee Brewer With Warmer View Diagrams & Manuals
TB3Q-LP (S.N. TU00020000 and After) Iced Tea Brewer View Diagrams & Manuals
TB6 (S.N. TU00020000 and After) Iced Tea Brewer View Diagrams & Manuals
TB6Q (S.N. TU00020000 and After) Iced Tea Brewer View Diagrams & Manuals
VP17 (Series) Coffee Brewer With Warmer View Diagrams & Manuals
VPR (29999.0000-39065.0000) Coffee Brewer With Warmer View Diagrams & Manuals
VPR-APS (29999.0000-39065.0000) Coffee Brewer With Warmer View Diagrams & Manuals
VPR (S.N. VPR0270000 and Before) Coffee Brewer With Warmer View Diagrams & Manuals
VPS (Without Lighted Switch) Coffee Brewer With Warmer View Diagrams & Manuals
VPS (With Lighted Switch) Coffee Brewer With Warmer View Diagrams & Manuals
Show More Compatible Models
This item works with the following types of products:
- Tea Maker Parts
- Coffee Maker Parts
Questions & Answers ?
Our customer Service team is at the ready daily to answer your part and product questions.

Ask our Team
We have a dedicated staff with decades of collective experience in helping customers just like you purchase parts to repair their products.
Does this fit my product?Questions & Answers for Grommet, Thermostat
No questions have been asked yet
Customer Repair Instructions ?
All our customer repair instructions are solicited directly from other customers just like you who have purchased and replaced this exact part.
Leaking
Jeff - August 13, 2018
👍 2 of 3 people found this instruction helpful
Tool Type
Coffee Maker
Difficulty
Easy
Time
Less than 15 minutes
Tools Used
Screwdriver
Parts Used
Disassembled the unit and replaced the thermostat grommet that was leaking. This was a very easy repair. Tested unit by running multiple pots thru it and no leaks were found after repair was made.
Did you find this story helpful?
Thanks for voting and helping fellow customers!
Coffee maker was popping breaker
Larry - February 4, 2017
👍 1 of 1 people found this instruction helpful
Tool Type
Coffee Maker
Difficulty
Medium
Time
30-60 minutes
Tools Used
Screwdriver, Socket set, Nutdriver
1. Removed top of coffee maker.
2. Removed wires from top warmer.
3. Removed nut in bottom of water collection tray.
4. Removed water collection tray.
5. Removed nuts holding thermostat rack and moved rack to the side.
6. Removed wires from tank heater on thermostat rack.
7. Removed spray head and nut on water flow tube.
8. Removed all nuts from top of water tank and flow tube.
9. Removed top of water tank.
10. Removed nuts from heater element on top of water tank.
11. Removed limit thermostat from top of water tank.
Replaced all gaskets and reinstalled all items in reverse order of tear down.
NOTE: Make sure you delime all internal parts while you have it apart and rinse well with vinegar and water.
NOTE: Do not plug coffee maker in until you fill the water tank and water flows out the flow tube after you put everything back together.
Did you find this story helpful?
Thanks for voting and helping fellow customers!
Leak when filling
KEN - May 18, 2020
Tool Type
Coffee Maker
Difficulty
Easy
Time
15-30 minutes
Tools Used
Screwdriver, Wrench Set, Nutdriver
Unscrewed lid
Note tiny clip are loose on lip
Pulled out water tank with 7/8 socket
Pulled out old seal and replaced
Pulled out thermostat and cut off old grommet
Slid new grommet on and pushed back in
Screwed top back on mindful of little clips
Note tiny clip are loose on lip
Pulled out water tank with 7/8 socket
Pulled out old seal and replaced
Pulled out thermostat and cut off old grommet
Slid new grommet on and pushed back in
Screwed top back on mindful of little clips
Did you find this story helpful?
Thanks for voting and helping fellow customers!
tank inlet gasket & thermostat replacement
James - December 28, 2018
Tool Type
Coffee Maker
Difficulty
Easy
Time
30-60 minutes
Tools Used
Screwdriver
Remove old parts and inserted new parts
Did you find this story helpful?
Thanks for voting and helping fellow customers!
LOL. It's 25 years old in a church Activity Center. The reservoir was 50% full of Calcium deposit
Charles - January 12, 2018
Tool Type
Coffee Maker
Difficulty
Medium
Time
30-60 minutes
Tools Used
Screwdriver, Pliers, Nutdriver
Basically removed the reservoir and cleaned out all the calcium, deposits, adjusted the thermostat to a less hot setting, replaced all the gaskets and it's a 100% win. New unit like ours would run $500-$600 dollars easy. Repaired this one on less than $40.00. Super satisfied.
Also, my grateful thanks to your company for the EXCELLENT SERVICE and the correct parts. You folks are super.
Many Thanks!!
Also, my grateful thanks to your company for the EXCELLENT SERVICE and the correct parts. You folks are super.
Many Thanks!!
Did you find this story helpful?
Thanks for voting and helping fellow customers!
Leaked.
Paul - December 14, 2017
Tool Type
Coffee Maker
Difficulty
Easy
Time
15-30 minutes
Tools Used
Screwdriver
1. Removed the top of the coffee maker.
2. Replaced the thermostat grommet and the tank inlet gasket.
3. Replaced the top. Tested for leaks. Put back in service.
2. Replaced the thermostat grommet and the tank inlet gasket.
3. Replaced the top. Tested for leaks. Put back in service.
Did you find this story helpful?
Thanks for voting and helping fellow customers!
Thermostat grommet leaking
Joel - October 17, 2017
Tool Type
Coffee Maker
Difficulty
Easy
Time
Less than 15 minutes
Tools Used
Screwdriver, Adjustable Wrench
Removed top, then removed nut from reservoir, then slide old grommet up thermostat wire being careful not to damage wire. Install new grommet, reassemble make sure reservoir is filled with water plug in and ready for coffee.
Did you find this story helpful?
Thanks for voting and helping fellow customers!
Needed a thermostat grommet for Bunn coffee maker
David - October 5, 2017
Tool Type
Coffee Maker
Difficulty
Easy
Time
Less than 15 minutes
Tools Used
Screwdriver, Pliers
Parts Used
Put new part in now it does not leak
Did you find this story helpful?
Thanks for voting and helping fellow customers!
Industrial Bunn leaking water
Melissa - January 26, 2017
Tool Type
Coffee Maker
Difficulty
Easy
Time
Less than 15 minutes
Tools Used
Screwdriver
Parts Used
1. Took the top off.
2. Slid the old plug further up the thermometer as not to break it.
3. Placed the new one on under it and placed in the hole.
4. Put water in it to test for leak. There was none.
5. Put back together.
2. Slid the old plug further up the thermometer as not to break it.
3. Placed the new one on under it and placed in the hole.
4. Put water in it to test for leak. There was none.
5. Put back together.
Did you find this story helpful?
Thanks for voting and helping fellow customers!
Thermal fuse
Bobby - December 26, 2016
Tool Type
Coffee Maker
Difficulty
Medium
Time
More than 2 hours
Tools Used
Screwdriver, Pliers, Nutdriver
1. Removed top and water pan.
2. Tested for reason it would not heat.
3. Determined it was thermal fuse.
4. Took tank heating element out and cleaned.
5. Ordered parts.
6. Received parts and reassembled.
7. Works great.
8. New coffee maker 600 dollars fixed for under 30.
2. Tested for reason it would not heat.
3. Determined it was thermal fuse.
4. Took tank heating element out and cleaned.
5. Ordered parts.
6. Received parts and reassembled.
7. Works great.
8. New coffee maker 600 dollars fixed for under 30.
Did you find this story helpful?
Thanks for voting and helping fellow customers!
OEM stands for Original Equipment Manufacturer and means the part you’re buying is sourced directly from the manufacturer who made your product. At eReplacementParts, we sell only genuine OEM parts, guaranteeing the part you’re purchasing is of better design and of higher quality than aftermarket parts.
Our product descriptions are a combination of data sourced directly from the manufacturers who made your product as well as content researched and curated by our content & customer service teams. This content is edited and reviewed internally before being made public to customers.
Our customer service team are at the ready daily to answer your part and product questions. We have a dedicated staff with decades of collective experience in helping customers just like you purchase parts to repair their products.
All our part reviews are solicited directly from other customers who have purchased this exact part. While we moderate these reviews for profanity, offensive language or personally identifiable information, these reviews are posted exactly as submitted and no alterations are made by our team.
All our customer repair instructions are solicited directly from other customers just like you who have purchased and replaced this exact part. While we moderate these reviews for profanity, offensive language or personally identifiable information, these reviews are posted exactly as submitted and no alterations are made by our team.
Based on data from past customer purchasing behaviors, these parts are most commonly purchased together along with the part you are viewing. These parts may be necessary or helpful to replace to complete your current repair.
All our installation videos are created and produced in collaboration with our in-house repair technician, Mark Sodja, who has helped millions of eReplacementParts customers over the last 13 years repair their products. Mark has years of experience in selling and repairing both commercial and residential products with a specialty in gas-powered equipment.
This data is collected from customers who submitted a repair instruction after replacing this exact part. Customers can rate how easy the repair was to complete and how long it took. We aggregate this data to provide a repair rating that allows customers to quickly determine the difficulty and time needed to perform their own repair.