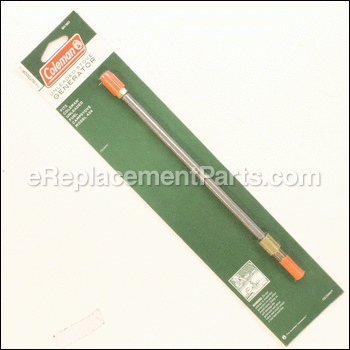

This is a genuine Coleman replacement part used with the model 424 stove. A generator atomizes fuel and mixes it with air. It connects the fuel tank to the burners and manifold. Note that this part is also included in the Valve And Generator Assembly found as part # 424-6601. To complete this repair, a pipe wrench or pair of pliers will be used. Installation instructions are printed on the package as well as below.
Installation Instructions:
• Remove tank from stove. Take tank away from flames (including pilot lights) and other ignition sources.
• Invert tank and securely grip square top of valve in a vise. Using pliers or a pipe wrench, unscrew and discard generator tube and coil.
• Using pliers, unscrew and discard generator needle.
• Finger-tighten new generator needle into valve. Using pliers, tighten generator needle 1/4 turn. Do not overtighten!
• Slip new coil and generator tube over needle. Wrench-tighten generator tube to valve to form a leak-tight joint.
• Visually check for leaks immediately after lighting.
Generator 3000005110
OEM part for: Coleman
Part Number: 3000005110
Product Description ?
- Classification: Part
- Weight: 0.22 lbs.
- Shipping: Ships Worldwide
Compatibility
This part will fit the following 1 machine
Coleman
This item works with the following types of products:
- Range Parts
This part replaces obsolete part #: 424-5621
Questions & Answers ?
Our customer Service team is at the ready daily to answer your part and product questions.

Ask our Team
We have a dedicated staff with decades of collective experience in helping customers just like you purchase parts to repair their products.
Does this fit my product?Questions & Answers for Generator
Customer Repair Instructions ?
All our customer repair instructions are solicited directly from other customers just like you who have purchased and replaced this exact part.
Coleman 424 stove clogged generator - bent nozzle needle
Tool Type
Range
Difficulty
Easy
Time
15-30 minutes
Tools Used
Pliers, Adjustable Wrench
Parts Used
1. you remove the old generator by unscrewing the brass sleeve at the valve. When this slides off, there will be a brass rod that will remain attached to the valve knob.
2. Unscrew the generator brass rod from the valve knob using pliers or vice-grips. This has normal threading so turn counter-clockwise to unscrew. Do NOT break this rod at the threads. If it is frozen and won't turn soak it in a good carburetor cleaner until the threads come loose. If you break it at the valve knob it is too small to drill out without damage to the knob threads and you will need to replace the entire valve assembly.
3. un-package the new generator and remove the protective plastic caps from both ends. Slide the brass rod out of the new generator. (WARNING) the nozzle end of this brass rod has a 1/4", thin steel needle that helps disperse the gas evenly into the carburetor. It is sharp enough to puncture skin, and it is very important that it does NOT get bent. It is not delicate being hardened steel but it can get bent.
4 Using pliers or vice-grips to tighten, screw the new brass rod into the valve knob. Use the old rod to gauge how deep to set these threads. The new rod must be the same length as the old one. If not set deep enough the valve will not close properly and will jam and bend the brass rod. If set too deeply the steel needle will not sit in the nozzle properly and the fuel will not mix properly in the carburetor causing a yellow flame at the burner.
5. CAREFULLY slide the new generator tube over the brass rod. If you feel resistance just before it begins to thread into place, the steel needle is not aligned with the hole in the nozzle. Wiggle the tube a bit to try to get the needle to enter the nozzle hole. If this doesn't work, turn the valve to full open. This should give enough room to begin threading the tube into place and align the needle
6. Use pliers to tighten the base of the generator to the valve housing. This threaded, brass fitting must seal with the valve housing or it will leak fuel.
7. For the first use of the new generator, frequently check around the base of the valve for liquid fuel or gasoline. If you see fuel collecting here, tighten the threaded brass fitting a littler more until the leak stops.
8. If you use unleaded gas as fuel, periodically remove the generator tube and clean the inside with carburetor cleaner. Spray it in to the tube and let it sit. This is more effective if the tube is warm, but not necessary. Shake out the excess cleaner or rinse it with a bit of gasoline. Prolong the cleaning by adding 1/2 teaspoon of injector cleaner to the fuel tank when you fill it.
OEM stands for Original Equipment Manufacturer and means the part you’re buying is sourced directly from the manufacturer who made your product. At eReplacementParts, we sell only genuine OEM parts, guaranteeing the part you’re purchasing is of better design and of higher quality than aftermarket parts.
Our product descriptions are a combination of data sourced directly from the manufacturers who made your product as well as content researched and curated by our content & customer service teams. This content is edited and reviewed internally before being made public to customers.
Our customer service team are at the ready daily to answer your part and product questions. We have a dedicated staff with decades of collective experience in helping customers just like you purchase parts to repair their products.
All our part reviews are solicited directly from other customers who have purchased this exact part. While we moderate these reviews for profanity, offensive language or personally identifiable information, these reviews are posted exactly as submitted and no alterations are made by our team.
All our customer repair instructions are solicited directly from other customers just like you who have purchased and replaced this exact part. While we moderate these reviews for profanity, offensive language or personally identifiable information, these reviews are posted exactly as submitted and no alterations are made by our team.
Based on data from past customer purchasing behaviors, these parts are most commonly purchased together along with the part you are viewing. These parts may be necessary or helpful to replace to complete your current repair.
All our installation videos are created and produced in collaboration with our in-house repair technician, Mark Sodja, who has helped millions of eReplacementParts customers over the last 13 years repair their products. Mark has years of experience in selling and repairing both commercial and residential products with a specialty in gas-powered equipment.
This data is collected from customers who submitted a repair instruction after replacing this exact part. Customers can rate how easy the repair was to complete and how long it took. We aggregate this data to provide a repair rating that allows customers to quickly determine the difficulty and time needed to perform their own repair.