
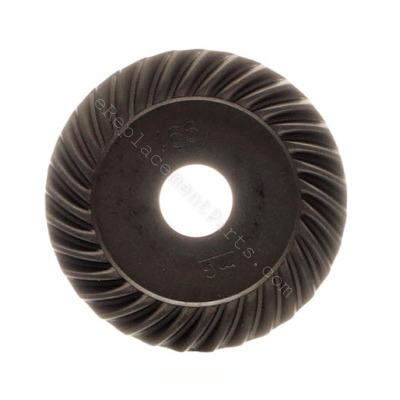


The gear goes inside the gear case assembly and is priced individually. It is made out of metal and will need to be replaced if it becomes broken or the teeth are stripped. This is an OEM part sourced directly from the manufacturer and used in DeWALT small angle grinders. To replace this part you may need a screwdriver, a set of pliers, and a wrench.
Gear 659967-00
OEM part for: DeWALT
Part Number: 659967-00
$9.49
In Stock
Jump To:
Frequently Purchased Together ?

Compatibility
This part will fit the following 7 machines
DeWALT
D28402K Type 1 4-1/2 Small Angle Grinder View Diagrams & Manuals
D28110K (Type 1) 4-1/2 Sm.Ang.Grndr View Diagrams & Manuals
D28111-B3 (Type 1) 4-1/2 Small Angle Grinder Power Tool View Diagrams & Manuals
D28111-B3 (Type 2) 4-1/2 Small Angle Grinder Power Tool View Diagrams & Manuals
D28112-B3 (Type 2) 4-1/2 Grinder Power Tool View Diagrams & Manuals
D28112-BR (Type 1) 4-1/2 Grinder Power Tool View Diagrams & Manuals
D28402-B3 (Type 1) 4 1/2 Small Angle Grinder Power Tool View Diagrams & Manuals
Show More Compatible Models
This item works with the following types of products:
- Grinder Parts
Questions & Answers ?
Our customer Service team is at the ready daily to answer your part and product questions.

Ask our Team
We have a dedicated staff with decades of collective experience in helping customers just like you purchase parts to repair their products.
Does this fit my product?Questions & Answers for Gear
No questions have been asked yet
Customer Repair Instructions ?
All our customer repair instructions are solicited directly from other customers just like you who have purchased and replaced this exact part.
The Gear teeth were chewed to dust.(moter ran but grinding wheel didnt turn)
John - March 26, 2016
👍 2 of 2 people found this instruction helpful
Tool Type
Grinder
Difficulty
Medium
Time
1-2 hours
Tools Used
Screwdriver, Pliers, Socket set, Wrench Set, Bench Vice.
Parts Used
Here is what I did.First Unplugged the tool (Duu!:) Removed the grinding wheel and nut. Using a torx screwdriver removed the gear case cover,then removed the the gear case assembly from the motor body,and also removed the one side of the handle set from the motor body(take care that the switch paddle assembly doesn't fall out) .With one side of the handle set removed I could then remove the Separator/Fan from the motor shaft using a flat screw driver to jam the Fan blades while turning the motor shaft with a wrench on Pinion nut.(The Separator/Fan is threaded onto the motor shaft ...(reverse threaded if memory serves me). With the Separator/Fan loose I pulled the Armature Assembly out of the housing.With the Armature Assembly clamped firmly in a PADDED bench vice remove the nut holding the Pinion gear on (It was on there pretty good and was NOT reverse threaded!). With the nut removed replace the Pinion gear and re-tighten that nut down to your best judgment (If you have no judgment you probably shouldn't be doing this project;). Place the Armature Assembly back in the motor housing ( while holding the 2 spring loaded Brush assembly's apart ....I had to hold my mouth just right:). Spin the Separator/Fan back on ,put the handle set back to gather (carefully) and also make sure that the Bearing. Retainer is lined in the slots in the motor housing.
OK! Now for the other gear!
Remove the snap ring from the shaft with the appropriate pliers.
Pry the Flange off the shaft (ya is on there good ...just keep prying)
Now were going to need to press that shaft off the big gear and out of the gear case assembly.(uuuh ....wait a minute....how do we do that?! No really ,it is possible:)
Mount the gear case assembly in the bench vice using a large (deep?) socket as a spacer that holds the gear case assembly stationary but also makes room for the shaft as in gets pressed off the gear : using a small socket or bolt...(anything as long as it has a slightly smaller diameter than the shaft) as a spacer on the other end end of the shaft. Now Line this entire thing in the vice and start cranking HARD.the gear will start sliding off while emitting loud screeching noises.Stop and make sure that everything is still lined up right periodically and keep cranking....until the gear is off.(I hope these instructions makes some sense....I really suck at verbalizing what is pictured in my head).
Yippee! the gear is off! The shaft should now pass out of the gear housing with little effort. Now might be a good time to feel if those 2 shaft bearings are in need of attention/replacing.And now would also be a good time to thoroughly clean all that nasty grease out that most likely has little bits of metal suspended in it that used to be gear teeth.
With the shaft installed in the newly cleaned gear housing, start the new gear on the shaft and mount it in the vice with a spacer that will press on the gear but allow room for the shaft(A socket or large nut should do). Crank HARD again..same screeching noises... but this time the gear should be pressed on the shaft,until it is where the old gear used to be on the shaft (How far has that again?! Don't worry I think it bottoms out at the right depth;) .
The gear is ON!
Put the snap ring back on,mount the gear housing assembly back on the motor .Make sure the gears mesh good! Put a big blob (Time to use that judgment again:)of grease on the gears,and replace the cover. Push the Flange back on the shaft(that O ring right need to be replaced).
The moment of truth! Plug it in and press the trigger Hopefully every thing works fine!
You DID IT....Well done!
Did you find this story helpful?
Thanks for voting and helping fellow customers!
OEM stands for Original Equipment Manufacturer and means the part you’re buying is sourced directly from the manufacturer who made your product. At eReplacementParts, we sell only genuine OEM parts, guaranteeing the part you’re purchasing is of better design and of higher quality than aftermarket parts.
Our product descriptions are a combination of data sourced directly from the manufacturers who made your product as well as content researched and curated by our content & customer service teams. This content is edited and reviewed internally before being made public to customers.
Our customer service team are at the ready daily to answer your part and product questions. We have a dedicated staff with decades of collective experience in helping customers just like you purchase parts to repair their products.
All our part reviews are solicited directly from other customers who have purchased this exact part. While we moderate these reviews for profanity, offensive language or personally identifiable information, these reviews are posted exactly as submitted and no alterations are made by our team.
All our customer repair instructions are solicited directly from other customers just like you who have purchased and replaced this exact part. While we moderate these reviews for profanity, offensive language or personally identifiable information, these reviews are posted exactly as submitted and no alterations are made by our team.
Based on data from past customer purchasing behaviors, these parts are most commonly purchased together along with the part you are viewing. These parts may be necessary or helpful to replace to complete your current repair.
All our installation videos are created and produced in collaboration with our in-house repair technician, Mark Sodja, who has helped millions of eReplacementParts customers over the last 13 years repair their products. Mark has years of experience in selling and repairing both commercial and residential products with a specialty in gas-powered equipment.
This data is collected from customers who submitted a repair instruction after replacing this exact part. Customers can rate how easy the repair was to complete and how long it took. We aggregate this data to provide a repair rating that allows customers to quickly determine the difficulty and time needed to perform their own repair.